You can add dox42 buttons to your entity forms and grids with Power Apps. This is our recommended approach, if you use D365 CE.
In the example below you will add a separate button for each document template you want to call.
Steps
Open your Power Apps solution.
Go to make.powerapps.com
Go to Apps.
Select the app, where you want to integrate a new dox42 button into. In our example, the Sales Hub.
Select the … > Edit
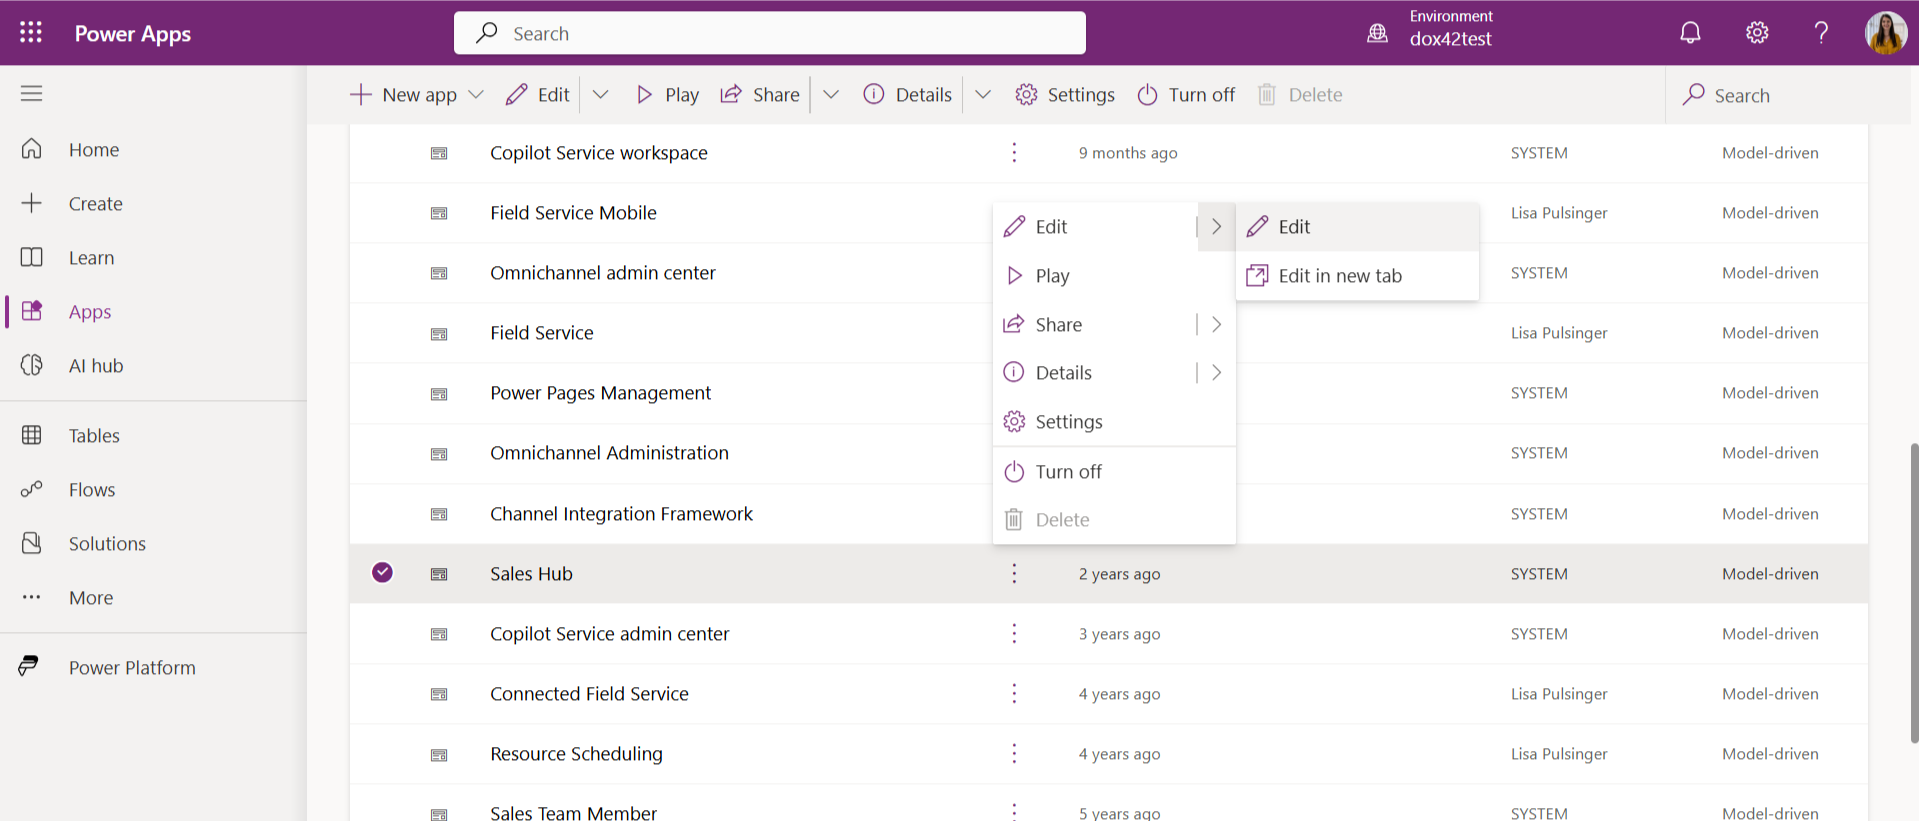
Apps page
Decide on which entity you would like to display your dox42 button on and select … > Edit in command bar”
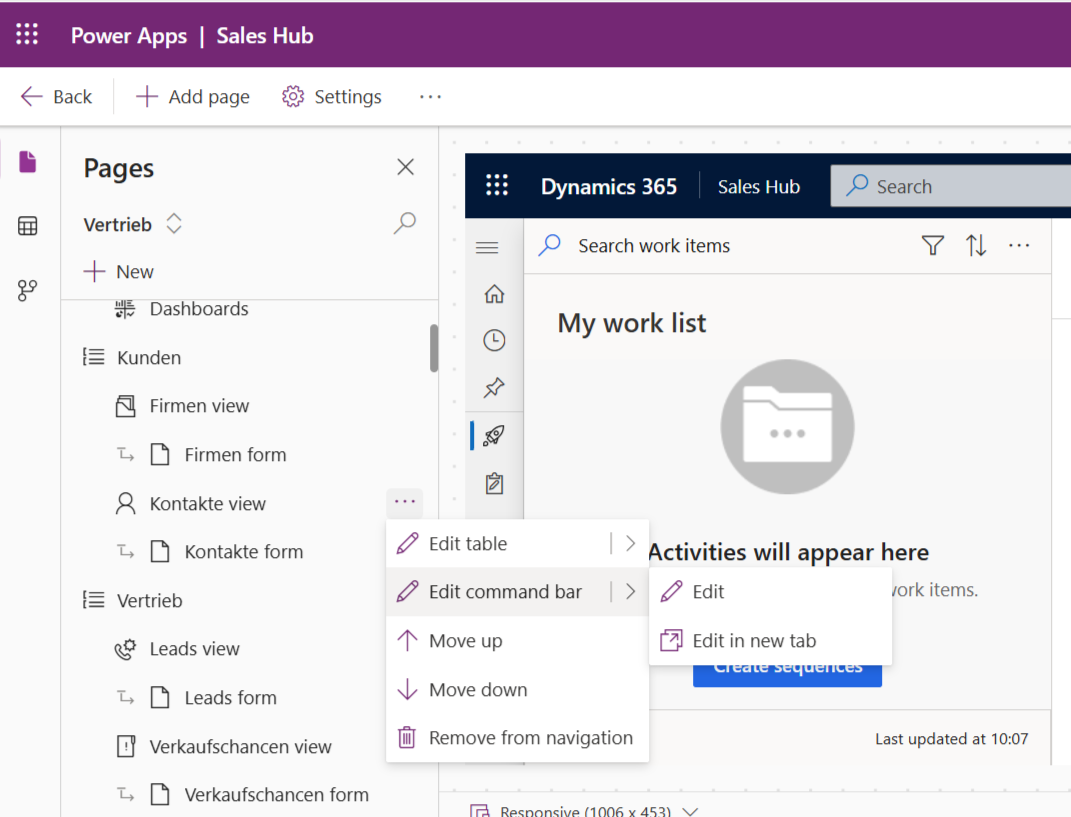
The Edit command bar pop-up opens.
Select whether you would like to place your dox42 button on the entity form (main form) or on a grid or subgrid and select the Edit button.
Select the New command button.
In the Label text field enter the button label.
Example:dox42.From the Icon menu select the Use web resource entry.
From the Library menu select the desired icon or add a new one via Add web resource.
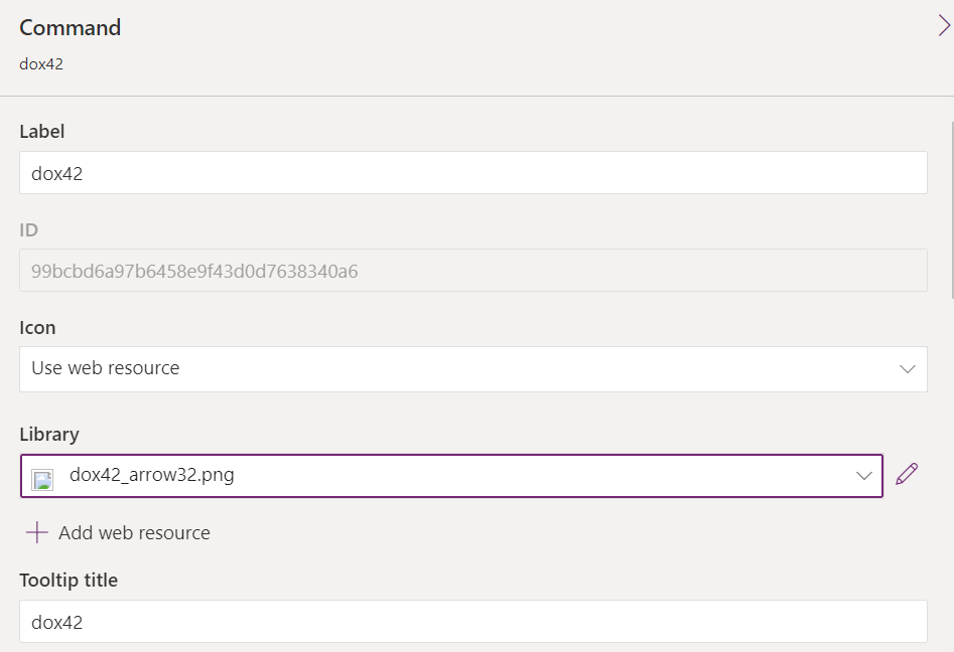
Name and label details in the command form
From the Visibility menu select the Show on condition from formula entry.
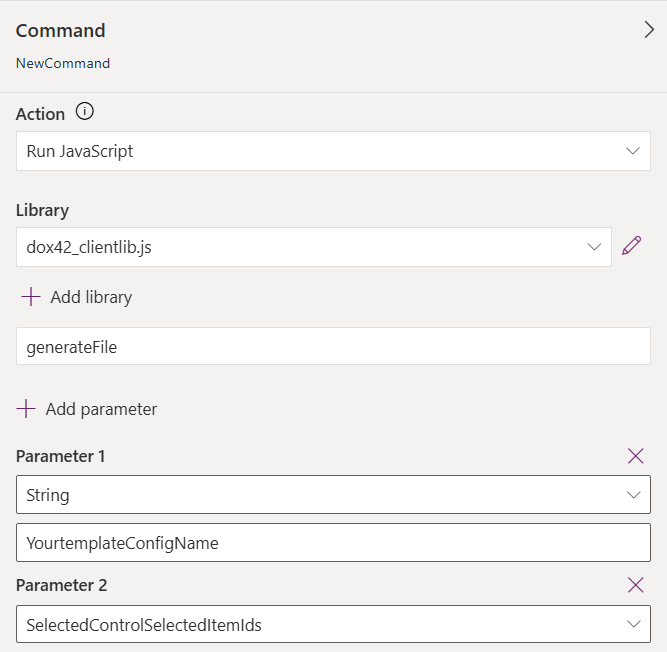
Go to the Action section to configure the button action:
From the Action menu select the Run JavaScript entry.
Select the Add library button.
The Add JavaScript library pop-up opens.Search for
dox42_clientlib.js.Select the dox42_clientlib.js search result and select the Add button.
In the text field below enter the function name.
For a single button:generateFile.Select the Add parameter button.
From the menu select the String Parameter entry.
Enter the name of the dox42 pop-up web resource you want to integrate.
Example:YourtemplateConfigName.From the menu select the SelectedControlSelectedItemIds entry.
Action details in the command form
Select the Save and Publish button.
Note
See https://docs.microsoft.com/en-us/powerapps/maker/model-driven-apps/use-command-designer#actions for further details.
Result
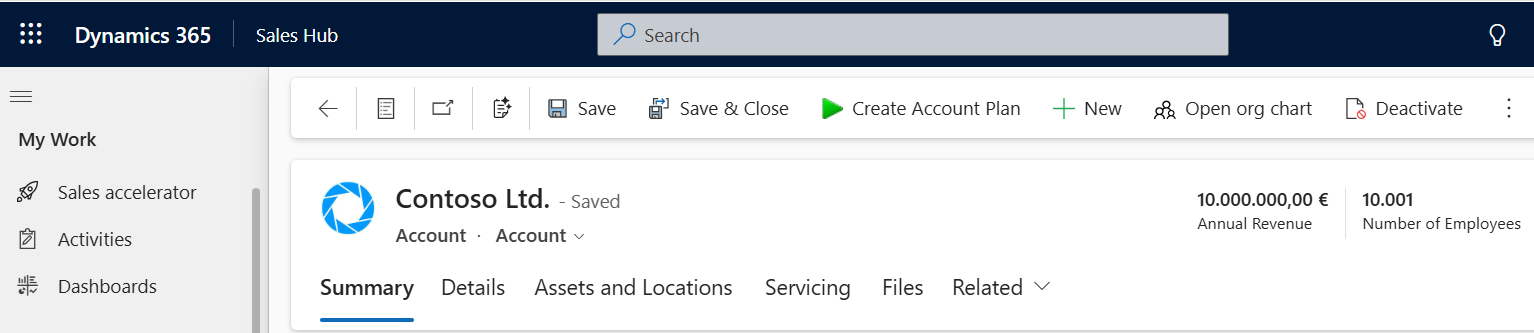
The button is now added to your D365 CE form.