In general, on-premises installation of dox42 D365 FSCM for dox42 Server is similar to its cloud approach, although there are several differences.
Steps
We need to register an application in Active Directory Federation Services (ADFS - an “onprem” analogue of Azure Active Directory) to be able to link a new data source during report template setup to D365 FO instance.
In most cases application registration that allows users/apps to interact with Dynamics environments should already exist. In that case you only need to add a new native client application role by logging in to ADFS server and running the following PowerShell command:
Add-AdfsNativeClientApplication -Name Dox42 -Identifier “aeff3b71-25b8-4b4b-b7e5-3d13ab83c006” -RedirectUri http://dox42foroperations/ -PassThruImportant
You must use the same Identifier value as is provided in command (
aeff3b71-25b8-4b4b-b7e5-3d13ab83c006)To grant permission to the application, use the following PowerShell command:
Grant-AdfsApplicationPermission -ClientRoleIdentifier “aeff3b71-25b8-4b4b-b7e5-3d13ab83c006” -ServerRoleIdentifier "D365_Instance_URL_Here"If an application, that allows interaction with D365 FSCM environment, is not registered in ADFS, the system administrator should create it first, in case you have to create it:
In ADFS expand Application Groups folder and open existing group. There you have to create a new Native Application with the properties as on the screenshot:
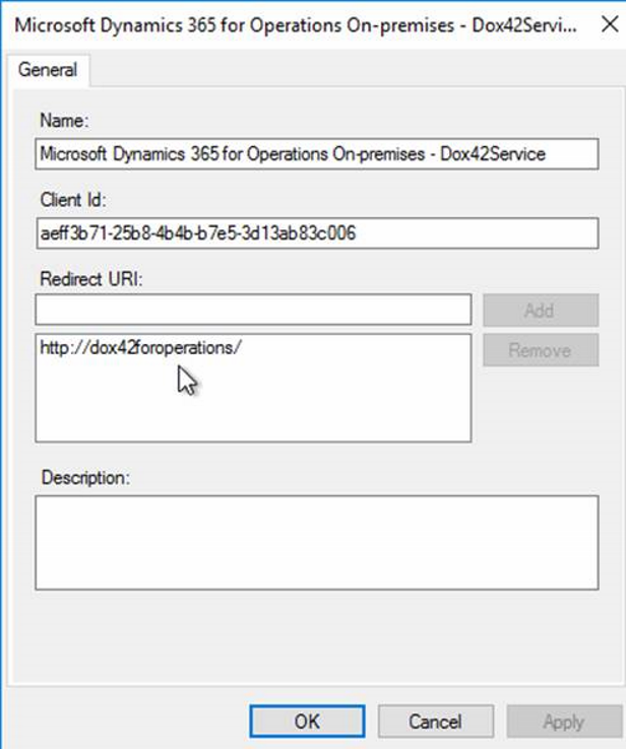
Configuration settings
Select OK.
A new application is added.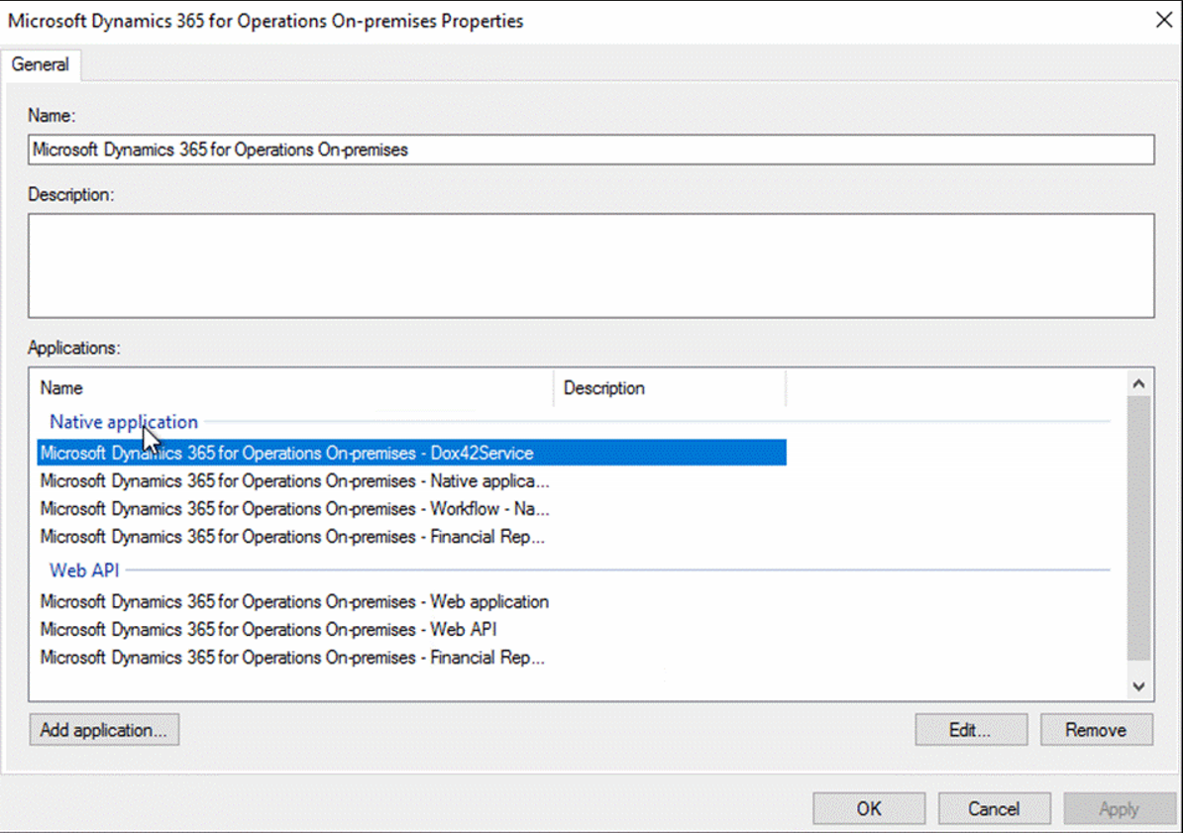
New application in Applications list
Grant permission by running the following PowerShell script (as admin):
Grant-AdfsApplicationPermission -ClientRoleIdentifier "aeff3b71-25b8-4b4b-b7e5-3d13ab83c006" -ServerRoleIdentifierNow you have to properly set properties for the Web API app:
Double click Web API app from the existing applications list in ADFS group.

Selected Web API app
On the Access control policy tab select the Permit everyone policy.
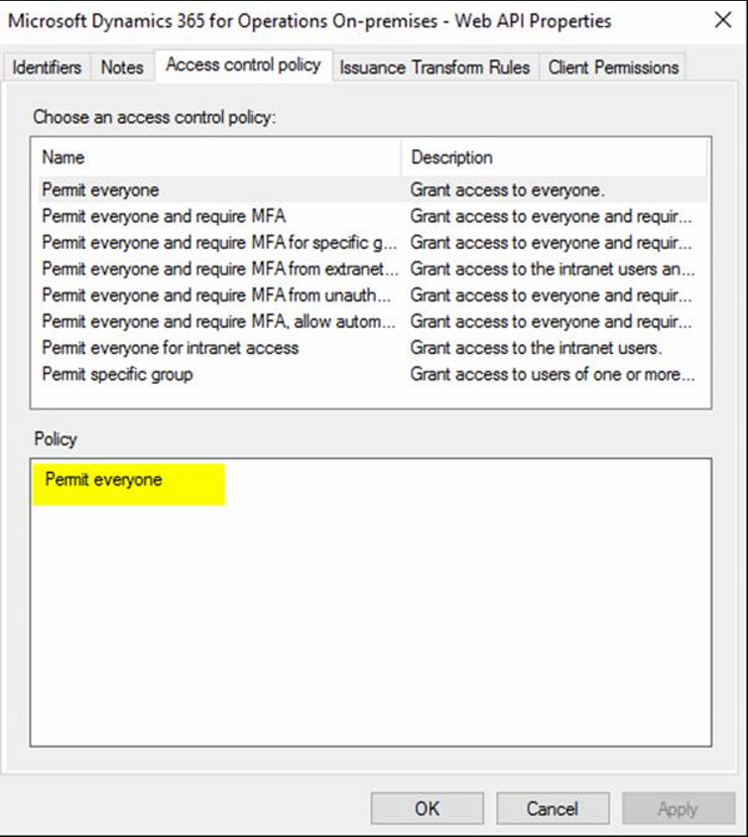
Access control policy tab
On the Client permissions tab check the same permitted scopes as are set for the Workflow app.
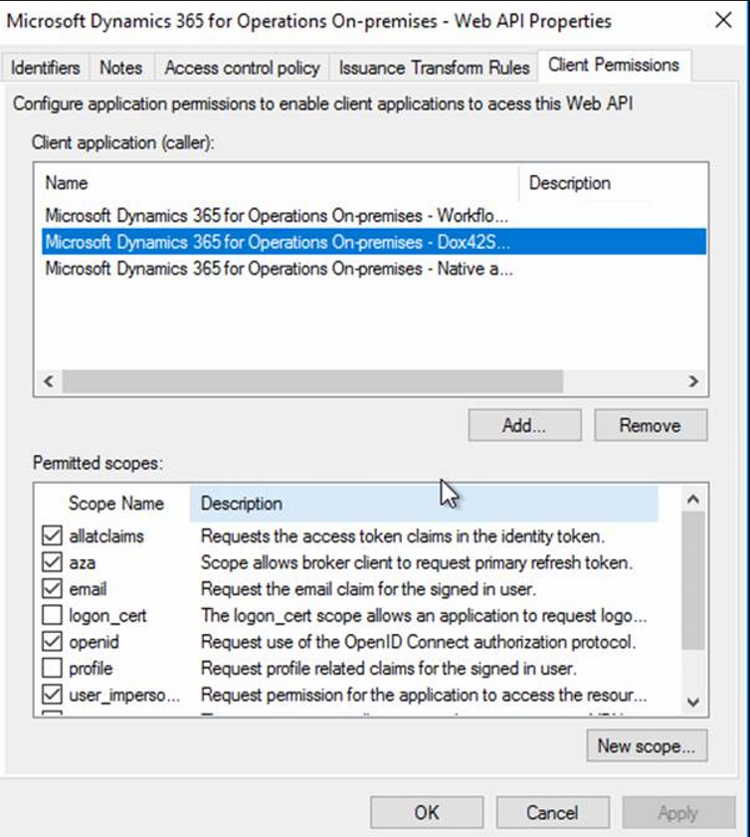
Client permissions tab
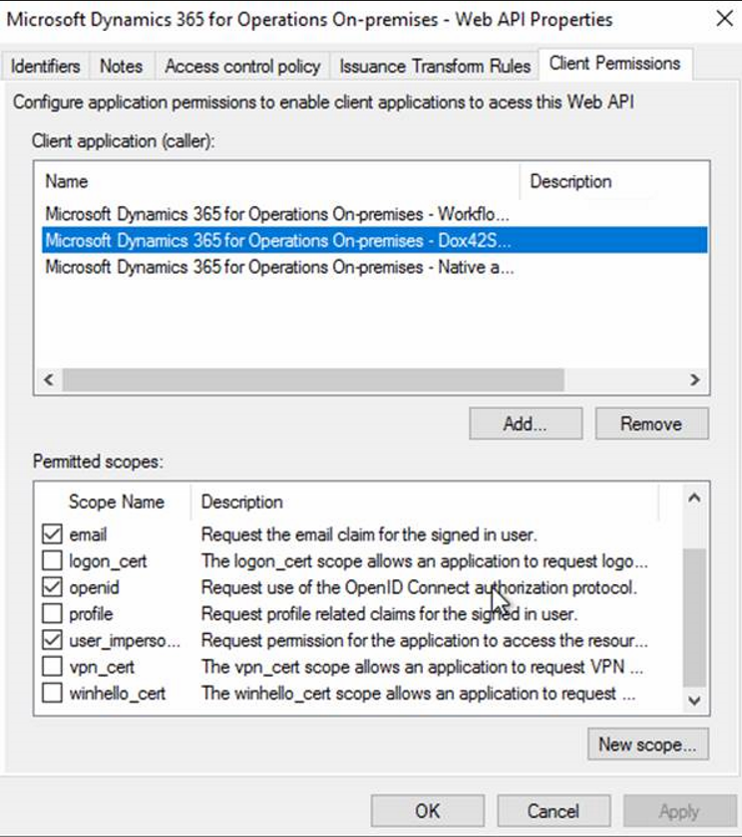
Client permissions tab
Select OK to apply and save changes.
To connect the data source:
In Microsoft Word or Excel, go to the dox42 ribbon and select Data Map.

dox42 ribbon
The Data Map Designer window opens.
Select the D365 FSCM Report data source.
Go to the Connection tab.
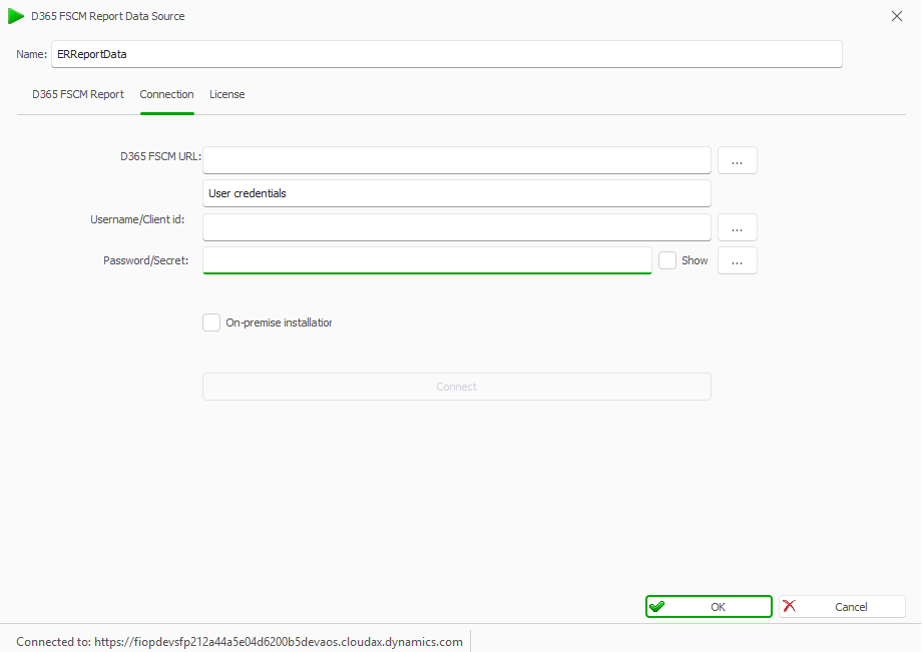
Connection tab
Select the On-premise installatior checkbox.
Enter the respective values into the following text fields:
D365 FSCM URL: URL of the target Dynamics environment.
Username/Client id: e-mail address of the user that has access and is enabled in D365 FSCM instance that we are connecting to.
Password/Secret: password of that valid user.
Authority: ADFS server URL (normally:
https://hostname/adfs/). You can find this URL on the user settings page in D365 FSCM (System administration > Users > any valid user settings).
Select OK.
Save the data map.