A SharePoint data source allows you to connect any of your SharePoint libraries and lists to your template. You may then use data from SharePoint for template design and document generation.
Prerequisites
Steps
In Microsoft Word, Excel or PowerPoint, open your document template.
Next, go to the dox42 ribbon and select Data Map.

dox42 ribbon
The Data Map Designer window opens and previously added data sources appear.
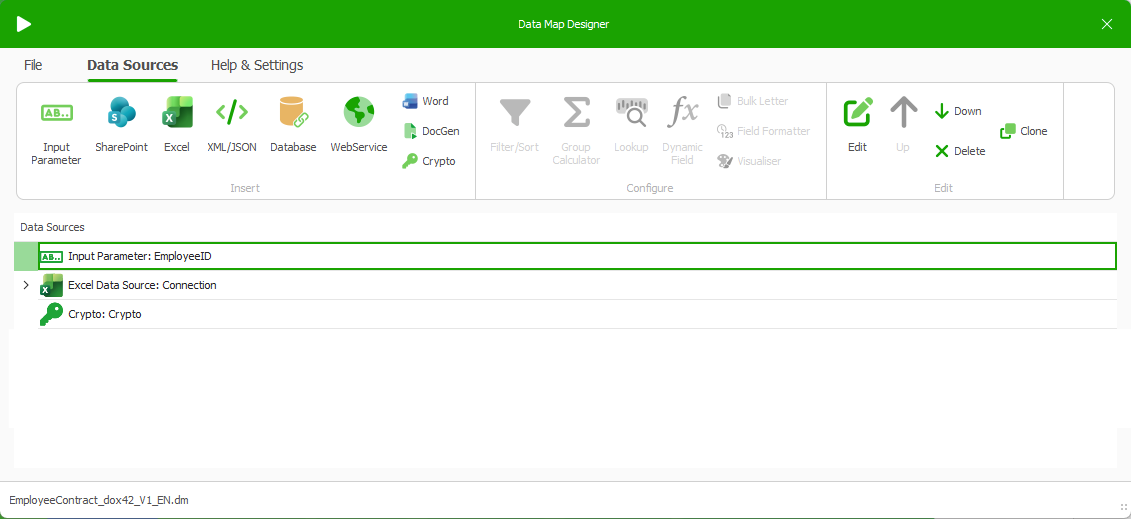
Data sources of a data map
Select the SharePoint data source from the Data Sources tab.
The SharePoint window appears.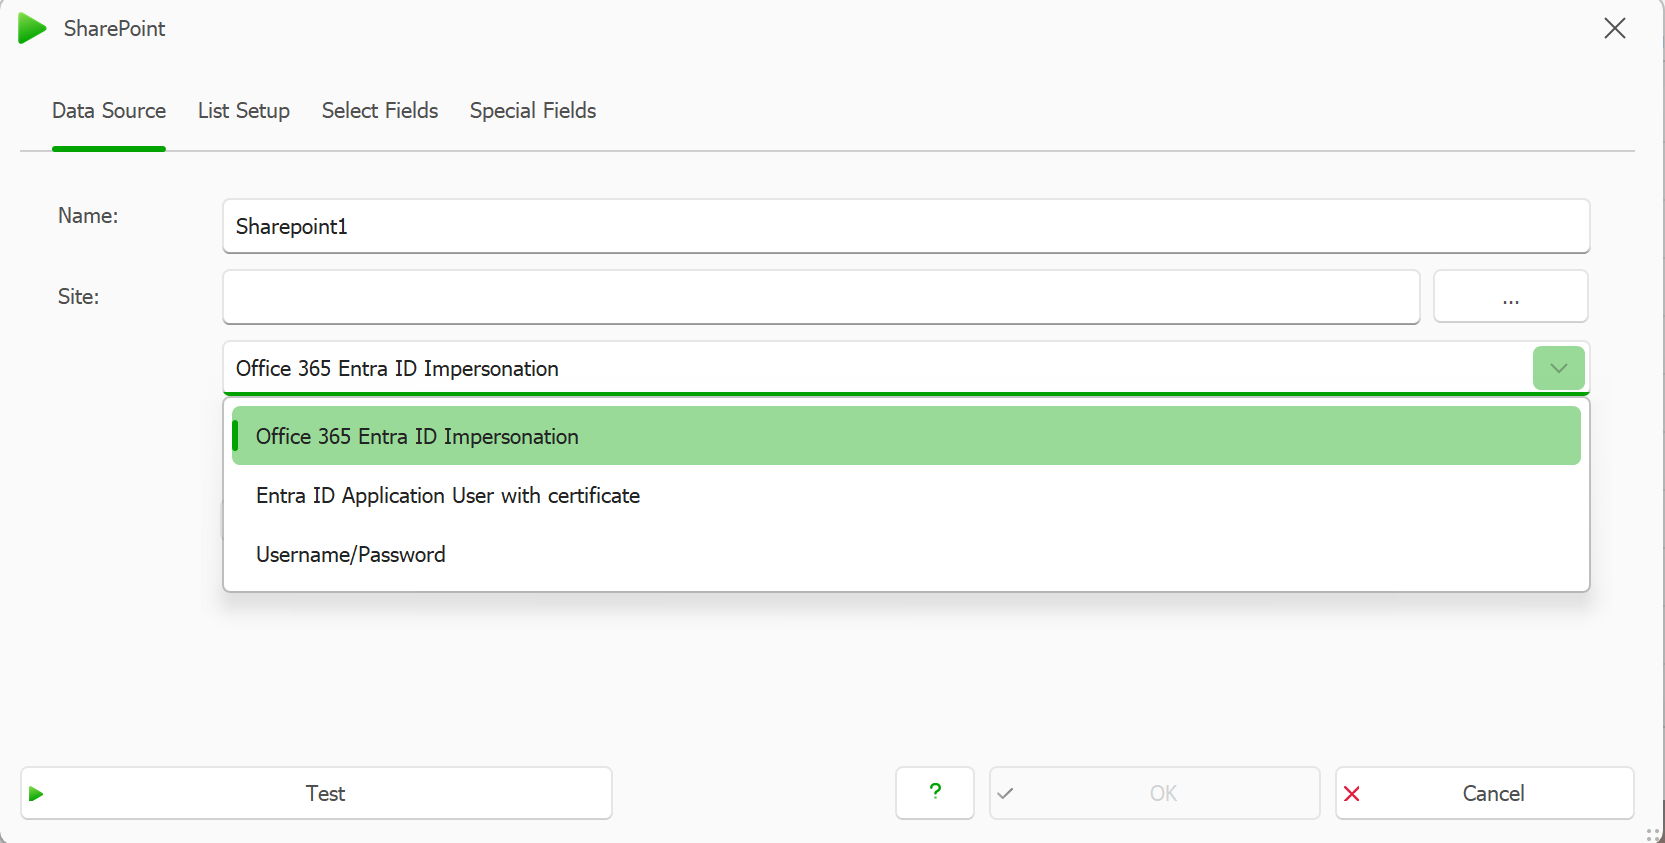
Data source tab in the SharePoint window
In the Data Source tab, enter a name for the new data source in the Name field.
Note
Names should follow your internal guidelines consistently to help template users understand and navigate your templates easily.
In the Site field, enter the SharePoint site URL/directory you want to connect to. Click on the three dots next to this field to link to a data source that has already been added to your data map. This allows dynamic Site selection.
Still in the tab Data Source, select your preferred authentication type:
Office 365 Entra ID impersonation
Select Office 365 Entra ID Impersonation from the dropdown.
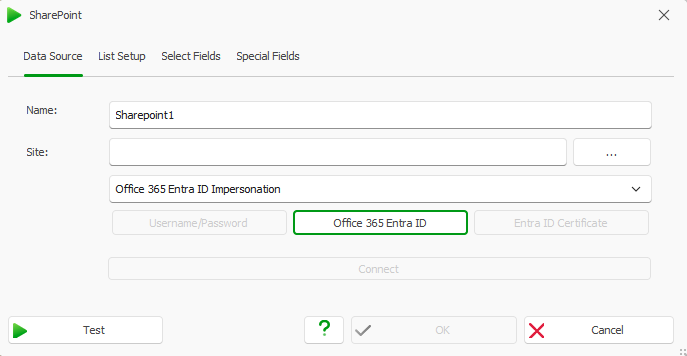
Authentication with Entra ID Impersonation
The Entra ID Configuration window opens.
.png)
Entra ID Configuration window
Enter your tenant and Entra ID App registration details.
Select OK to close this window and go back to the SharePoint window.
Note
To centrally manage your Entra tenants and simplify tenant setup, you may use another connected Excel data source. See: Using a Microsoft Excel config file for the Add-in’s Entra ID configuration (recommended).
The Client Secret can also be entered via a Crypto data source.See: Adding a Crypto Data Source.
Entra ID Application User with certificate
Note
Instead of Entra ID impersonation, you can also connect to your SharePoint with an application user and a certificate that have been added to Entra ID.
You need to prior upload the certificate to your Entra ID app registration and password protect it.
Select Entra ID Application User with certificate from the dropdown.
.png)
Authentication using an Application User with Certificate
Select the Entra ID Certificate button.
The Entra ID Clientsecret or Certificate Configuration window opens.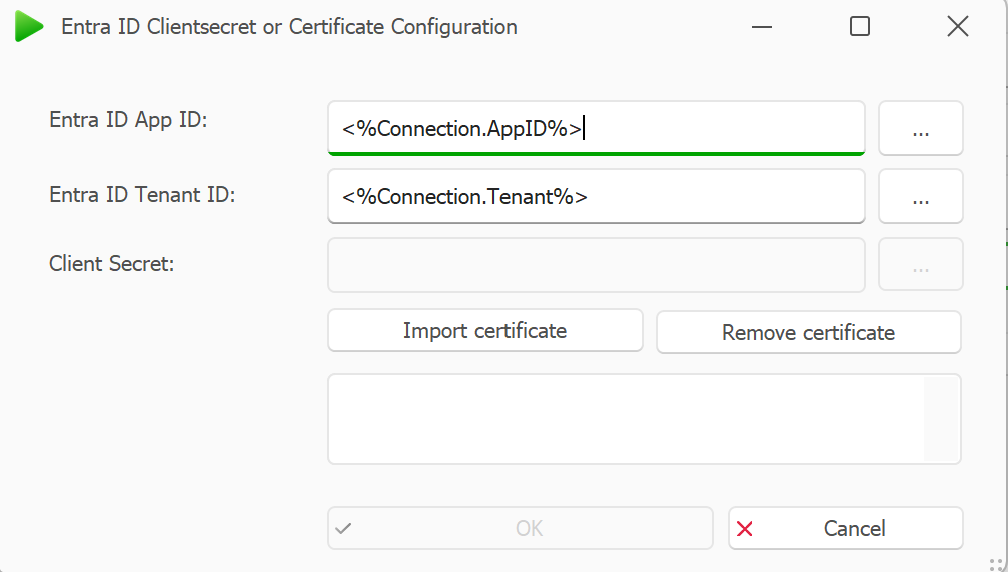
Entra ID Clientsecret or Certificate Configuration window
Enter your App ID and Tenant ID.
Note
If you saved your credentials in a Microsoft Excel config file and added this Excel data source to your data map before, you can select the App ID and the Tenant ID via the three dots next to each field. The dox42 Data Fields explorer will open from where you can navigate to the corresponding data.
Select the Import certificate button and import your certificate after entering your password.
Select OK to close this window and go back to the SharePoint window.
Username/Passwort
Note
This authentication type does not support multi-factor authentication (MFA). It is best used in on-premises scenarios.
Select Username/Password from the dropdown.
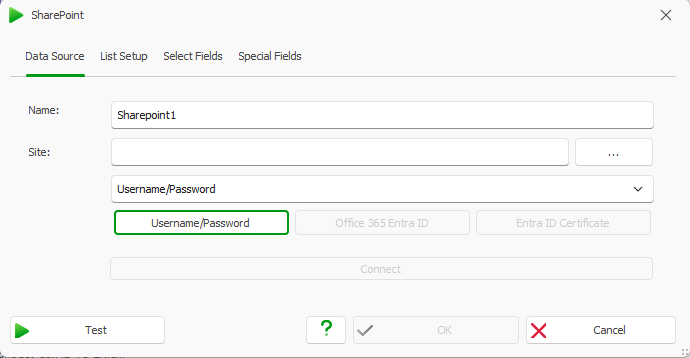
Authentication with Username/Password
Select the Username/Password button.
The Username/Password window opens.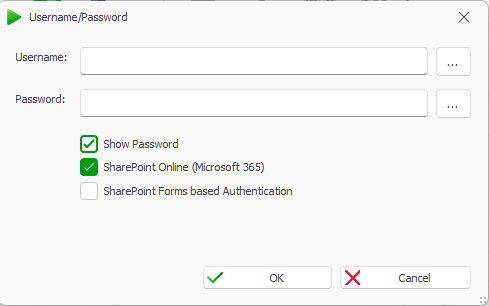
Username/Password window
Enter your username and password.
Select the SharePoint Online (Microsoft365) checkbox.
Select OK to close this window and go back to the SharePoint window.
Back in the SharePoint window, click the OK button to save your settings.
Check the connection by clicking the Test button.
Successful connection
You are now connected to the respective SharePoint Site. If you want to configure the SharePoint list and field access, proceed with the following steps.
If an error message appears…
check whether all your connection and configuration details are indeed correct. Typical candidates for errors are your EntraID details, redirect URLs, and MAUI trustedTemplateLocations. The logging in your tenant MAUI gives important cues when debugging, given an error..
In the List Setup tab, select the SharePoint list, where your data can be retrieved.
The Root Folder text field is filled in automatically.Select the Load Attachments checkbox if SharePoint lists contain images or attachments.
Select the Use Internal Field Names checkbox if you want to display the SharePoint internal names (recommended).
Select the Date/Time Fields in Local Time checkbox if the system default UTC time zone does not fit your needs.
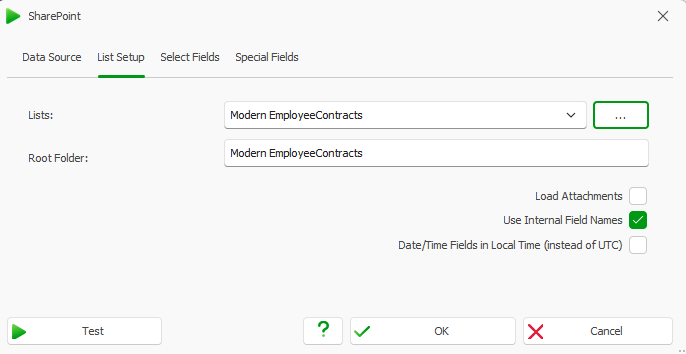
List Setup tab in the SharePoint window
Check the connection by clicking the Test button.
If the connection was successful, all records of the selected list are displayed.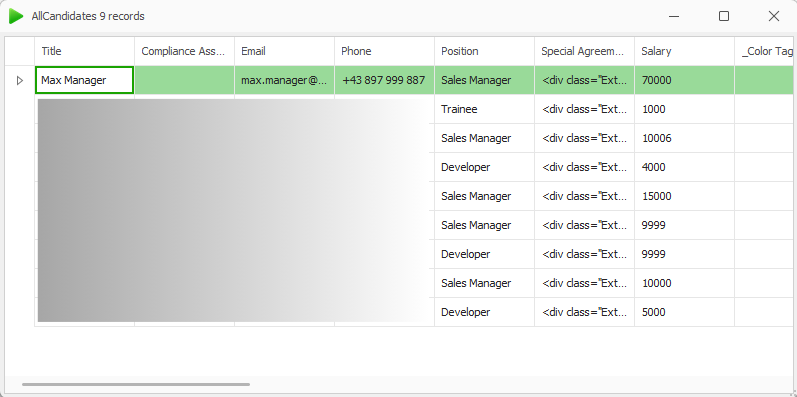
Records from the selected list
Optional: Speed up SharePoint queries and reduce the number of fields.
Tip
Selecting fields reduces the number of columns loaded to the bare minimum. This makes loaded tables clearer and improves performance.
In the Select fields tab, you can configure in more detail which data of your lists should be retrieved.
Use the Views dropdown to define a customized view of your SharePoint list.
Use the Folder text field to define a specific folder within your SharePoint list.
Select the Recursive checkbox if you also want to do a recursive search of your directory.
Use the Fields button to deselect the data fields you don’t need.
Select the Query button to filter and return only specific records. This also helps to reduce the volume of data and enables relevant data sets to be loaded in a targeted manner.
Check the connection by clicking the Test button.
If the connection was successful, all records of the selected views, folders and fields are displayed.
Result
You have connected dox42 with Microsoft SharePoint and can now use the SharePoint data when designing and generating templates.
Next steps
Depending on your needs, try