You can install dox42 Server on a Windows Server or a Windows Server on Azure. The following steps describe the installation on Windows Server.
Steps
Copy the directory
dox42ServerPack\dox42ServerVXXXX\dox42Serverto a different physical path, e.g.C:\dox42Server.Set up a site in the IIS Manager (inetmgr):
Start the IIS Manager.
In the Connections pane, right-click the Sites node in the tree view, and then select Add Website.
The Add Website dialog opens.Enter
dox42Serverin the Site name text field.If you want to select a different application pool than the one listed in the Application pool box: In the Select Application Pool dialog box, select dox42Server from the Application pool list, and then select OK.
In the Physical path box, enter the physical path of the chosen folder in step 1, or select the browse button (...) to browse the file system to find the folder.
Select the protocol for the site from the Type list.
The default value in the IP address box is All Unassigned. If you must specify a static IP address for the website, enter the IP address in the IP address box.
Enter
4242in the Port text field.Note
You may use any other port, but bear in mind that the standard port (80) is often already in use by other applications, e.g. SharePoint.
If you do not have to make any changes to the site, and you want the website to be immediately available, select the Start Website immediately checkbox.
Select the OK button.
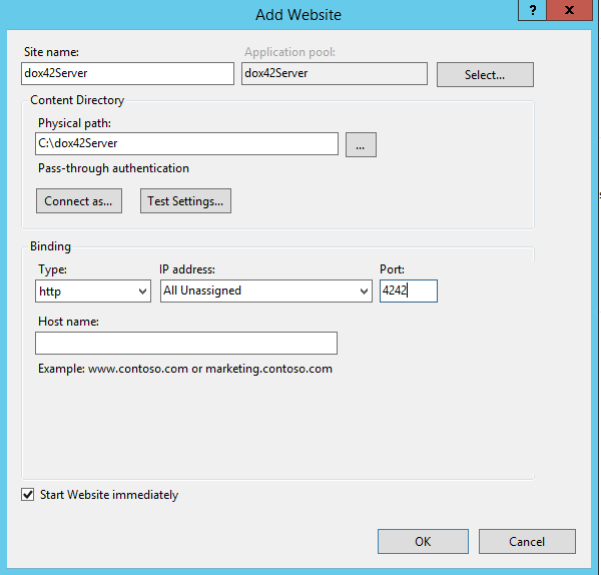
Add Website dialog
Copy your Aspose.Total.Lic file to the
binfolder in yourdox42Serverfolder.Important
This step is not applicable for trial installations.
Install the NET 4.5.2 framework.
Use Server Manager to activate ASP.NET (inclusive HTTP activation).
If you want to enable access to SharePoint Online (Office 365) for your dox42 Server, install the Microsoft SharePoint Server 2013 Client Components SDK.
Run iisreset.
Configure the dox42 Server application pool as follows:
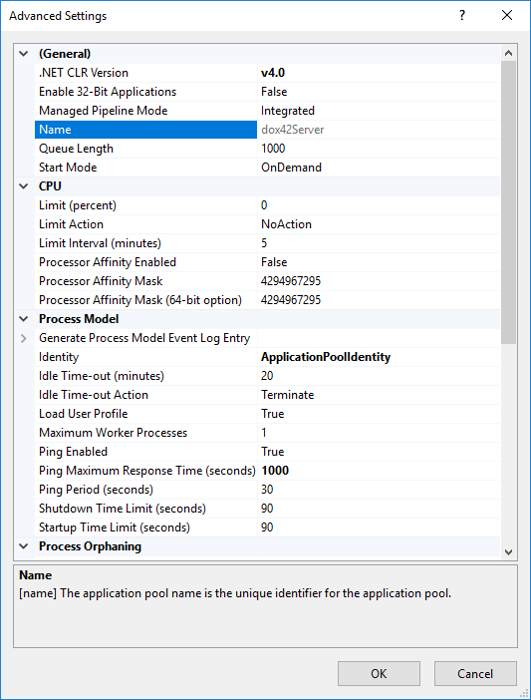
Advanced settings dialog
In the Identity text field, you can use
Service-Userinstead ofApplicationPoolIdentity.In case you want to generate a dox42 sample template which occasionally uses Microsoft Access (32-Bit needed), you might to set the Enable 32-Bit applications list to True.
Select the OK button.
In IIS Manager, right-select your site in the Sites node in the tree view, and then select IIS Manager permissions.
Look for the user entry IIS AppPool\dox42Server or a dox42 Service account.
Note
Use the local computer as search path.
Give this user read and write permissions to
C:\dox42Server.Configure web.config (key, license-dir, mail server) and NLog.config (log-dir) files.
Activate the port on your firewall:

Windows Firewall settings showing inbound rules for various protocols and applications
Try to reach your dox42 web service via browser:
http://localhost:4242/dox42Service.asmx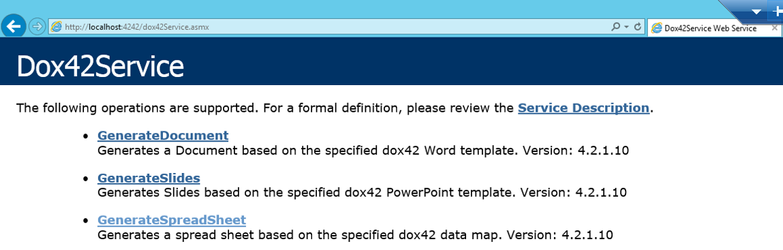
Dox42Service webpage displaying document generation options and service descriptions
Note
For showing the version, opening the dox42Service web service endpoint reveals the installed version for each available operation.
Test generating a document with the dox42 Service Designer.
Note
The dox42 Service Designer can be used for the easy configuration of your dox42 web service calls. Please watch the #dox42class Video Tutorial for more information on how to use it.
Install dox42 Service Designer and open it. You can download it from https://www.dox42.com/Modules/Download
Open the HelloWorld_ServiceDesigner.config file from
C:\dox42Server\templates\HelloWorldTest.Select Call Service to test your dox42 Service document generation.
Use adequate access control to protect your dox42 service against unauthorized use.
Result
You have installed the dox42 Server.