To ensure that the dox42 Add-In can access your specific data, you must first add the respective data sources to your dox42 Add-In. The data sources can be both additional and custom data sources.
A dox42 custom data source enables access to specific data sources or systems, additionally to the already predefined data sources. You or your dox42 partner can develop custom data sources yourself.
Prerequisites
Make sure that Windows Identity Foundation is installed and activated on your Windows computer. Otherwise, you will get the error
Microsoft.IdentityModel could not be found. To activate Windows Identity Foundation go to the Control Panel > Programs > Turn Windows Features on or off and select the checkbox at Windows Identity Foundation..NET Framework 4.5.2 or higher is installed on your Windows computer.
Steps
Download a data source from https://www.dox42.com/de/Modules/Download.
.Note
Depending on the data source (e.g. MODUS M365 dox42 Document Automation, dox42 D365 FSCM) you might need to login before accessing the download page. If you do not have any credentials, please contact support@dox42.com.
Unzip the file (.zip) to a fixed directory on the computer, on which you want to use dox42.
In Microsoft Word, go to the dox42 ribbon and select Data Map.

dox42 ribbon
The window Data Map Designer window opens.
Open the File menu and select Additional / Custom Data Sources.
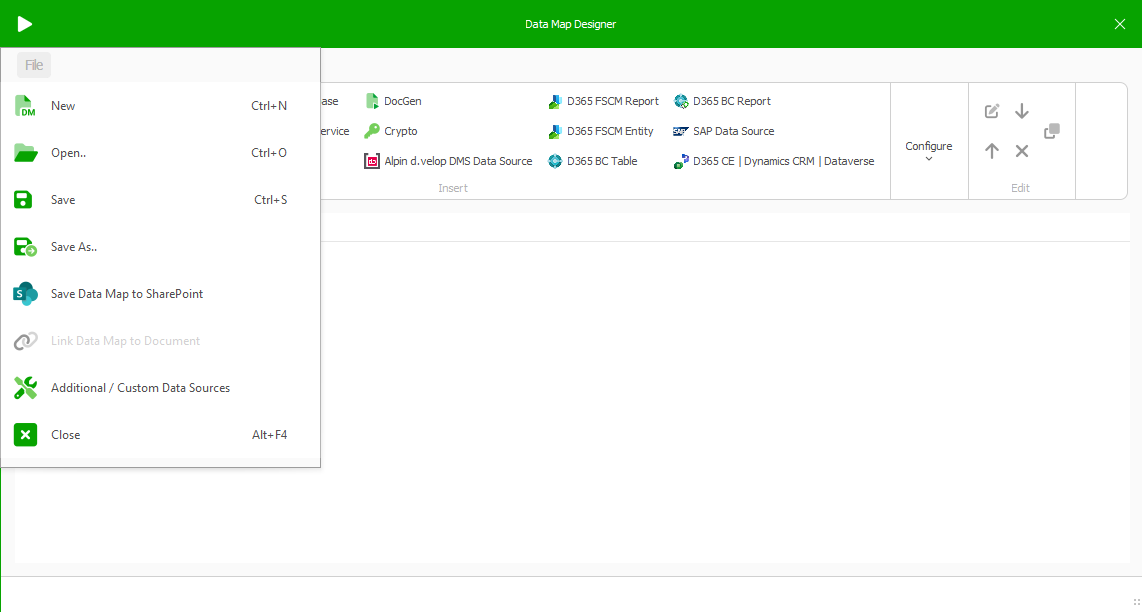
Data Map Designer
The Register Additional and Custom Data Sources window opens.
Select the Import button to import a configuration file (.config). This configuration file is located in the
DataSourcefolder of the respective data source. Find the corresponding .config file names below:dox42 D365 CE | Dataverse: dox42DynamicsCRMmport.config.
dox42 D365 FSCM: dox42OperationsDataSourceImport.config and AX7ODataSourceImport.config
dox42 D365 BC: BCDataSourceImport.config and BCReportDataSourceImport.config
dox42 SAP: SAPDataSourceImport.config
dox42 App for d.velop: DvelopDataSourceImport.config

Register Additional and Custom Data Sources window
Select the OK Button.
The button for the added data source is displayed in the Data Sources tab.
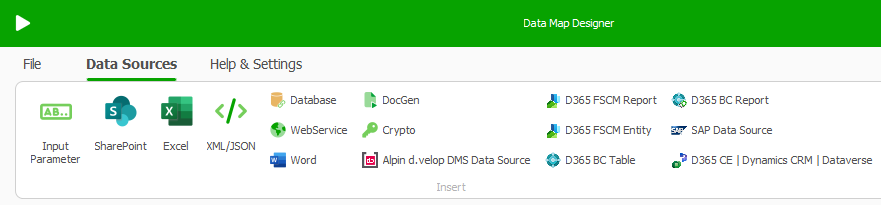
Data Map Designer
To activate your license key:
In the Data Map Designer select the data source, which you have previously added.
The window of your defined data source opens.
Go to the License tab.
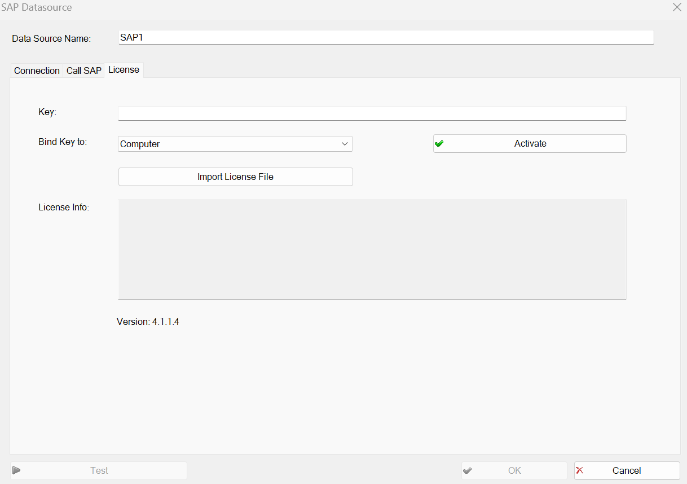
Example: License tab in the SAP Data Source window
To insert your license:
Insert your license key in the Key text field.
Select the Import License File button.
Select the Activate button.
Select the OK button.
Result
You have added the additional or custom data source to your dox42 Add-In.