You can archive reports to your SharePoint.
Note
There is no difference between archiving reports based on “D365 FSCM entity” and “normal” reports based on “D365 FSCM report”. Everything is available at the Data entities setup.
Not available: show data entity report on screen and archive it on SharePoint. It is only possible to archive it or show it on the screen.
Steps
Determine library and folder path on SharePoint:
Go to the Sharepoint folder where the report should be saved and copy the link.
Example:
https://company.sharepoint.com/SPlayground/dox42%20Sharepoint%20Archiving%20V1810DemoSF1EinsIn D365 FSCM go to System administration > Setup > dox42 > dox42 SharePoint sites.
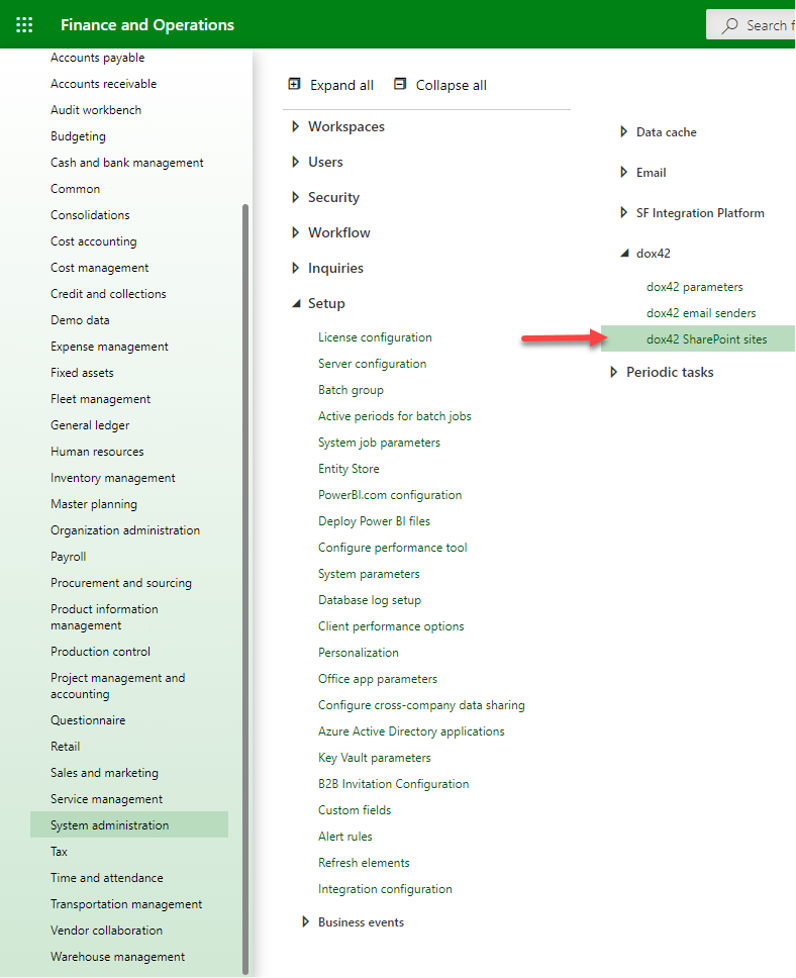
The dox42 Sharepoint sites page opens.
Select the New button.
In the Site URL text field enter the URL.
Example:https://company.sharepoint.com/SPlayground/In the Library text field enter the Library name.
Example:dox42%20Sharepoint%20Archiving%20V1810DemoSF1EinsImportant
You may not use a
-in the Library nameIn the Check-in message text field enter a text.
Set the SharePoint online button to Yes.
From the Authentication mode dropdown select the Inherit entry (Fixed - is not recommended and only works for non MFA SharePoint users).
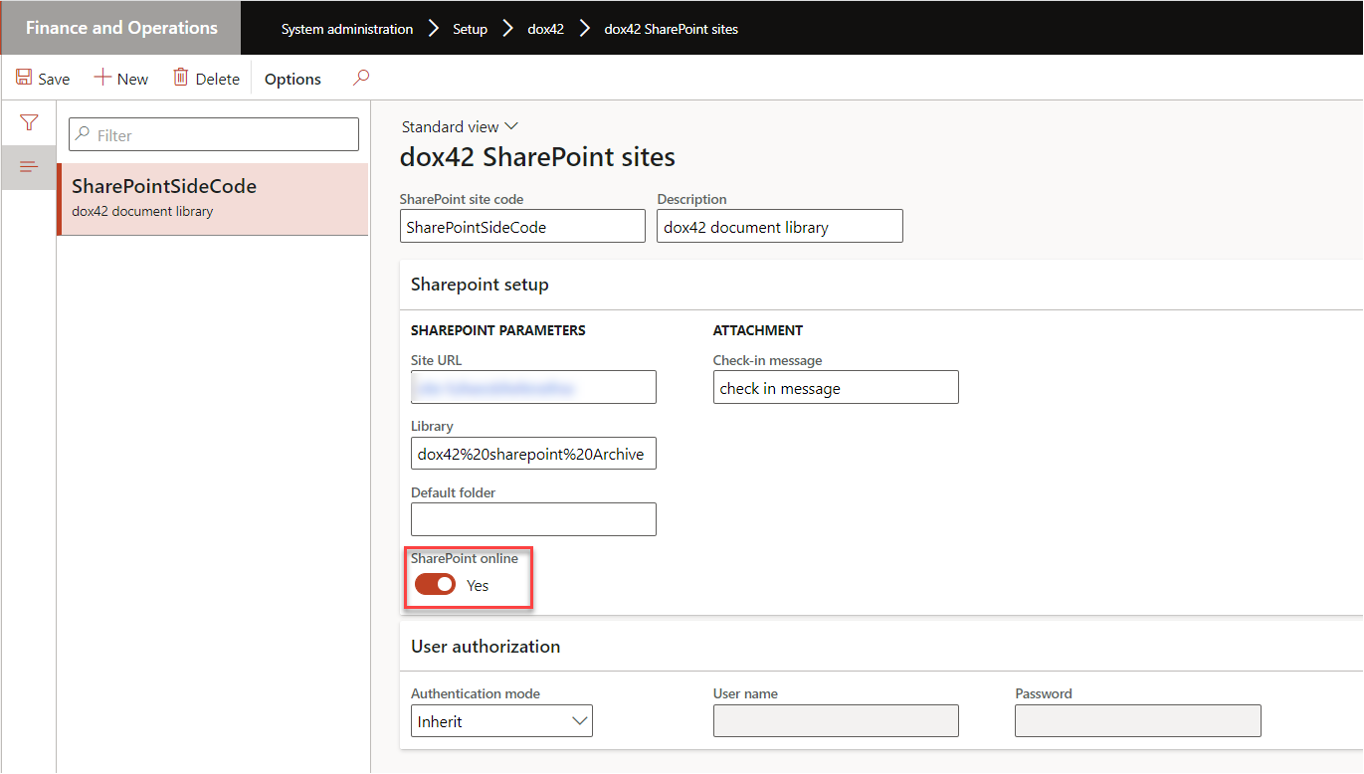
Adding a new SharePoint site
Select the Save button.
Go to System administration > Setup > dox42 > dox42 parameters.
In the SSRS reports tab select the desired report and then the SharePoint mapping button.
The SHAREPOINT MAPPING page opens.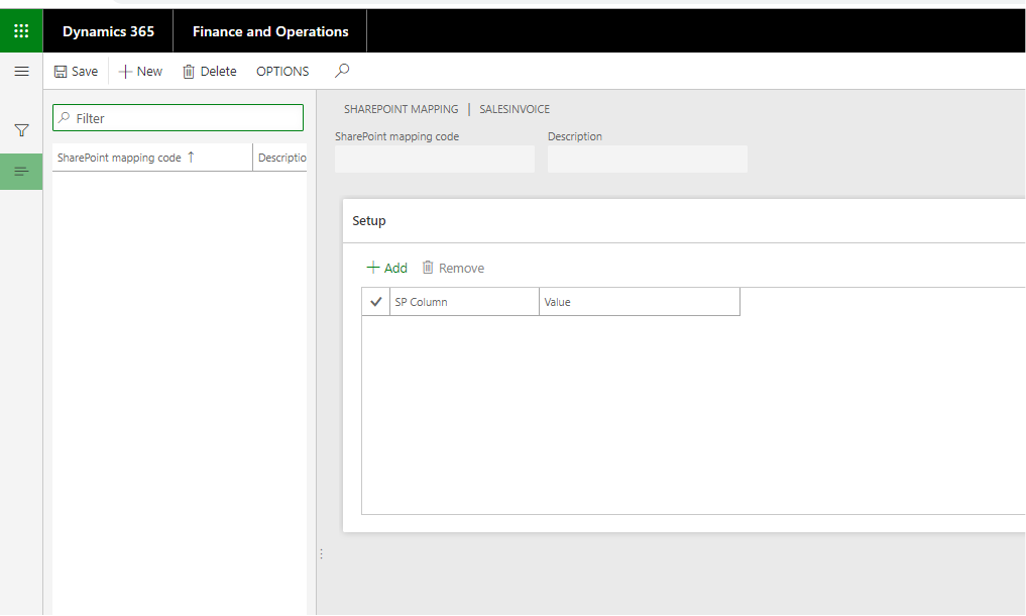
SHAREPOINT MAPPING page
Select Add button to add the columns which should be filled on the SharePoint.
The column Name on SharePoint will be automatically filled, but for example the column InvoiceID has to be inserted here in the SharePoint mapping.Enter the name of the new column.
Example:InvoiceIDEnter a value.
If the columnInvoiceIDon Sharepoint should be filled, the value is:<%SalesInvoiceLines.InvoiceId%>.png)
Data source configuration showing SalesInvoiceLines
Note
SalesInvoiceLinesis the table in which the InvoiceId is stored. The name of the table as well as the name of the field can be looked up in the data map of the report.Select Save to save the SharePoint mapping.
Go to System administration > Setup > dox42 > dox42 parameters.
In the SSRS reports tab enter the needed values into the fields:
SharePoint site code: contains the location as well as the library of SharePoint.
SharePoint folder name: defines in which folder, on SharePoint, the report should be saved.
SharePoint mapping code: contains the information how the columns on SharePoint are filled.
SharePoint file name: contains the name you want to give to the report file.
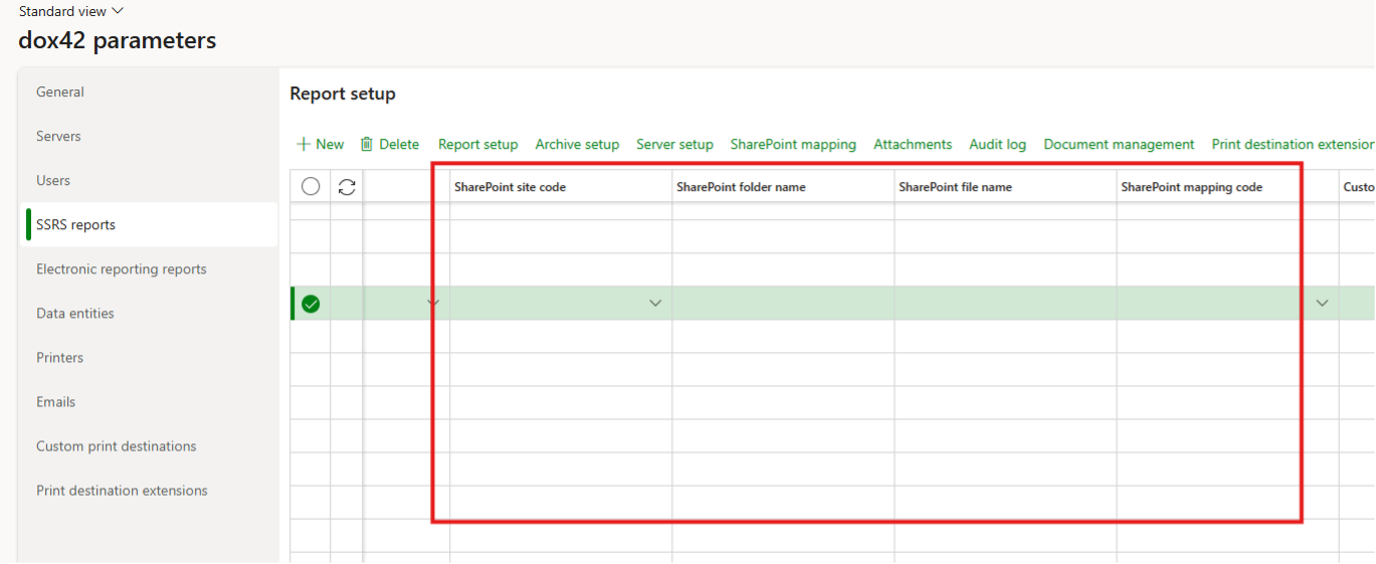
SSRS reports tab
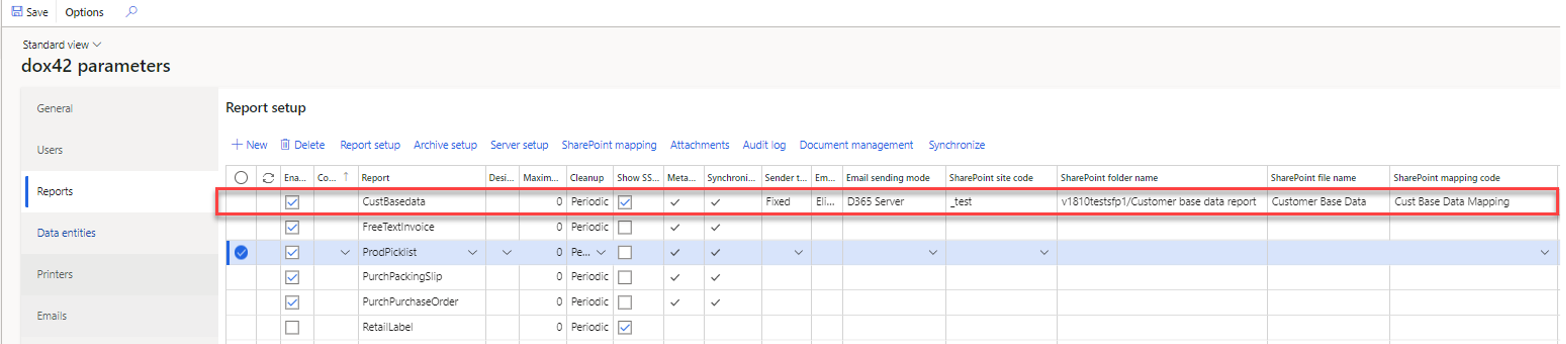
Example: SSRS reports tab
You can to set up the file name mixing a hard-coded text with the fields from the data provider using placeholders (e.g.
<%YourDataSourceName.YourFieldName%>). An example of how the dynamic name of a SharePoint file name can look like:
Example: SharePoint file name
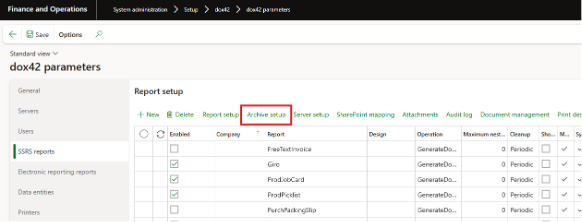
To set up the printer management for SharePoint:
Select the desired report and select the Archive setup button.
Select New.
Enter the path of the template in the Template name field.
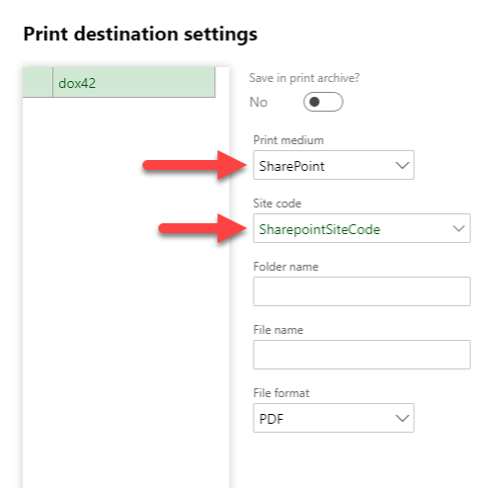
Select the Printer setup button.

In the Print medium dropdown select the SharePoint entry.
Enter a value in the Site code text field.
Enter a value in the File name text field y to give the files a dynamic name (e.g. the
InvoiceID).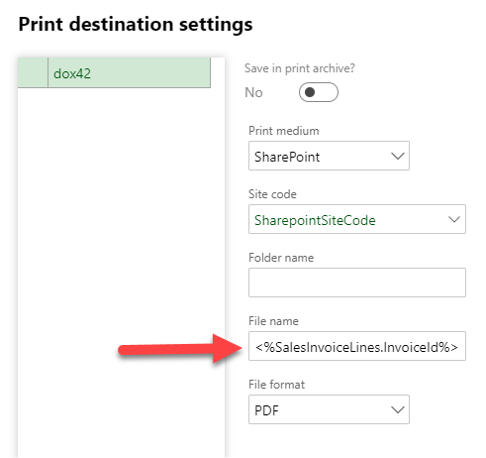
Go to Archive setup.
Set the value of Archiving enabled to yes in the “Archive setup”.

Optionally, you can configure a specific dox42 server to call for the archiving action in case of the multi-server landscape deployed. If not configured, the same dox42 server is called for the archiving action as for the report generation.
Result
The setup for the archiving on Sharepoint is finished. If a sales invoice is printed it will automatically be archived on SharePoint.
Note
If side code and report setup have different folders, D365 FSCM chooses the folder from report setup