As an alternative to Integrating dox42 into your Microsoft Dynamics CRM or D365 CE via the dox42 solution or if you wish for your dox42 calls to be added directly to an entity form, rather than via a button in the command bar, you can integrate dox42 calls via an HTML webresource/IFRAME to your entity form.
Note
This scenario is mostly used for Dynamics CRM on-prem, hence this article only describes the steps in the classic CRM UI.
Steps
Configure your JavaScript Interface following the instructions for the
AzureAD_dox42_javascript_interfacementioned in the Entra ID integration documentation.Note
You can find the JavaScript in your download package.
Create a HTML web resource for the JavaScript interface
AzureAD_dox42_javascript_interface:Copy the URL of your newly added web resource and add it as reply URL to your Entra ID Directory app registration.
To insert your web resource to your CRM page as an IFRAME using the D365 CRM form editor:
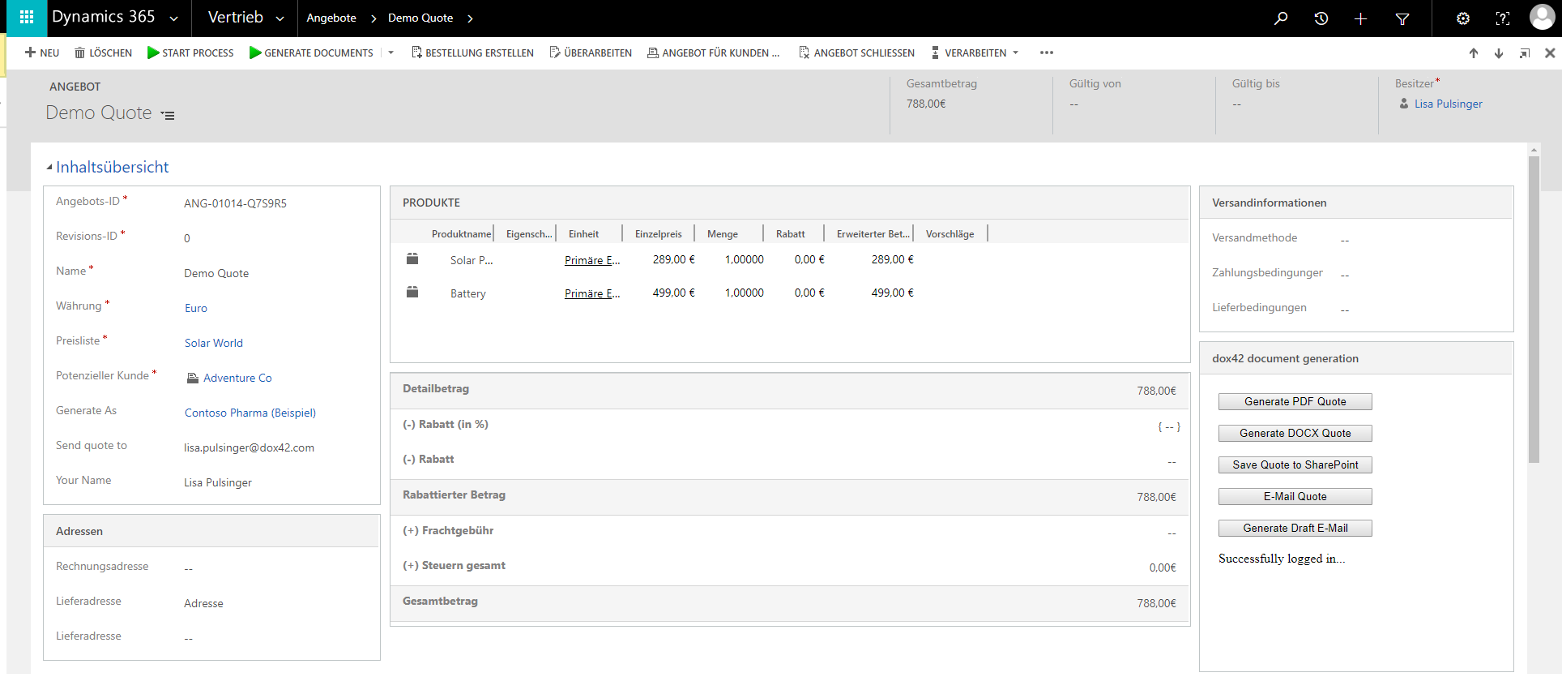
Open the desired form editor, e.g. from your quote overview.
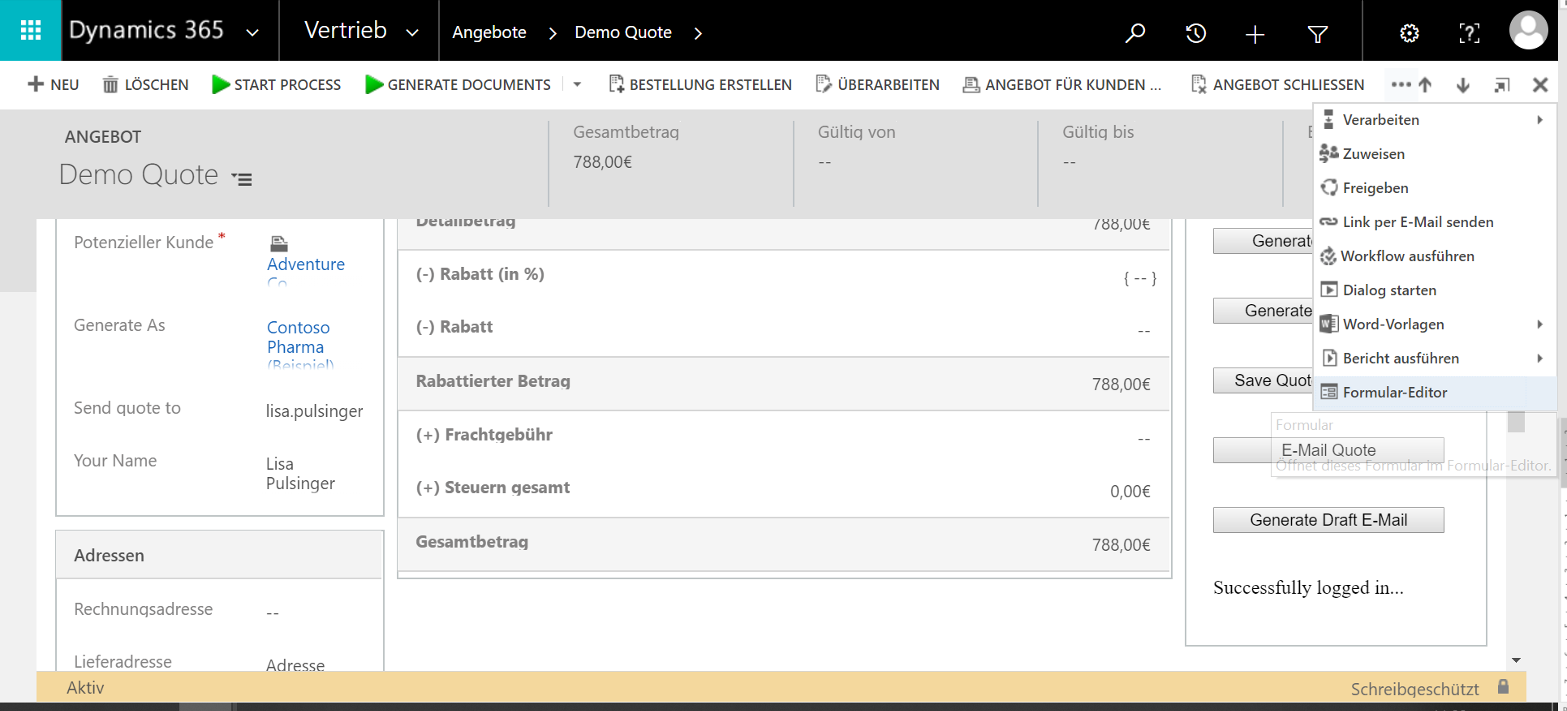
Select the area where you would like the web resource to appear on your form, select the Insert ribbon in the menu bar and select the IFRAME button.
The IFRAME settings form opens.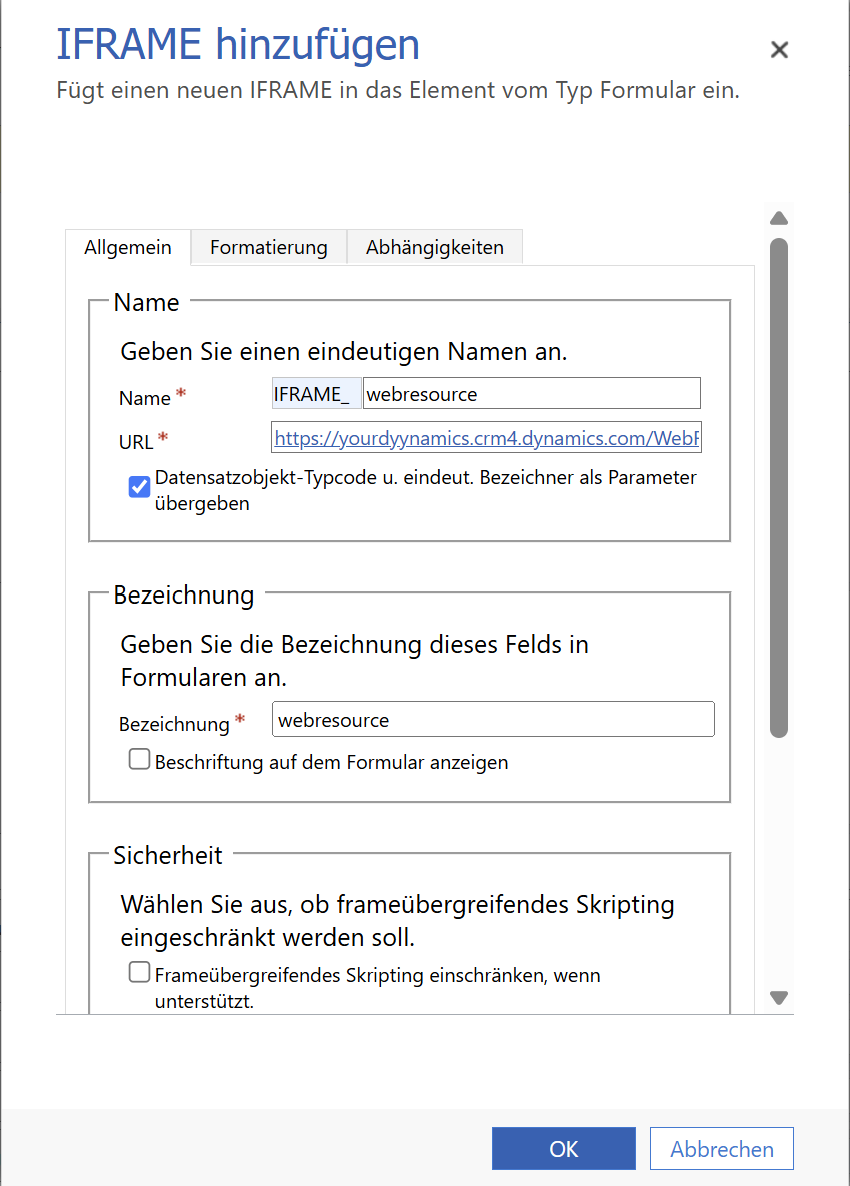
IFRAME settings form
In the URL text field enter the URL of your previously added web resource.
Select the OK button.
Select Save.
Select Publish.
Result
You have integrated dox42 calls via an HTML webresource/IFRAME to your entity form.