Prerequisite
Steps
In Word or Excel, go to the dox42 ribbon and select Data Map.

dox42 ribbon
The Data Map Designer window opens.
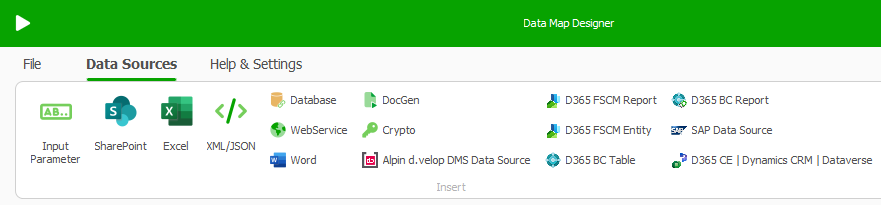
Data Map Designer
Connect your Microsoft Excel config file with the Data Map Designer. See Connecting the connection Excel file to the data map.
Select a data source, e.g. SharePoint.
Important
If you are using dox42 with D365 BC, see also Inserting information from the Microsoft Excel config file when using dox42 D365 BC.
Configuring the Entra ID Login with Entra ID impersonation
Choosing this authentication method means that dox42 will impersonate the rights of the logged in Microsoft user.
Steps
Select the Azure Active Directory Certificate button.
The Azure Active Directory Configuration (Entra ID Configuration) window opens.
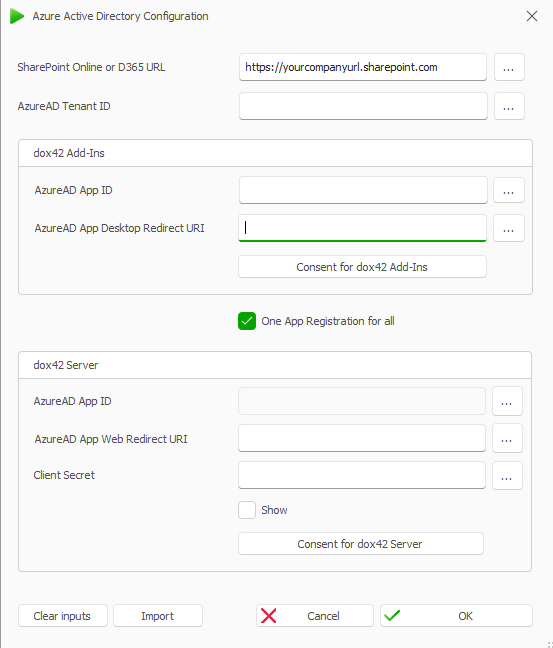
Entra ID Configuration window
To integrate the Entra ID connection data:
Select the … button next to each text field.
The dox42 Data Field Explorer opens.Select the corresponding value from your Excel Connection data source for each field of the Entra ID Configuration.
Select the value for the ClientSecret text field from your Crypto data source.
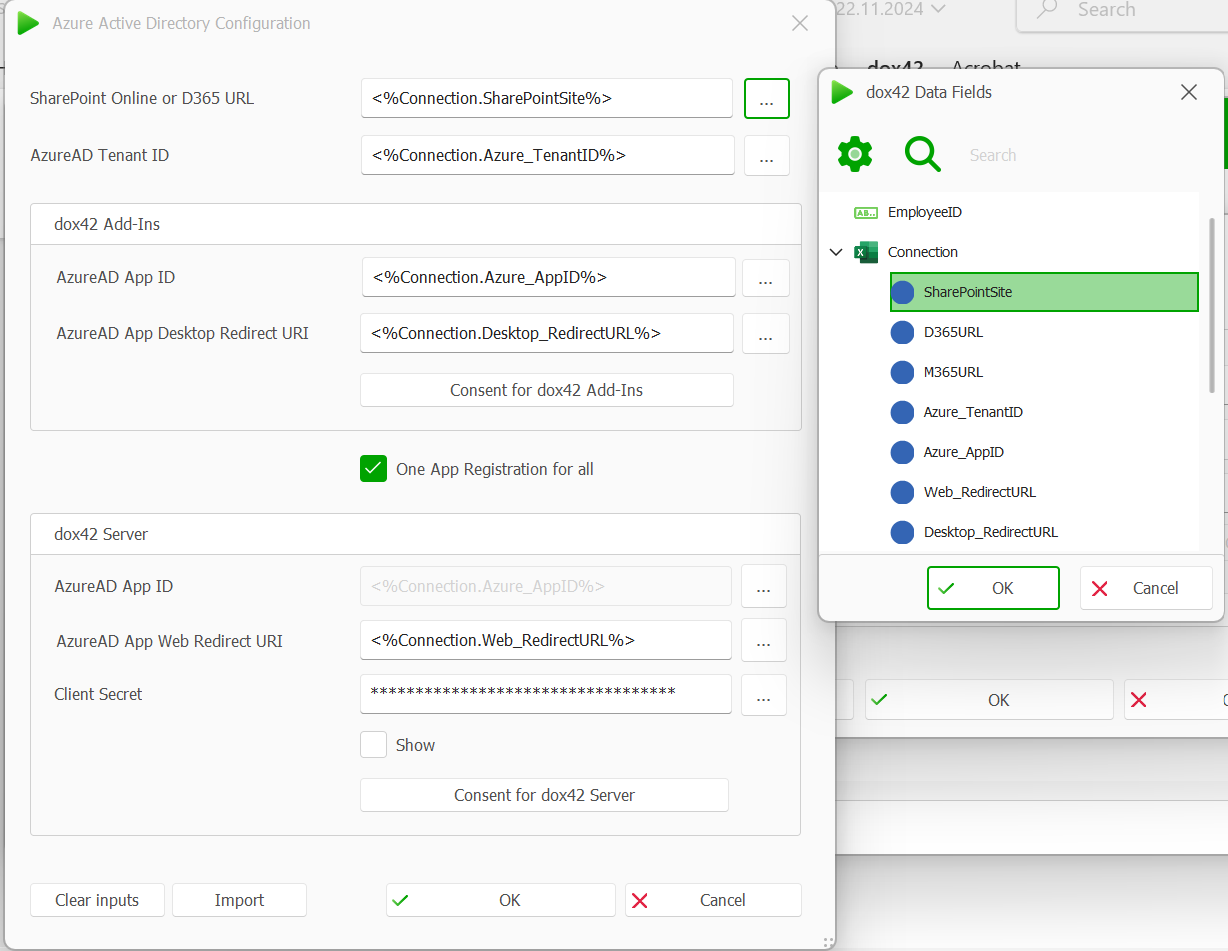
Configured Entra ID Configuration window
Select the OK button.
Save the data map.
Result
You have configured the Entra ID Login with Entra ID impersonation.
Configuring the Entra ID Login with Entra ID Application User
Choosing this authentication method means that dox42 will authenticate via the rights of an application user AND Certificate or Client Secret.
Steps
Select the Azure Active Directory Certificate button.
The Entra ID Application User Configuration window opens.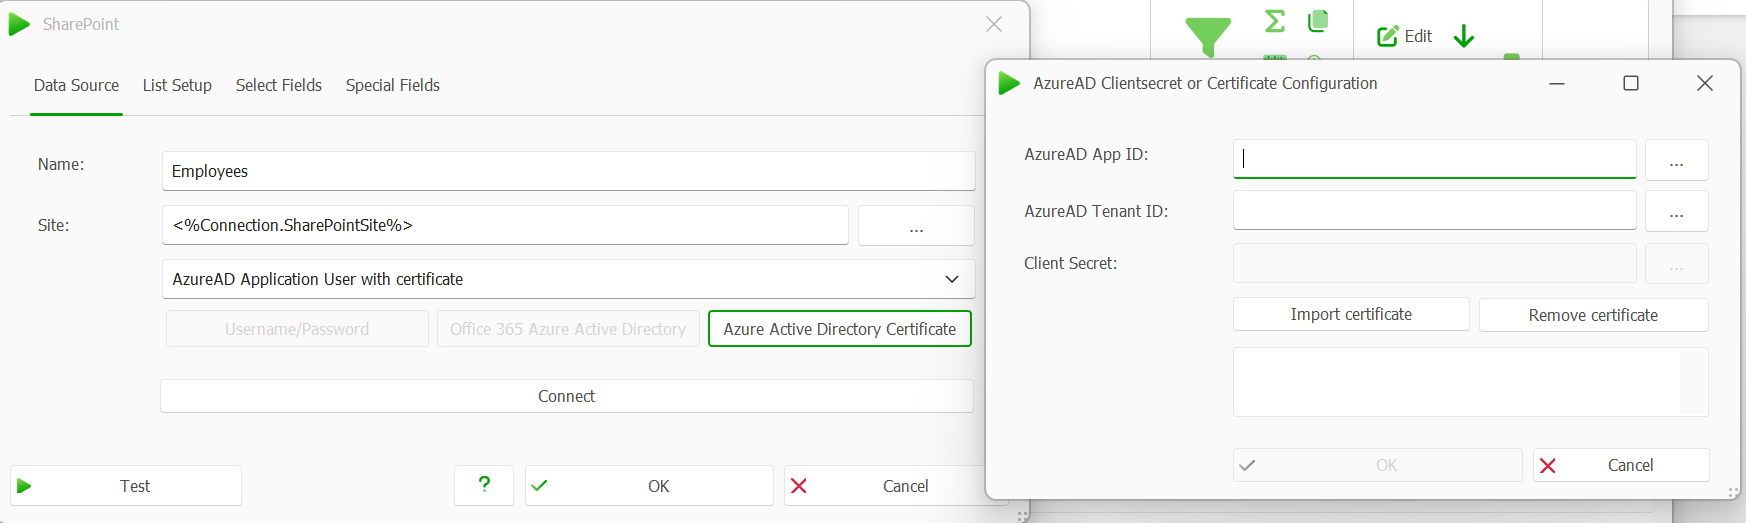
AzureAD Clientsecret or Certificate Configuration window
To integrate the Entra ID connection data:
Select the … button next to each text field.
The dox42 Data Field Explorer opens.Select the corresponding value from your Excel Connection data source for each field of the Entra ID Configuration.
Then:
Select the value for the ClientSecret text field from your Crypto data source or
import your certificate via the Import certificate button.
Note
For SharePoint data sources you can only work with certificates, not client secrets.
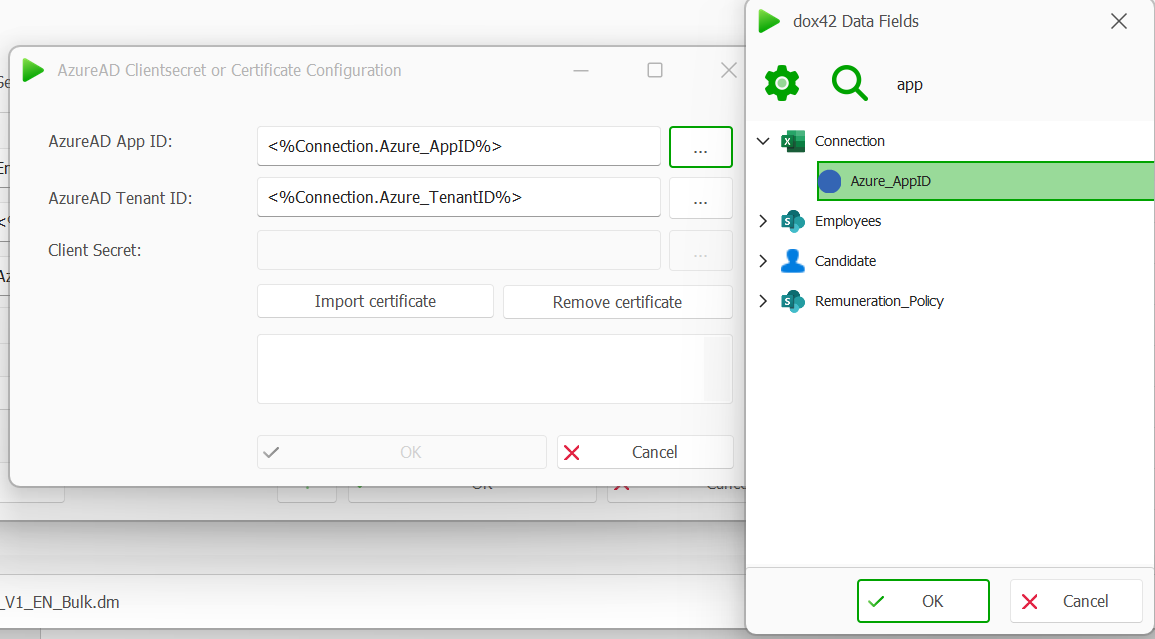
dox42 Data Fields within AzureAD Clientsecret or Certificate Configuration window
Select the OK button.
Result
You have configured the Entra ID Login with Entra ID Application User.