In order to use data fields from Microsoft Dynamics CRM, Dataverse or D365 CE in your dox42 templates, you need to include them into your data map.
Steps
In Microsoft Word, Excel or PowerPoint, go to the dox42 ribbon and select Data Map.
.png)
dox42 ribbon
The Data Map Designer window opens.
.png)
Data Map Designer
Select D365 CE | Dataverse.
On the Connection tab connect to your Data Source using the desired authentication method. See Connecting the dox42 D365 CE data source to Microsoft Dynamics CRM or D365 CE.
Move to the Configration Tab and select the Connect button to read the list of available entities from your CRM.
You have the following options to list the available data fields:
Select the desired entity from the Entity dropdown.
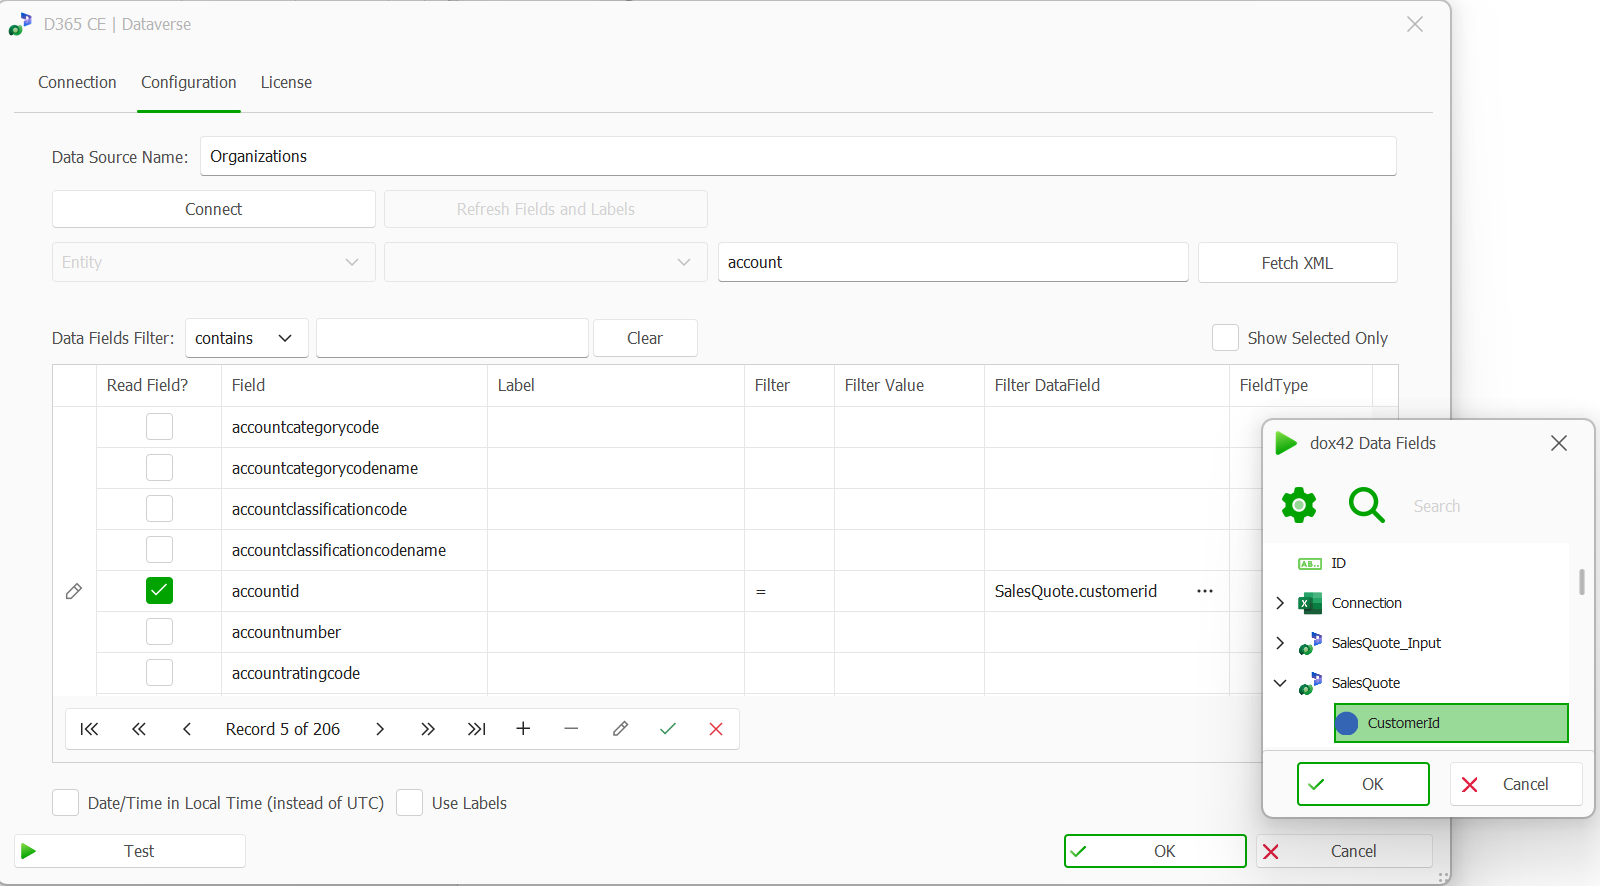
Read from D365 CE Config tab
Select the Fetch XML entry in the Entity drop down:
select the Fetch XML entry.
Select the Fetch XML button.
A text editor opens.Enter your Fetch XML.
Important
Aliases must be written using lowercase characters only.
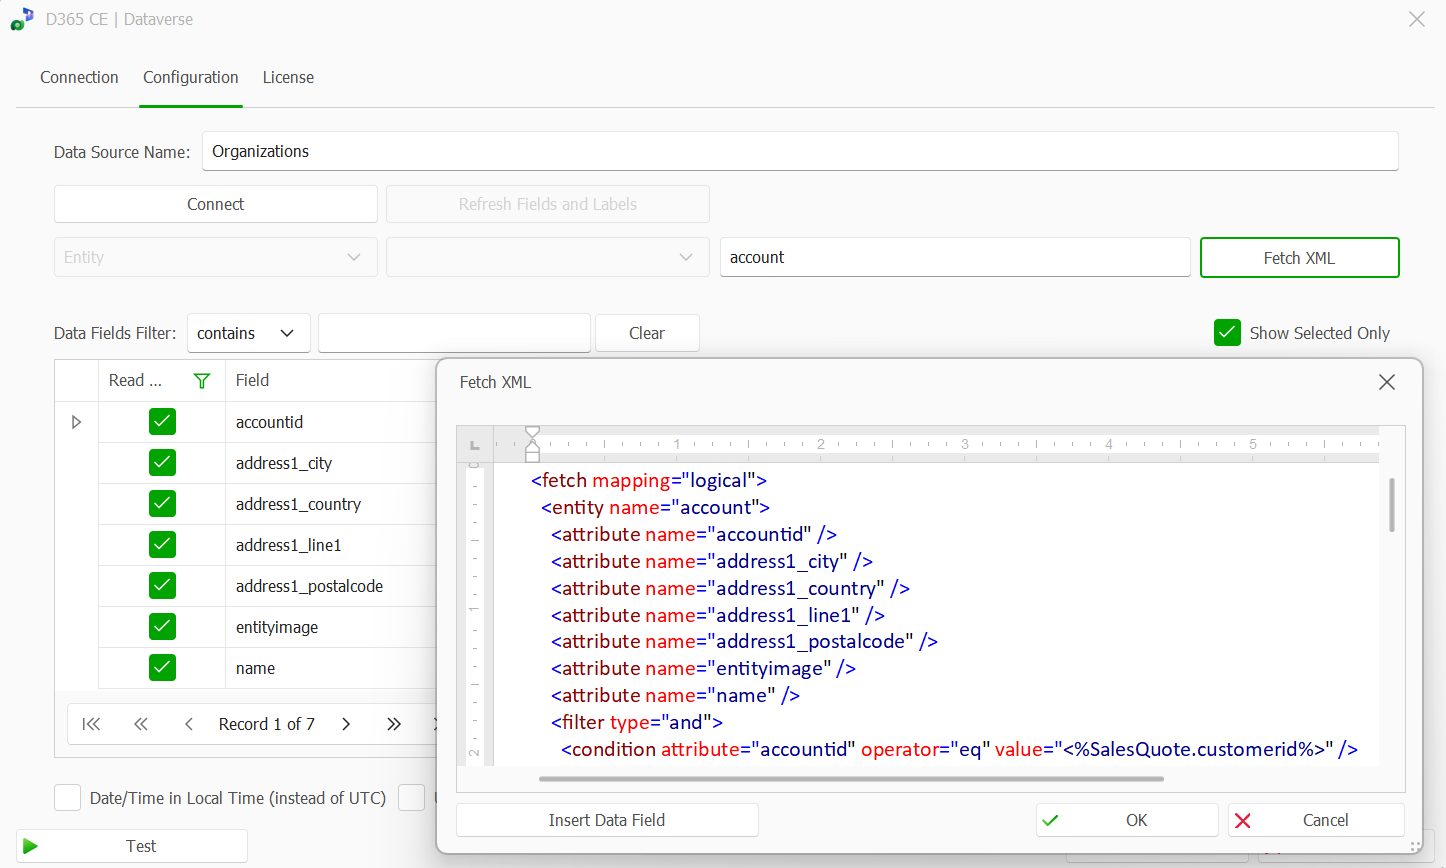
Fetch XML window in Data Map Designer
Close the text editor.
In the Data Fields list in the Read Field column select the data fields that you want to use in your templates.
By double clicking on Read Field, you can select/unselect all fields.Optional: If you want to set an attribute to a specific format, click on the FieldType cell and select one of the options.
Field Types
Binary - for reading images from D365 CE that are stored in Binary format
HTML - for reading HTML fields
Base64 - for returning and converting data from Base64 encoded fields
FS_base64 - for returning and converting strings from Base64 and URL encoded fields; typically needed in Dynamcis Field Service scenarios.PathSegment - for removing hyphens from your data fields, this needs to be applied on ID fields when storing documents on the D365 CE SharePoint integration standard SharePoint Library
Optional: To set a filter just enter a value into the Field List Filter Value field or choose a data field and choose the desired filter.
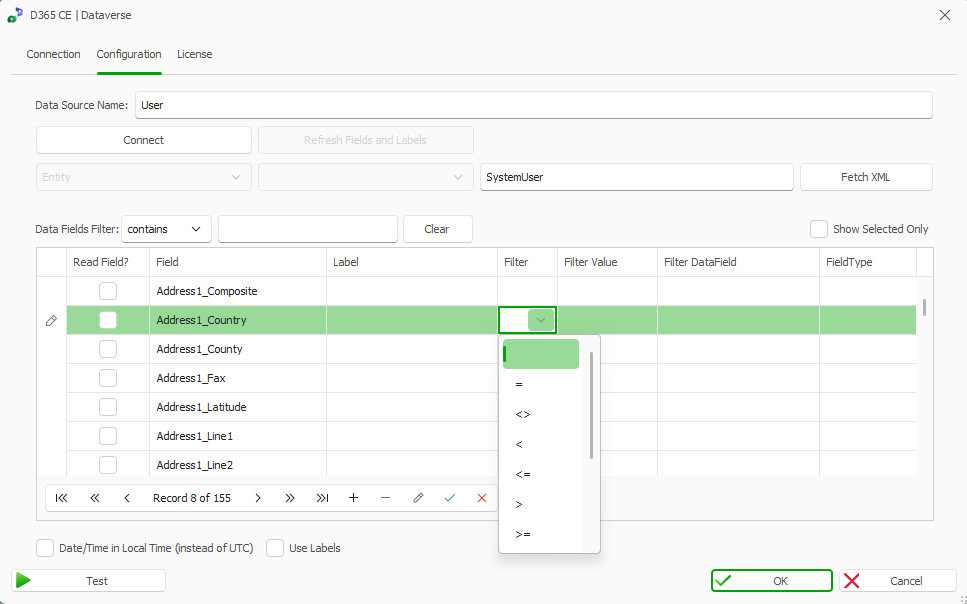
Select a filter operator by clicking in the Filter column in the cell corresponding to the Field you wish to filter
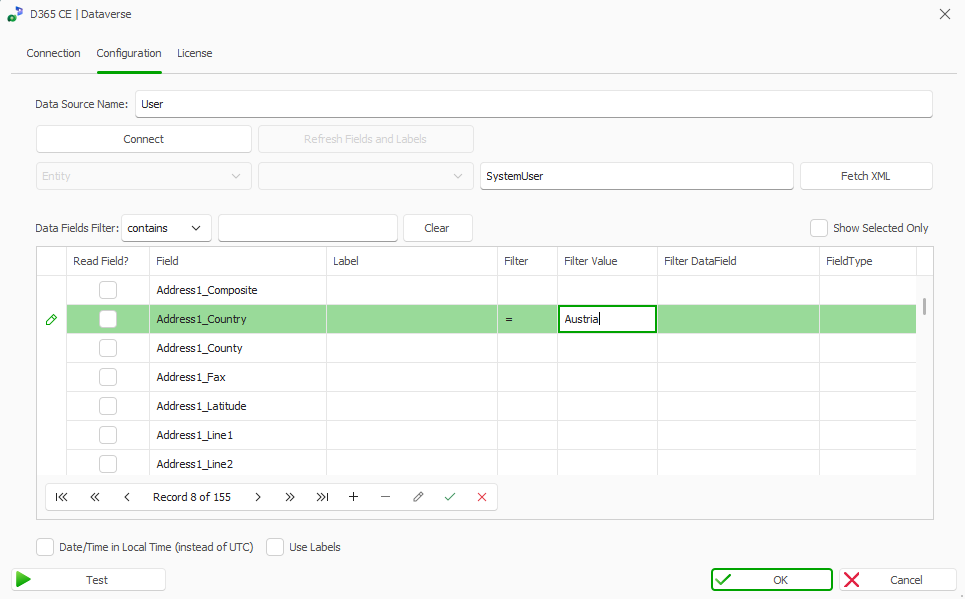
Enter either a value in the Filter Value Cell in the same row or select a pre-existing data field in the Filter DataField column.
Optional: To transform all date/time fields from UTC to local time select the Date/Time Fields in Local Time (instead of UTC) checkbox.
Note
Dynamics CRM stores data/time fields in UTC.
Optional: To show the CRM labels instead of the technical names in your templates, select the Use Labels checkbox.
Important
You need dox42 Version 5.0 and a switched on labels button in the Datafield Explorer to show the labels in your dox42 templates.
Optional: To overwrite the labels you can add your own comments.
To refresh the labels and reload the fields from your CRM select the Refresh Labels and Fields button.
Important
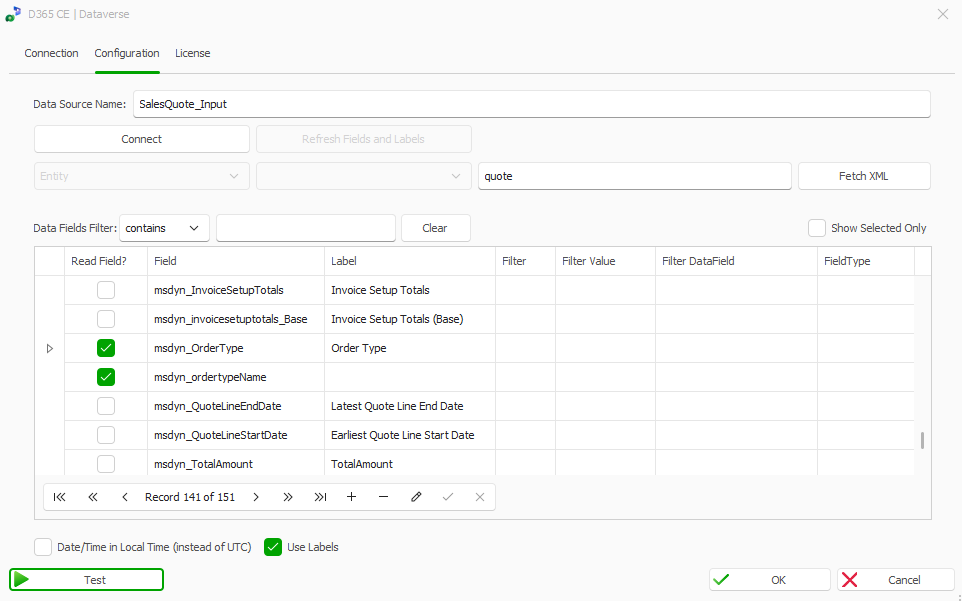
If you want to retrieve the human-readable label of an option set field in Microsoft Dynamics 365 CRM, use the field name with the suffix Name (for example, ExampleName). To ensure the label is returned correctly, you must also include the original option set field (Example) in the selection. If only the ExampleName field is selected, the value may be returned as empty.
In this case we want to get the “msdyn_ordertypeName” value, we need to select both “msdyn_ordertypeName” and “msdyn_ordertype”.
Selecting both will result in having the correct result
Selecting only “msdyn_ordertypeName” will not deliver any result.
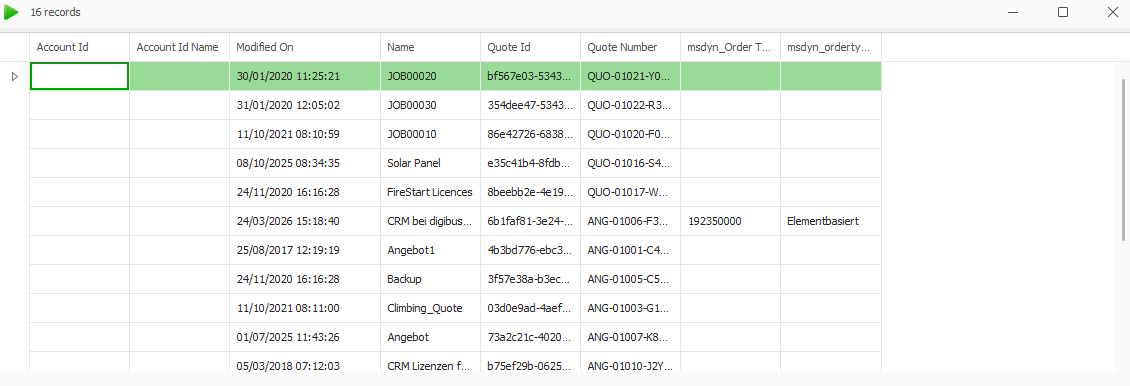
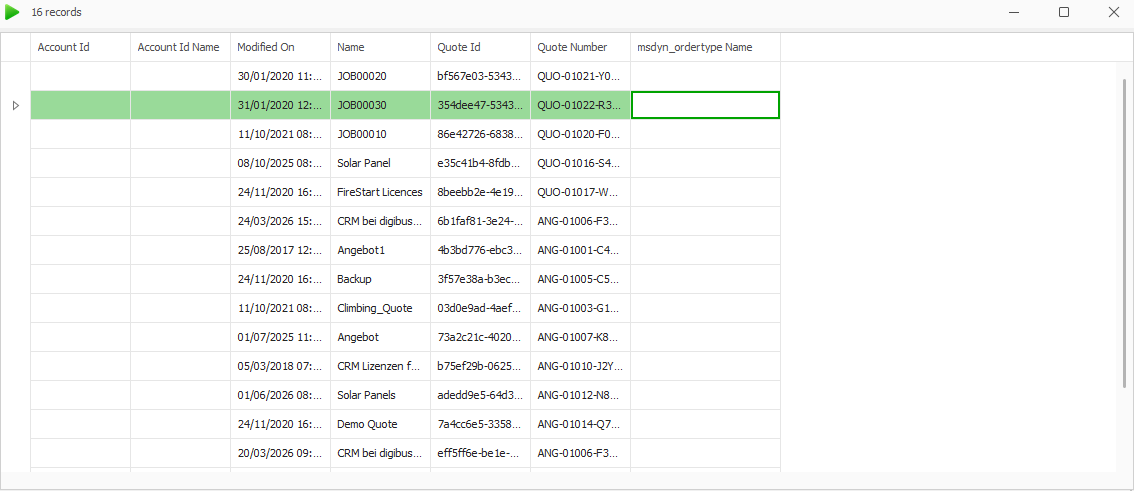
Result
Now you have included data fields from Microsoft Dynamics CRM, Dataverse or D365 CE and can use them in your templates like any other dox42 data fields.
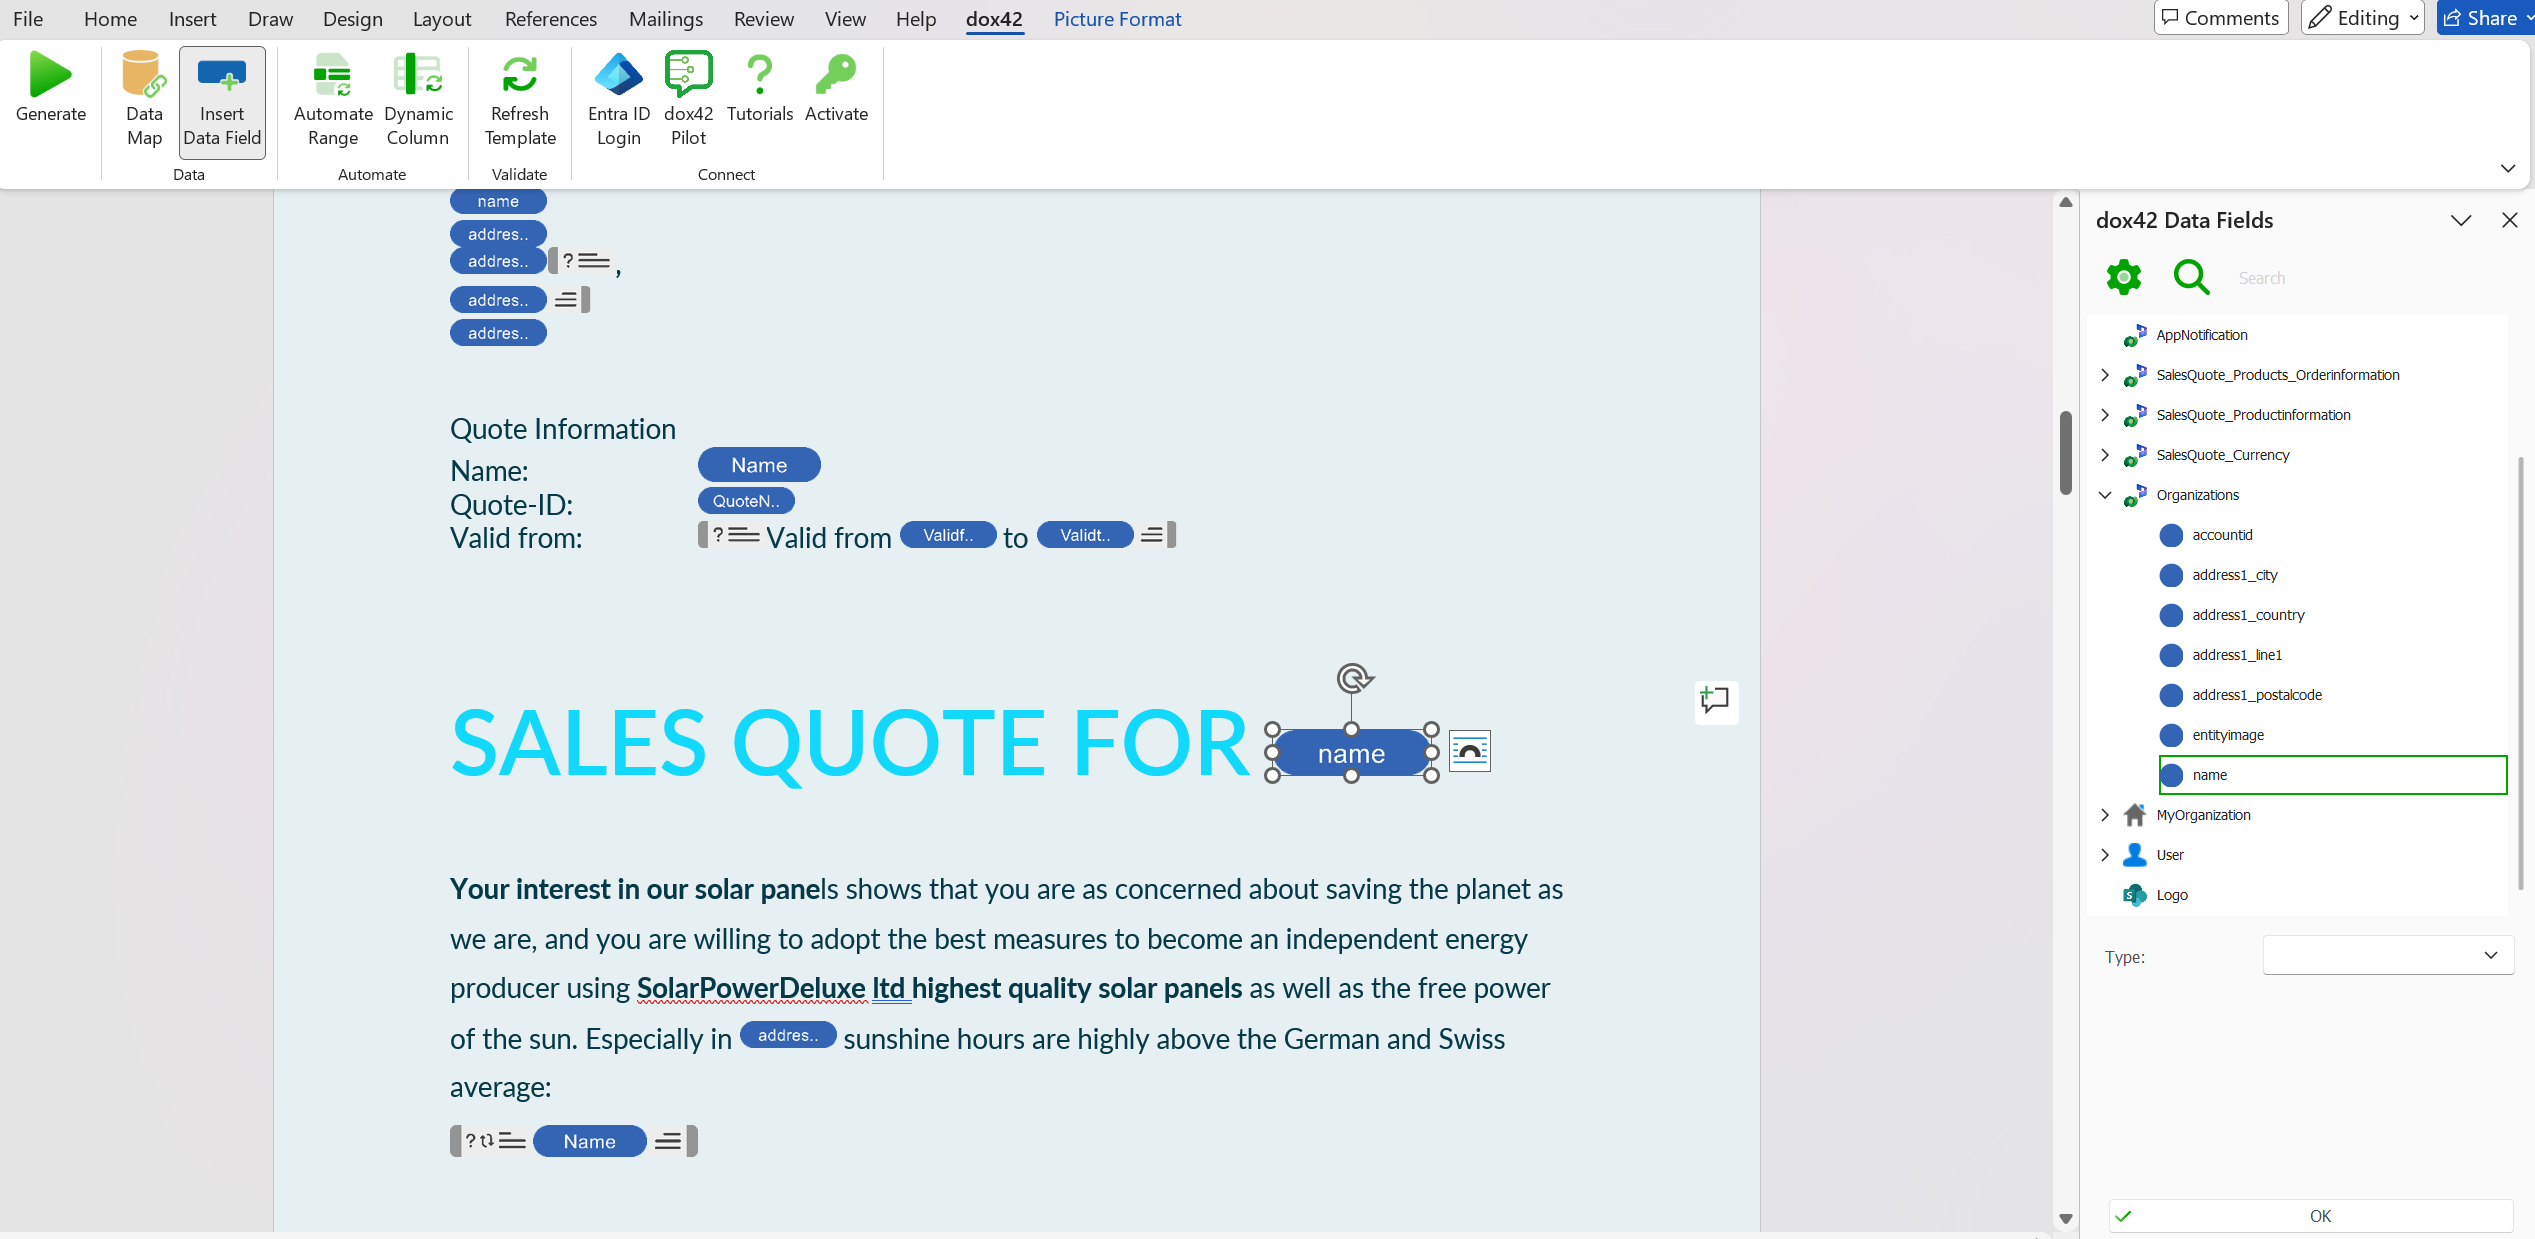
Data fields from MS Dynamics CRM, D365 CE or Dataverse in Microsoft Word