Note: The dox42 SharePoint Online App needs an input parameter to generate your documents.
You can configure an input parameter in the dox42 Add-In. An example is found in the sample template in your SharePoint App package folder SP_app_template.
Steps
In Microsoft Word, Excel or PowerPoint, go to the dox42 ribbon and select Data Map.

dox42 ribbon
The Data Map Designer window opens.
Select Input Parameter.
Configure an input parameter and give it a name (e.g.
ItemID).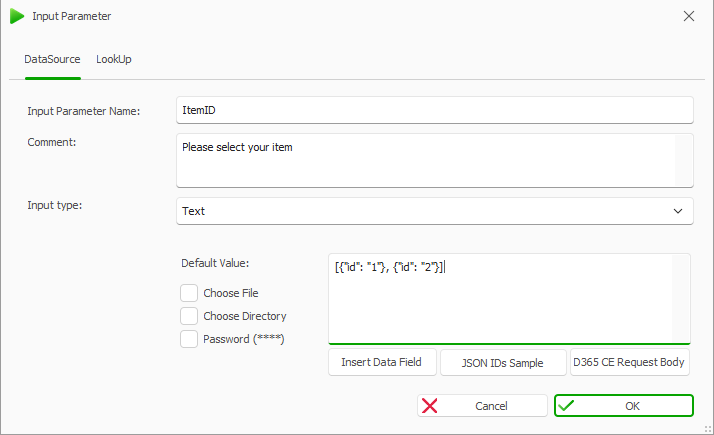
Input Parameter window
For testing your documents easier with the dox42 Word Add-In, enter a Default Value for example:
[ {"id": "1"}, {"id":"2"}]Add a XML/JSON data source and call it JSON, for example. The JSON data source parses the ID, which is important for the SharePoint Online App:
Select Insert Data Field and select your created input parameter:
ItemID.In the Element text field, enter:
ID.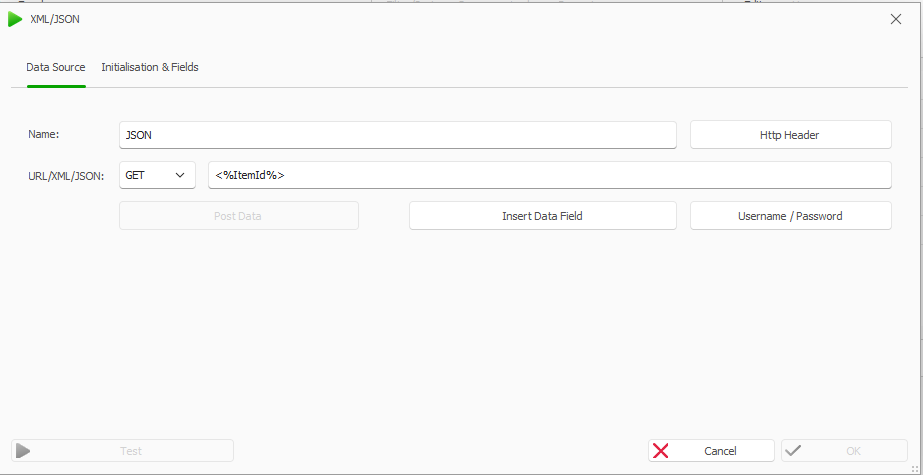
Adding a new XML/JSON data source
Go to the Initialisation & Fields tab.
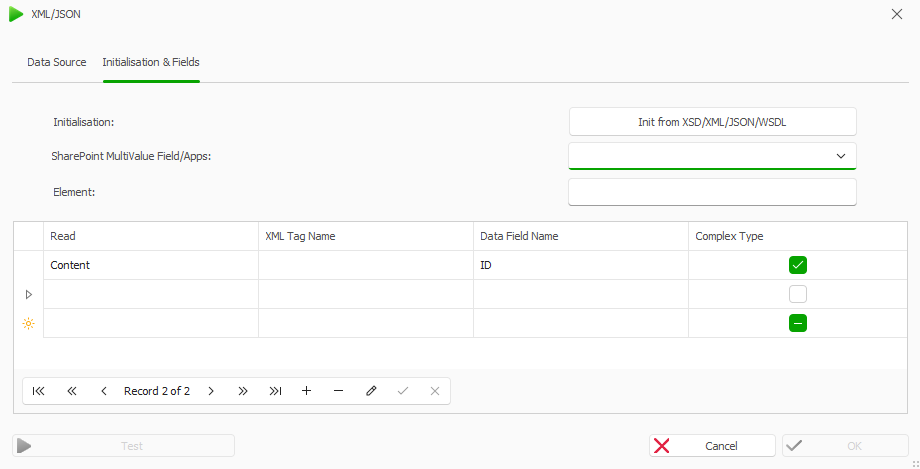
XML/JSON Data Source window
In the Table from the Read dropdown, select the Content entry.
In the Table, in the Data Field Name text field, enter
Example ID.
Add a SharePoint data source.
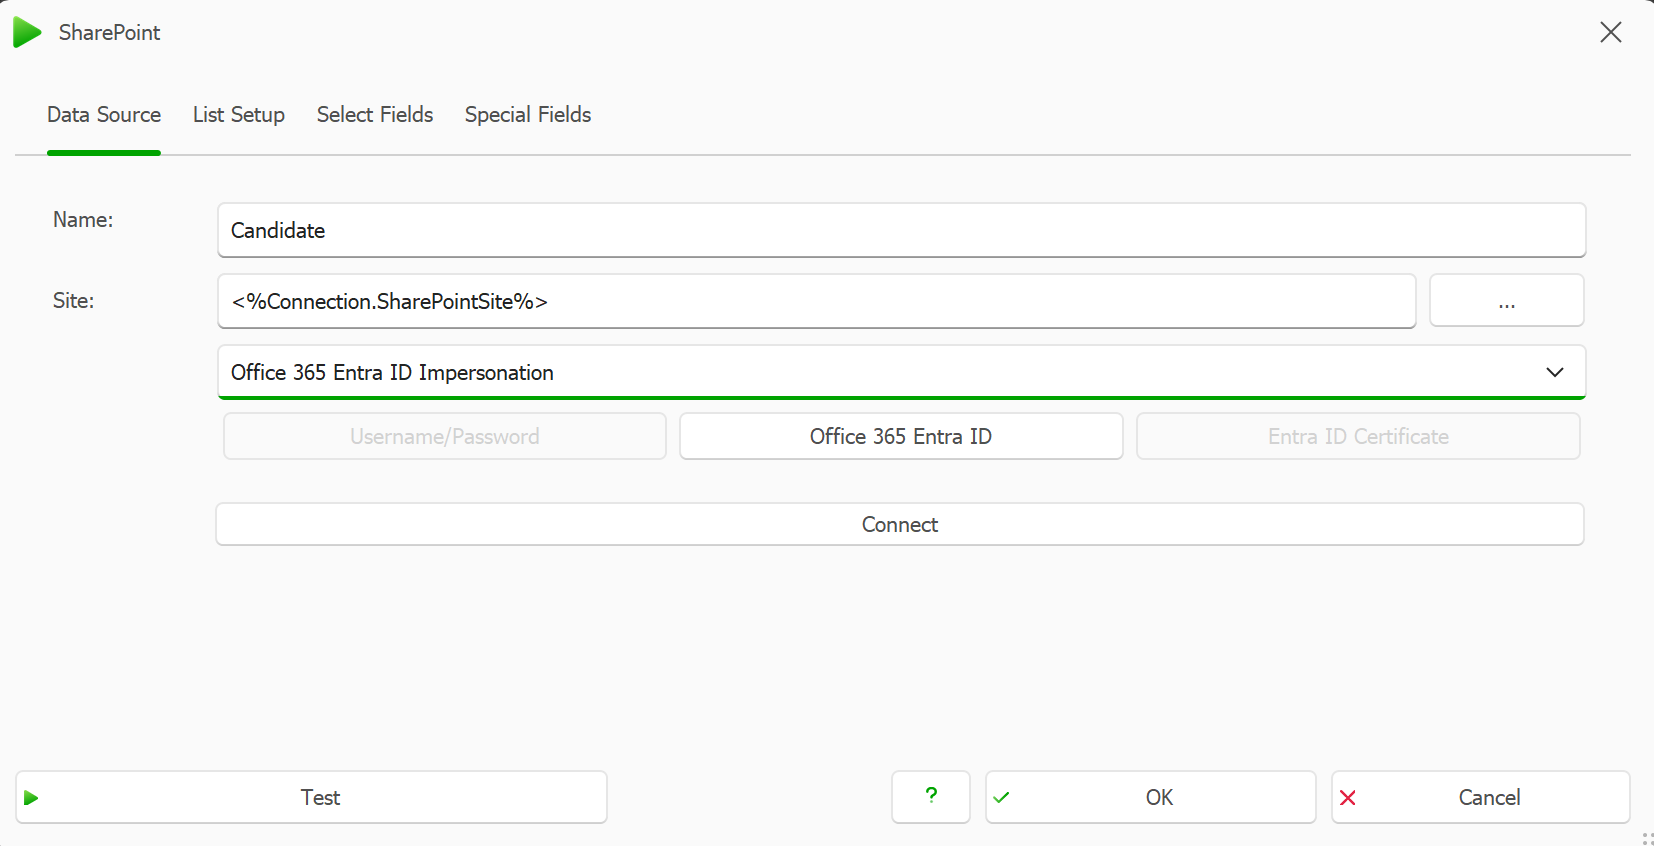
Adding a new SharePoint data source
Go to the Select Fields tab.
Select the Query button.
Configure the Query for your SharePoint data source.
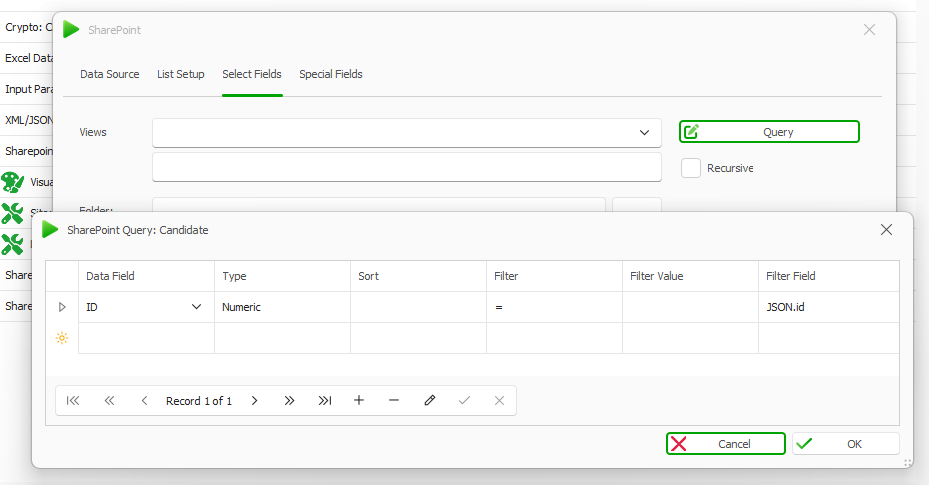
SharePoint Query configuration
In the Filter Field, filter the ID with your previously created JSON.ID data field.
Use the provided template to test if everything is set up correctly after you have entered your Entra ID information and the site links in the Excel connection file.
Result
You have created an input parameter and configured an XML/JSON data source as well as a SharePoint data source. You can now generate your documents directly from SharePoint Online.