The D365 BC Table data source is used to retrieve data from Business Central tables. It does not matter whether the tables are physical, system or even virtual tables.
After having added the D365 BC Table data source to your Add'In, you can manage the data source’s connection settings.
Note
The screenshots illustrate the procedure for setting up a connection with Business Central Online.
Prerequisite
Steps
In Microsoft Word or Excel, go to the dox42 ribbon and select Data Map.

dox42 ribbon
The Data Map Designer window opens.
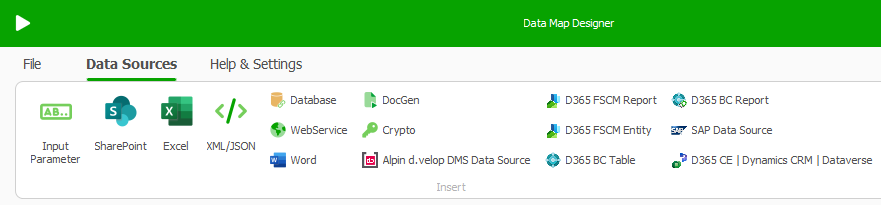
Data Map Designer
Select the D365 BC Table data source.
Select the Connection Settings button to set up the connection data.
The Connection Settings window opens..png)
Connection Settings window in the D365 BC Table data source
Set up the connection data.
Note
- For more information on the individual fields, you may want to consult the MODUS field description.
- The red frames in the screenshot indicate mandatory fields.
Tip
Using the Lookup-Icon
.png) you can load most connection settings from other data sources, for example Excel or a dox42 input parameter:
you can load most connection settings from other data sources, for example Excel or a dox42 input parameter:Select the Use specified URL directly checkbox.
Fill in the Authentication section. To do so, insert the Entra ID connection data from your Microsoft Excel config file.
Fill in the Data Settings section. To do so, in the Company text field, select or enter your company. You can also use an input parameter for the company (recommended when working with multiple companies).
Select the icon next to the Table text field.
The Select a Table window opens.Select a table from Business Central that you wish to connect to and then select OK.
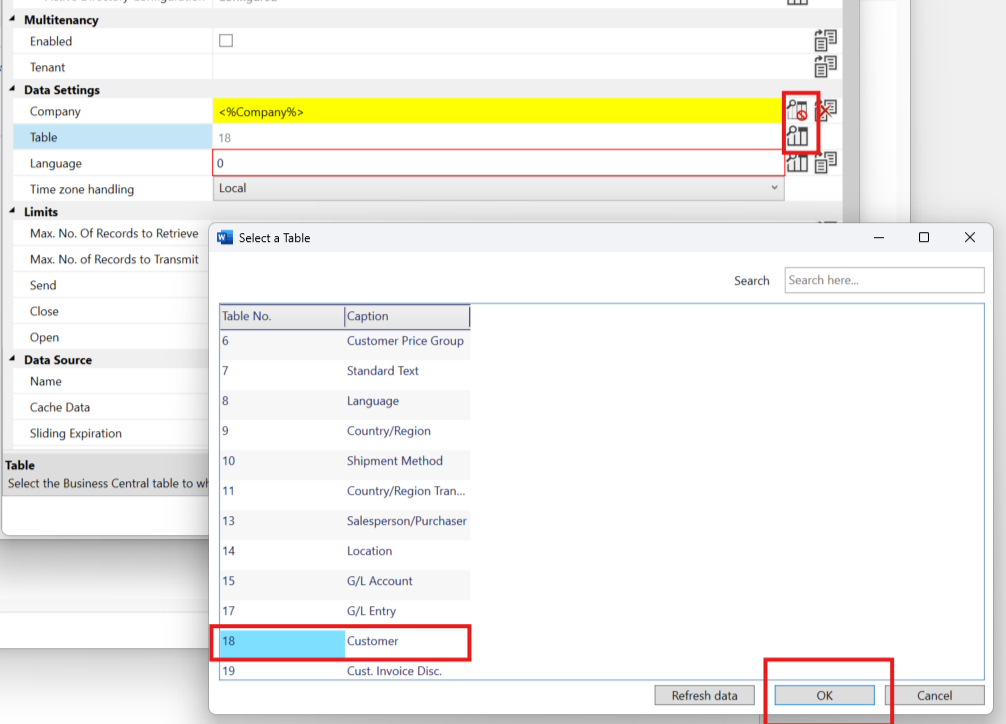
Selecting a table
Note
In the Data Source section, the Name text field is filled automatically after a table has been selected. By default, the name corresponds to the BC-internal table name.
From the Language text field, select a language for the data fields and then select OK to close the Connection Settings window.
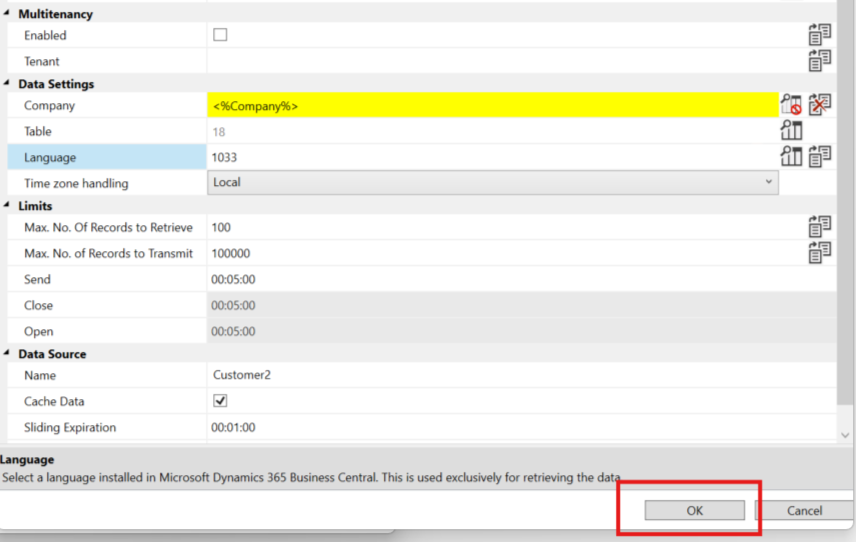
Selecting a language
In the Microsoft Dynamics 365 Business Central Table Data Source window, the Add new Fields button is now available.
Select the Add new Fields button.
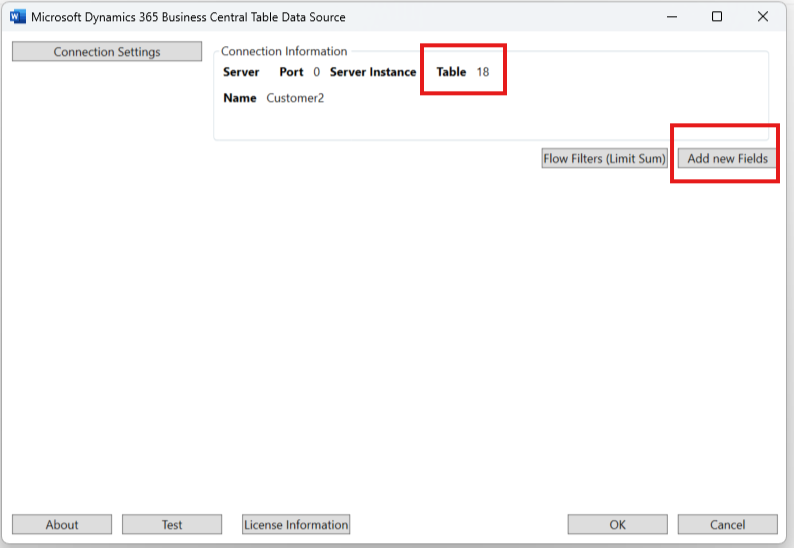
Add new Fields button
The Add fields window opens.
Add your desired fields by selecting the checkboxes and then selecting OK.
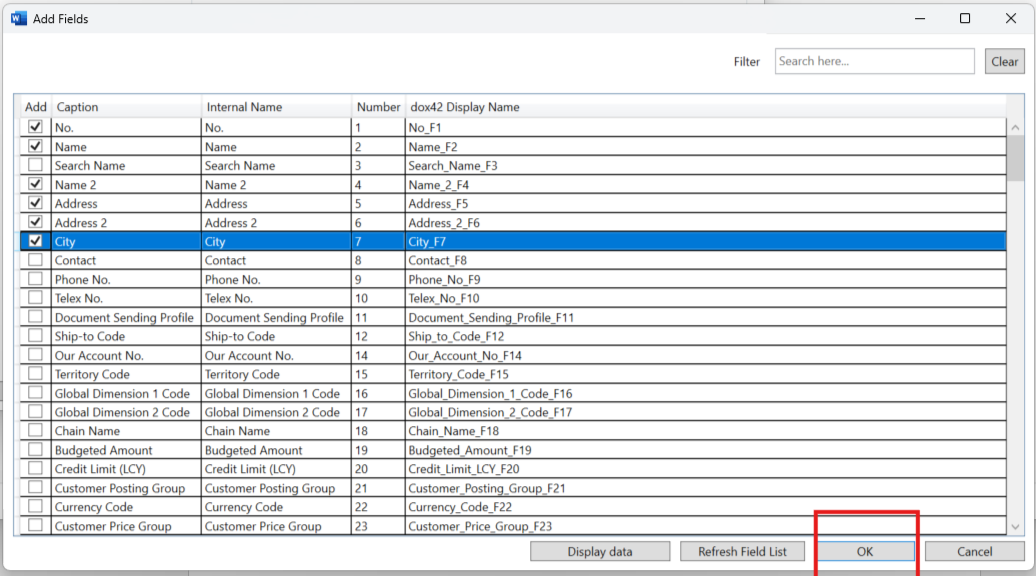
Selecting additional fields
In the Microsoft Dynamics 365 Business Central Table Data Source window, select OK.
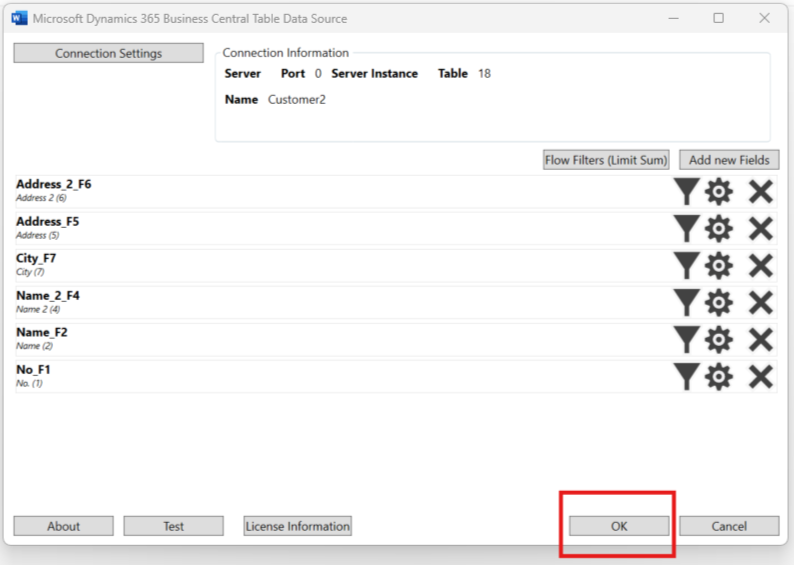
Completing the connection settings
Result
You have set up the data source’s connection settings. The data fields you selected from the connected BC table are now available.