Create an output configuration to control the way documents are created and processed. For instance, specify
in which file format your document(s) should be generated,
where your document(s) should be stored.
Follow these instructions if you want to generate multiple documents in bulk and save them to SharePoint Online.
Note
If you want to generate a single document and display a preview of the generated document directly on your Business Central client, see Create an output configuration (ReturnAction).
Prerequisites
You have the dox42 Administrator role in Business Central (to set the role, go to the cogwheel at the top right of Business Central, select the My settings menu and then the dox42 Administrator role).
You have installed and set up the dox42 Service Designer.
Steps
Log in to your D365 BC account.
In the Activities section, select the Output Configurations tile.
.png)
Activities section with Output Configurations tile
The dox42 Output Configurations dialog opens.Select the New button to add a new output configuration.
.png)
dox42 Output Configurations dialog
The dox42 Output Configuration Card dialog opens.
.png)
dox42 Output Configuration Card dialog
Enter a descriptive Code name, e.g.
“SAVE2SHAREPOINT”, and a suitable Description for your new output configuration in the respective text fields.From the Output Action dropdown menu, select the
QueryStringtype. In the following, we will demonstrate it for a SharepointAction.Note
In combination with the Service Designer, the
Query Stringtype allows you to create any output you want.After selecting it, the Query String Settings text box appears in the dialog, where you can paste your query string afterwards.
Note
If you want to generate a single document and display a preview of the generated document directly on your Business Central client, see Create an output configuration (ReturnAction).
For information on other Output Actions, see the corresponding dox42 Server or dox42 Online documentation.
Leave the dox42 Output Configuration Card dialog open and switch to the dox42 Service Designer to prepare your call.
Since you want to save your generated documents to SharePoint, add a new SharepointAction call.
.png)
New SharePointAction call in the dox42 Service Designer
In the parameters table, enter the values for the red parameters (mandatory):
Site
Library
FileName
.png)
Mandatory parameters and values of the new SharePointAction
In the parameters table, enter a few more values for these parameters:
Azure_AD:
true(optional) Field1.Value: e.g.
InvoiceNo(optional) Field1.Name: e.g.
<%InvoiceNo%>.png)
Additional parameters and values of the new SharePointAction
Go to the SOAP tab, select the SOAP Query String button and change the format of the SOAP Query String to JSON.
.png)
SOAP Query String of the configured new SharePointAction
Copy this string to your clipboard and paste it to the Query String Settings text box of the dox42 Output Configuration Card dialog.
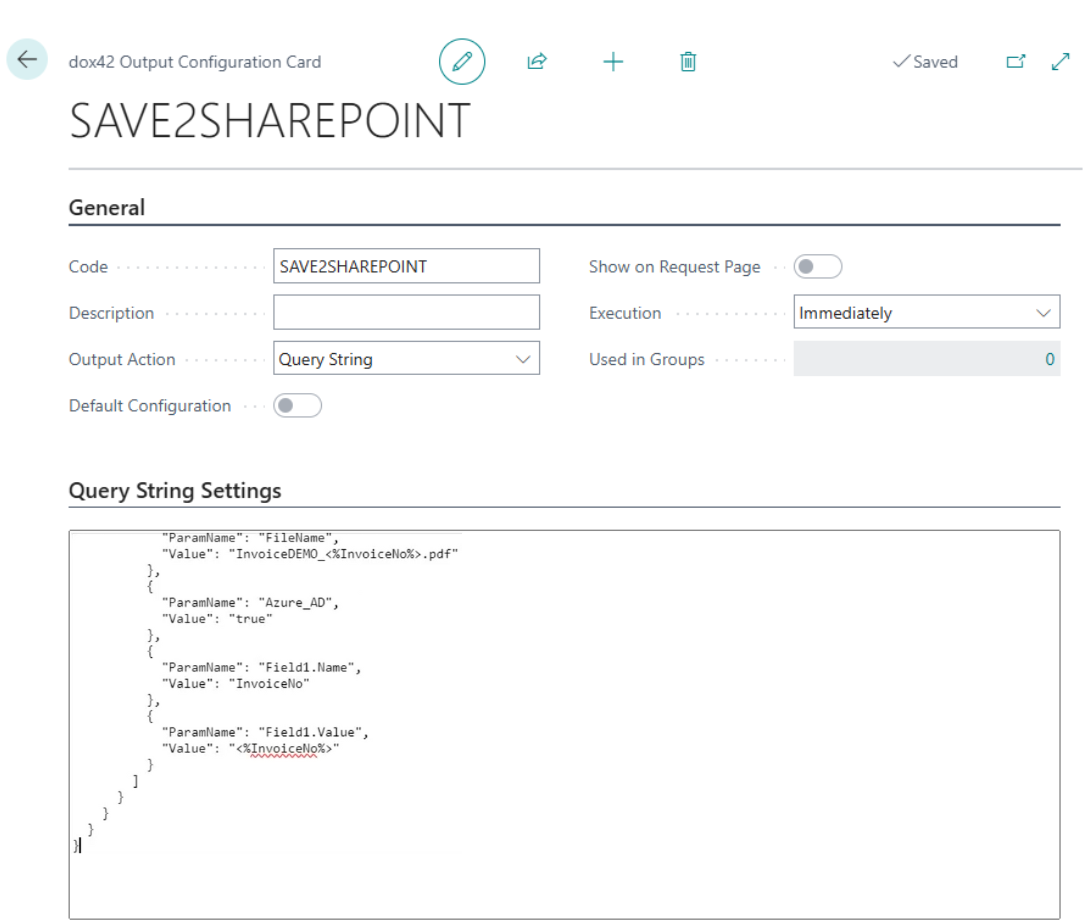
dox42 Output Configuration Card dialog with JSON Query String
Use the arrow button at the top to exit the window.
Result
You have set up a new output configuration.