Add an XML/JSON data source to your data map to import and structure XML or JSON data. This data can then be reused as structured data fields within the data map and your template.
In this article, learn how to import and structure data with flat structures. For information on working with more complex XML/JSON data, see processing nested XML/JSON structures.
In Microsoft Word, Excel or PowerPoint, open your document template.
Next, go to the dox42 ribbon and select Data Map.
dox42 ribbon
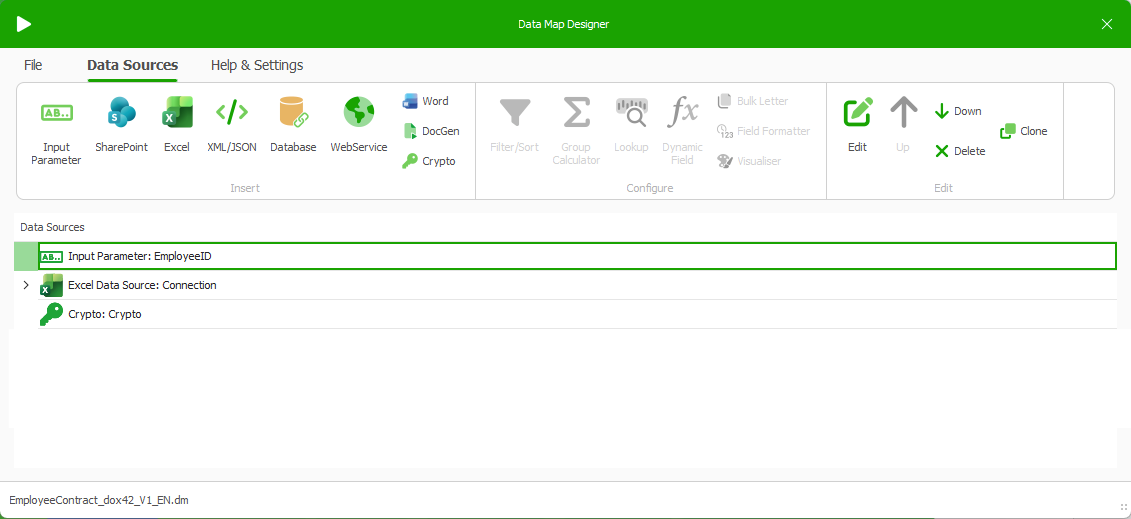
The Data Map Designer window opens and previously added data sources appear.
Data sources of a data map
Select the XML/JSON data source from the Data Sources tab. The XML/JSON window opens.
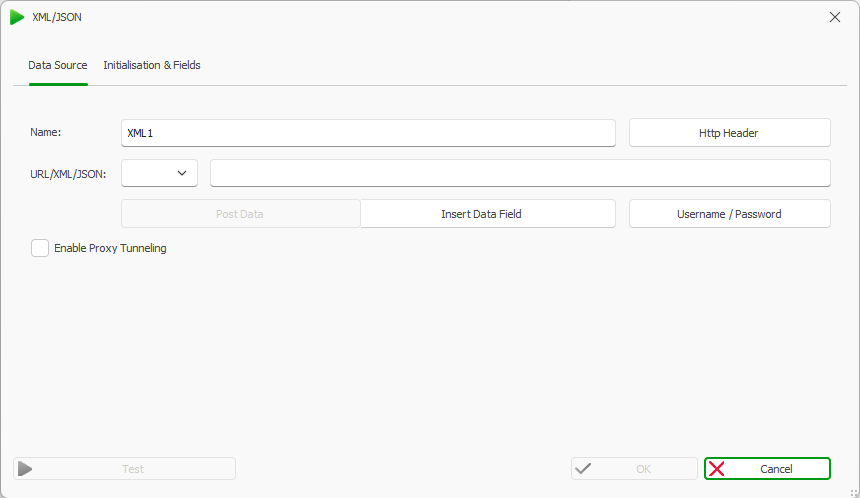
XML/JSON window
In the Data Source tab, enter a name for the new data source in the Name field.
Note
Names should follow your internal guidelines consistently to help template users understand and navigate your templates easily.
Select GET from the URL/XML/JSON dropdown.
Load your XML/JSON data in one of the following ways:
Loading XML/JSON data from a file or URL
In the text box to the right of GET,enter a path or URL to an XML or JSON data source.
If the XML or JSON data is retrieved via a web service, additional authentication details may be required (e.g., tokens, credentials). Configure these using the HTTP Header button.
Tip
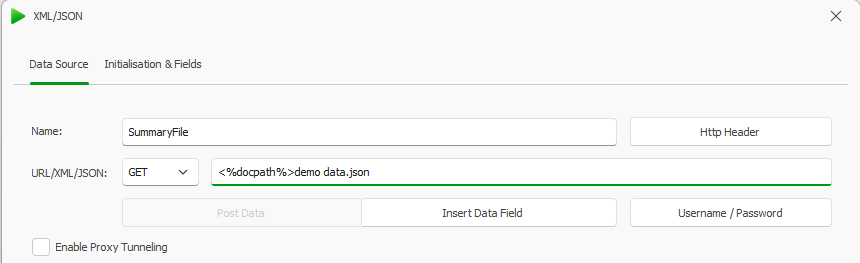
Relate the data source to your template and data map to ensure that it remains accessible at all times, even if the location of your template and data map changes. Therefore, use the DocPath feature. First, delete the beginning of the existing path/URL up to the last backslash before the data source name. Place <%docpath%> before the data source name.
Dynamic path to XML/JSON file
Loading XML/JSON data from an input parameter
To do this, you must first have created an input parameter in the data map in which the request body of an HTTP request is stored. This input parameter can be read as a data field by the XML/JSON data source.
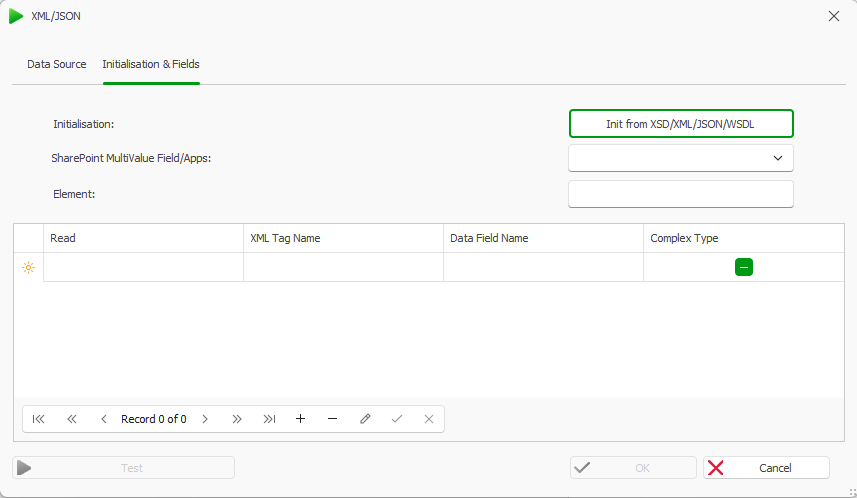
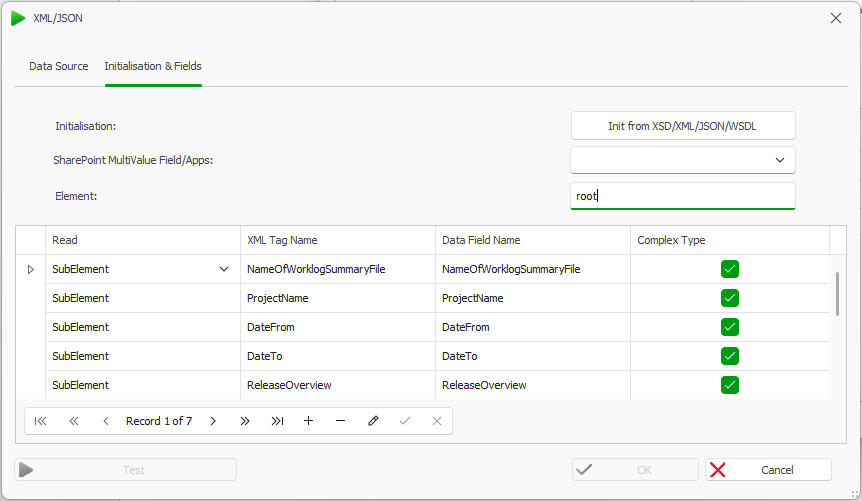
Next, initialise the data source’s structure so that dox42 can read it correctly. First, you need to specify the XML/JSON element from which data is to be read. Then, all child elements are made available as data fields. This is crucial for iterations, groupings and correct data mapping. Therefore, in the Initialisation & Fields tab, select the Init from XSD/XML/JSON/WSDL button.
Initialisation & Fields tab in the XML/JSON window
The Init XML/JSON Data Source window opens.
Select the three dots to choose an XML/JSON file and read its structure.
Select the Load button to load its structure. The structure of the data source is displayed.
Select the element level from which the data is to be read. If you wish to read all the data, select the root element.
Select the OK button to close this window and go back to the XML/JSON window. All elements located below the selected (root) element are displayed in the table as structured data fields.
Via the Read column in the table, select how you want to read the individual XML elements:
SubElement To read the entire element (default value)
Attribute To read the element’s attributes
Content To display all content as text, without any XML structure
XPath To display specific values using a filter
Via the Data Field Name column, define your data fields’ names that will be displayed in your template.
Prefixes for better data field recognition
If an XML file contains namespaces, they are recognised automatically during initialisation. dox42 adds a prefix for the namespace to the name of the data field, e.g. emp:FirstName to improve recognition of the data field.
Leave the Complex Type checkbox selected if you want to retrieve all the sub-elements of an element. These sub-elements can be accessed via an additional XML/JSON data source; see processing nested XML/JSON structures. If you only need the main element and no additional string information, then unmark it.
Recognised JSON structure in the Initialisation & Fields tab
Testing the XML/JSON data source
Once initialisation is complete, check whether the structure has been recognised correctly, whether all the required fields are present and whether the data is being read as expected. To do so, in the XML/JSON window, select the Test button.
Select the OK button to close this window and go back to the Data Map Designer window.
Save your data map.
Result
You have added an XML/JSON data source to your data map and structured the data so that it can be read.
You have also created data fields for the elements of the XML/JSON data source, which you can now use for your template design.
What should you do if the XML/JSON data source changes in the future?
If the general structure remains the same and only additional elements are added, it is sufficient to reinitialise the file in order to add the new elements as data fields.
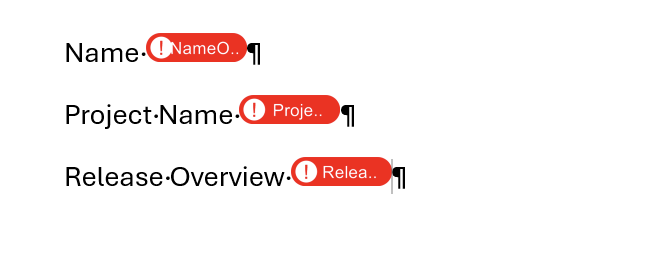
If the overall structure—in terms of hierarchies and/or element names—changes completely, it is advisable to reinitialise the file and then have the template highlight any incorrect references.
To do so, go to the dox42 ribbon and select Refresh Template.
dox42 ribbon
Incorrect references are highlighted in red and must be replaced.