There is a possibility priof building the dox42 report on top of electronic reporting (ER). It gives you an advantage of using electronic reporting capabilities instead of programming new fields in the data provider of the SSRS report.
Prerequisites
You have created a report template and Live/ test folder structure.
You have created a data map.
You have set up the connection from the D365 FSCM data sources to D365 FSCM.
Steps
In D365 FSCM go to Localizations configuration and create an Electronic Reporting configuration or select an existing one:
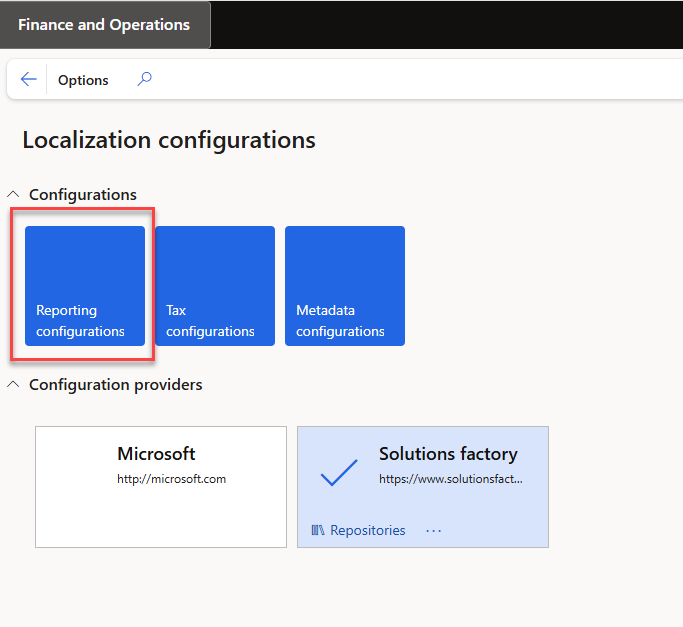
Localizations configuration page
Note
If you create several dox42 configurations, all of them will be available for choosing in Electronic Reporting destination settings.
We recommend using Excel format in ER format designer for transferring report data to dox42 as in the demo example following:

Format designer page
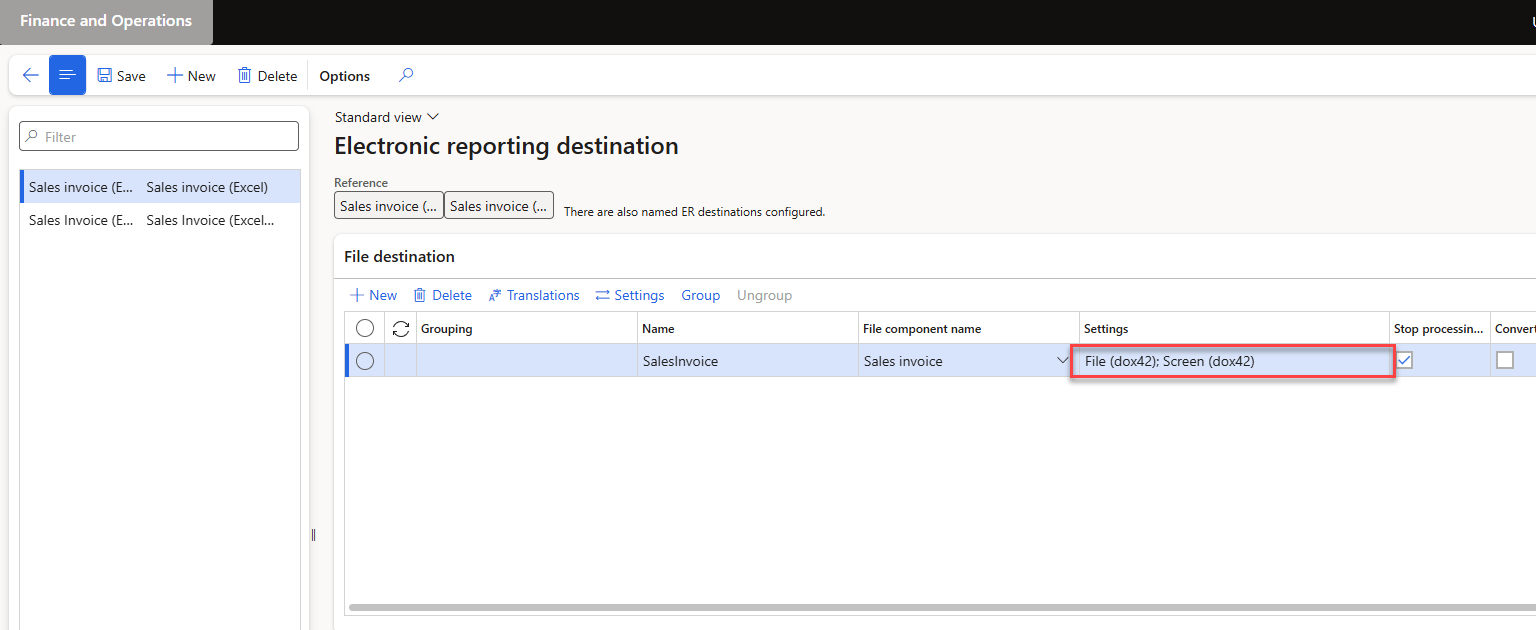
Select the Electronic Reporting destination link to setup the link of the created configuration
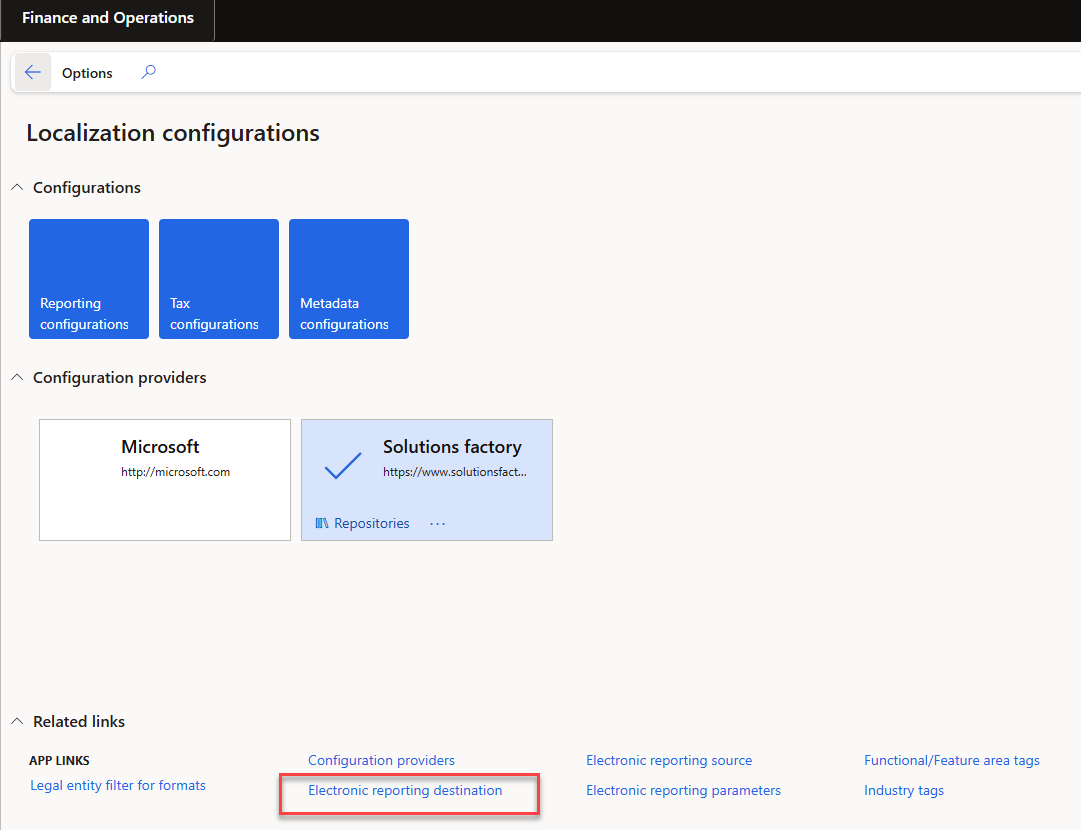
Electronic Reporting destination link
Select New.
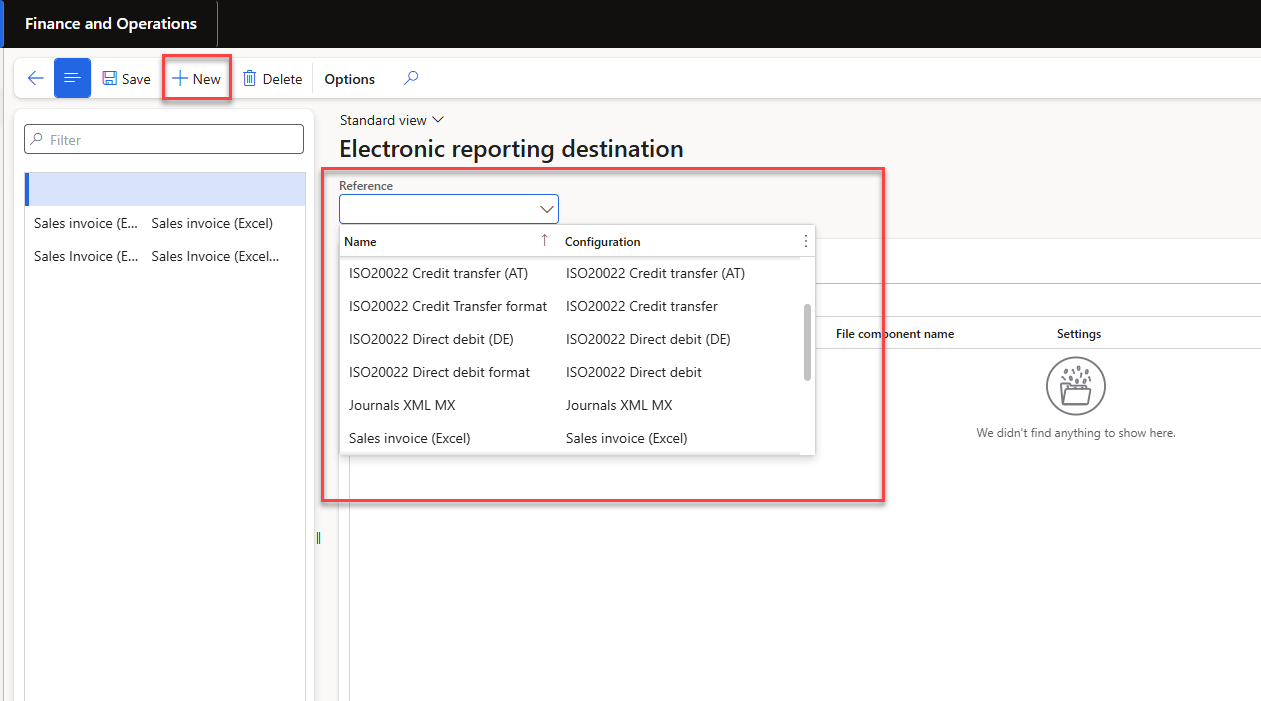
Electronic Reporting destination page
Select Settings.
There are additional dox42 destinations available:Email (dox42)
Archive (dox42)
File (dox42)
Screen (dox42)
Printer (dox42)
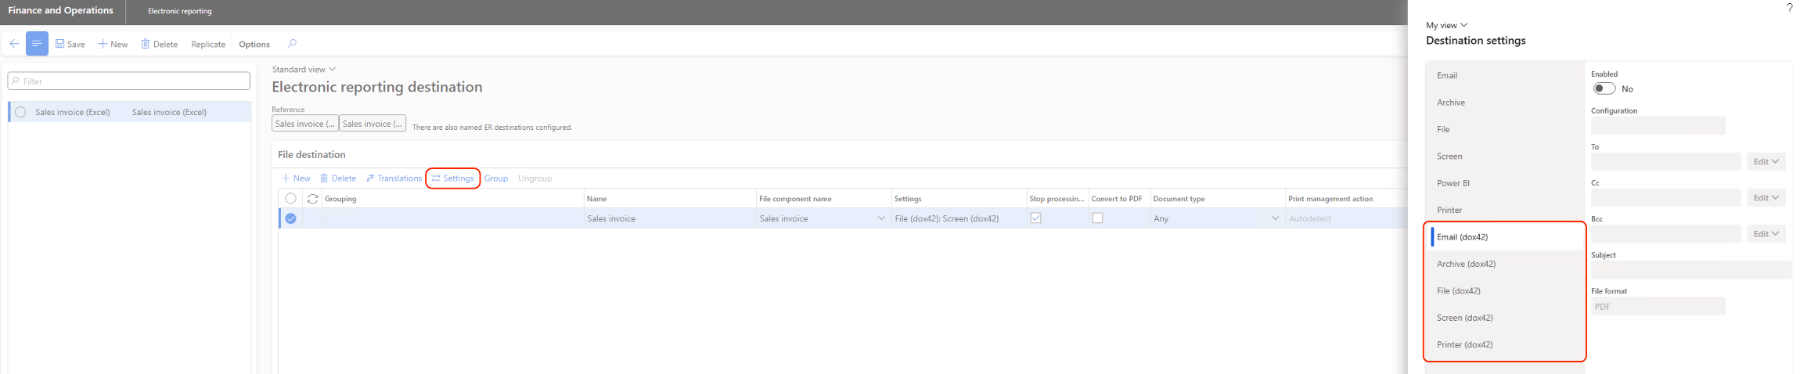
Destination settings
For each desired destination set the Enabled button to Yes.
In contrast to SRSS reports, for ER reports you are able to select several print destinations at once:
Electronic Reporting destination page
You need to fill in the Configuration text field for all the print destinations field:
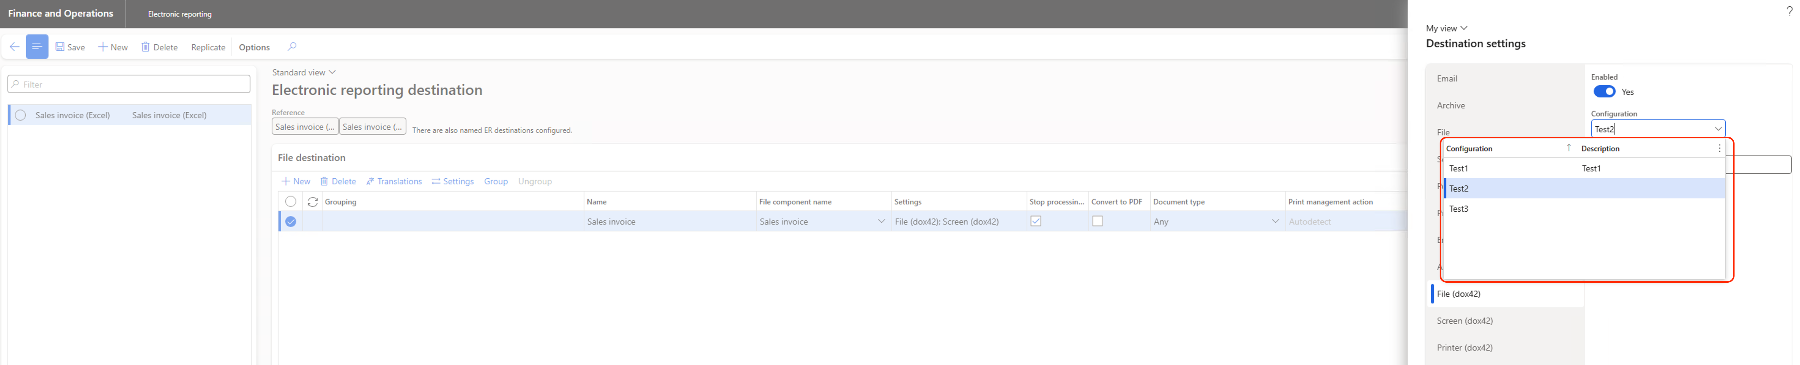
Destination settings
Select OK.
Select Save.
Go to System administration > Setup > dox42 > dox42 configurations.
Create new dox42 configuration.
Match it with ER configuration (column Format):
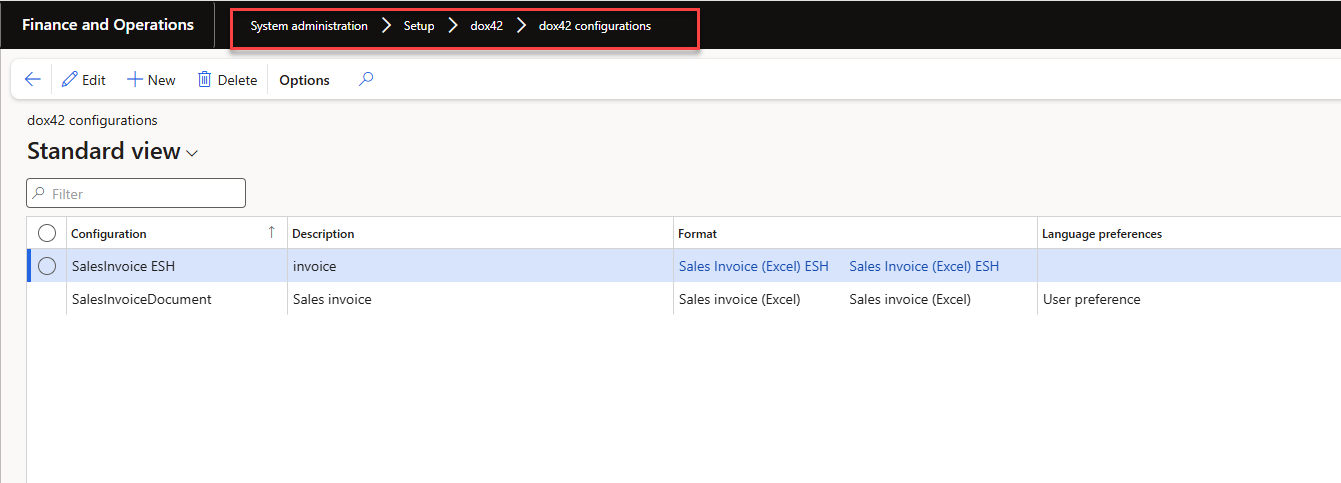
dox42 configurations
In the column Language preferences configure the language to find an appropriate report template later:
User preference: language of the user who generates the report.
Company preference: language of the legal entity where the report is run.
Blank: the language is not setup.
Go to System administration > Setup > dox42 > dox42 parameters.
You can find a new tab Electronic reporting reports where you can setup your configuration (the one created in previous step in dox42 configurations form):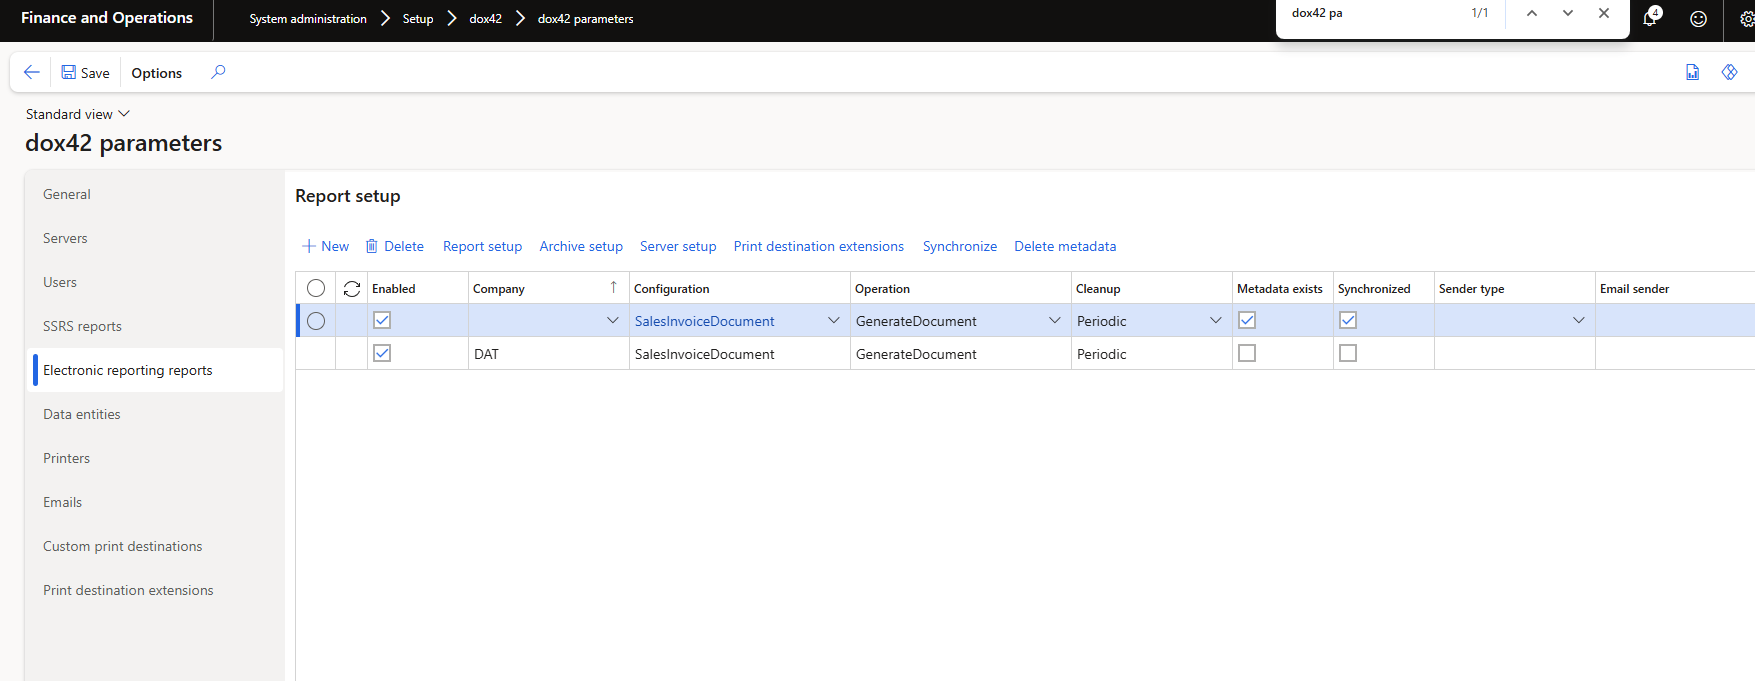
Electronic reporting reports tab
Report setup of Electronic Reporting report looks the same way as for SRSS reports:
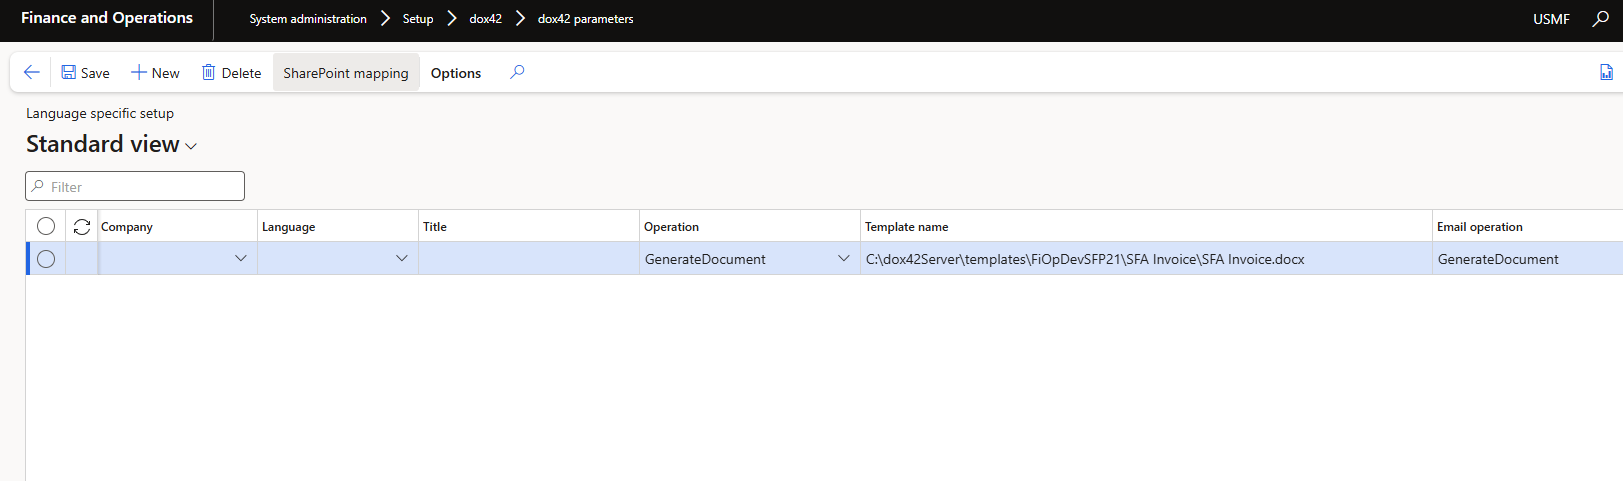
Report setup
Go to System administration > Periodic tasks > dox42.
In the dox42 audit log you can check the printing of your Electronic reporting report by filtering columns: Report type; Configuration and Format: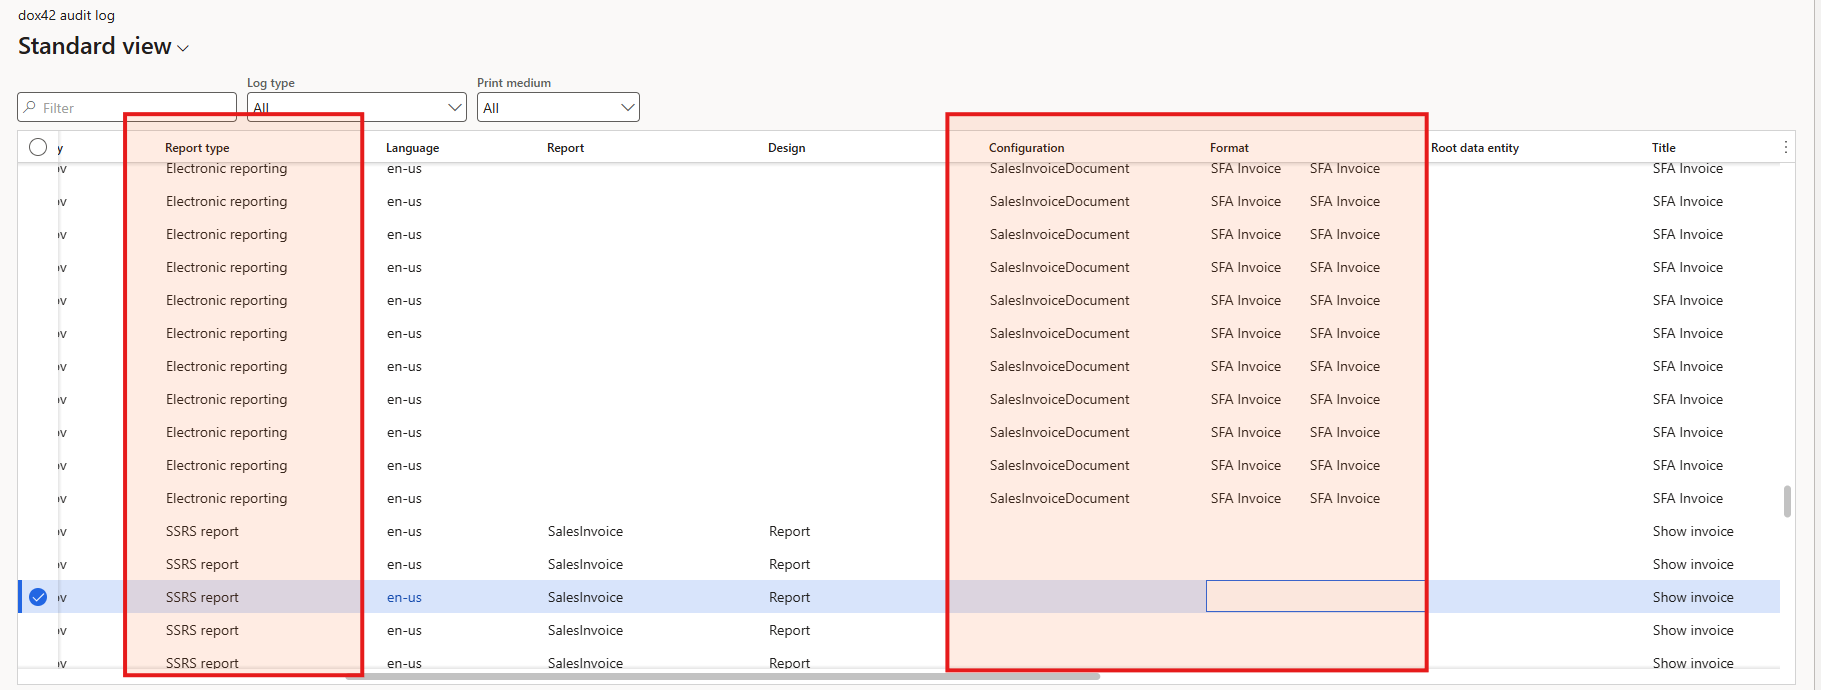
Electronic reporting in dox42 Audit log
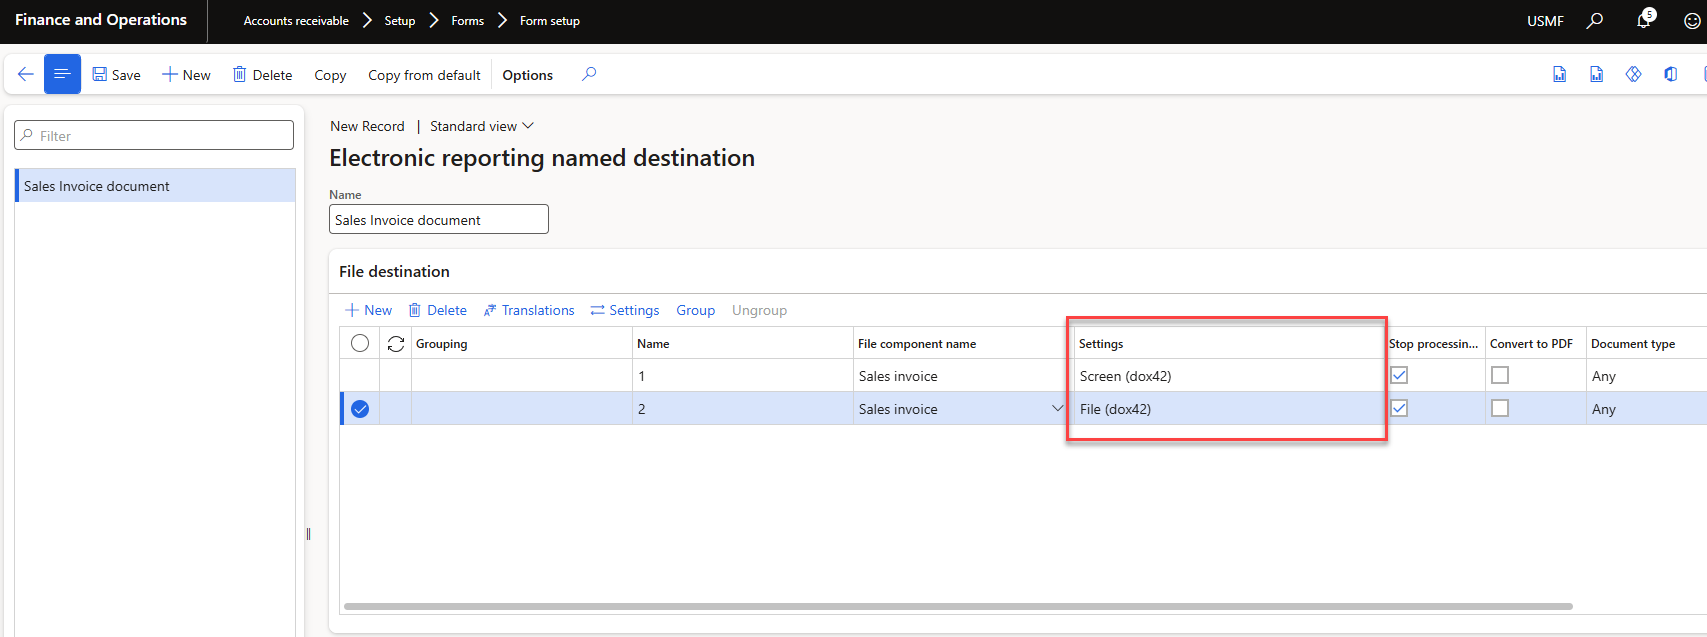
While setting up Electronic reporting through Print Management, you should choose the appropriate report format and do the setup on the Electronic reporting named destination form:
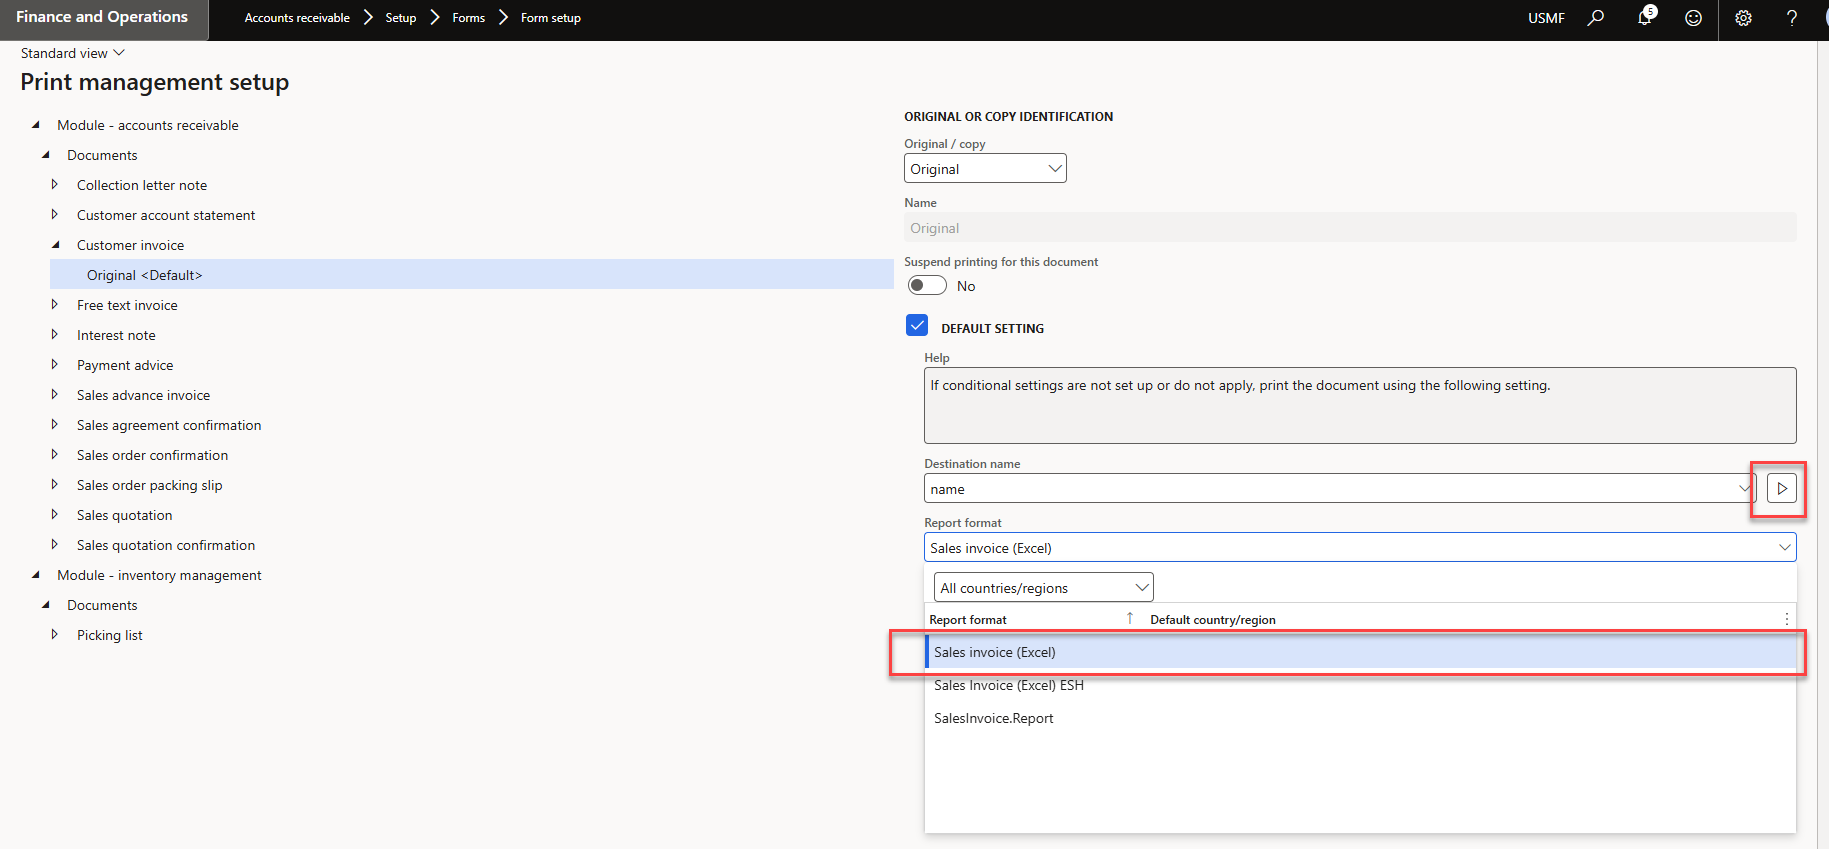
Print management setup
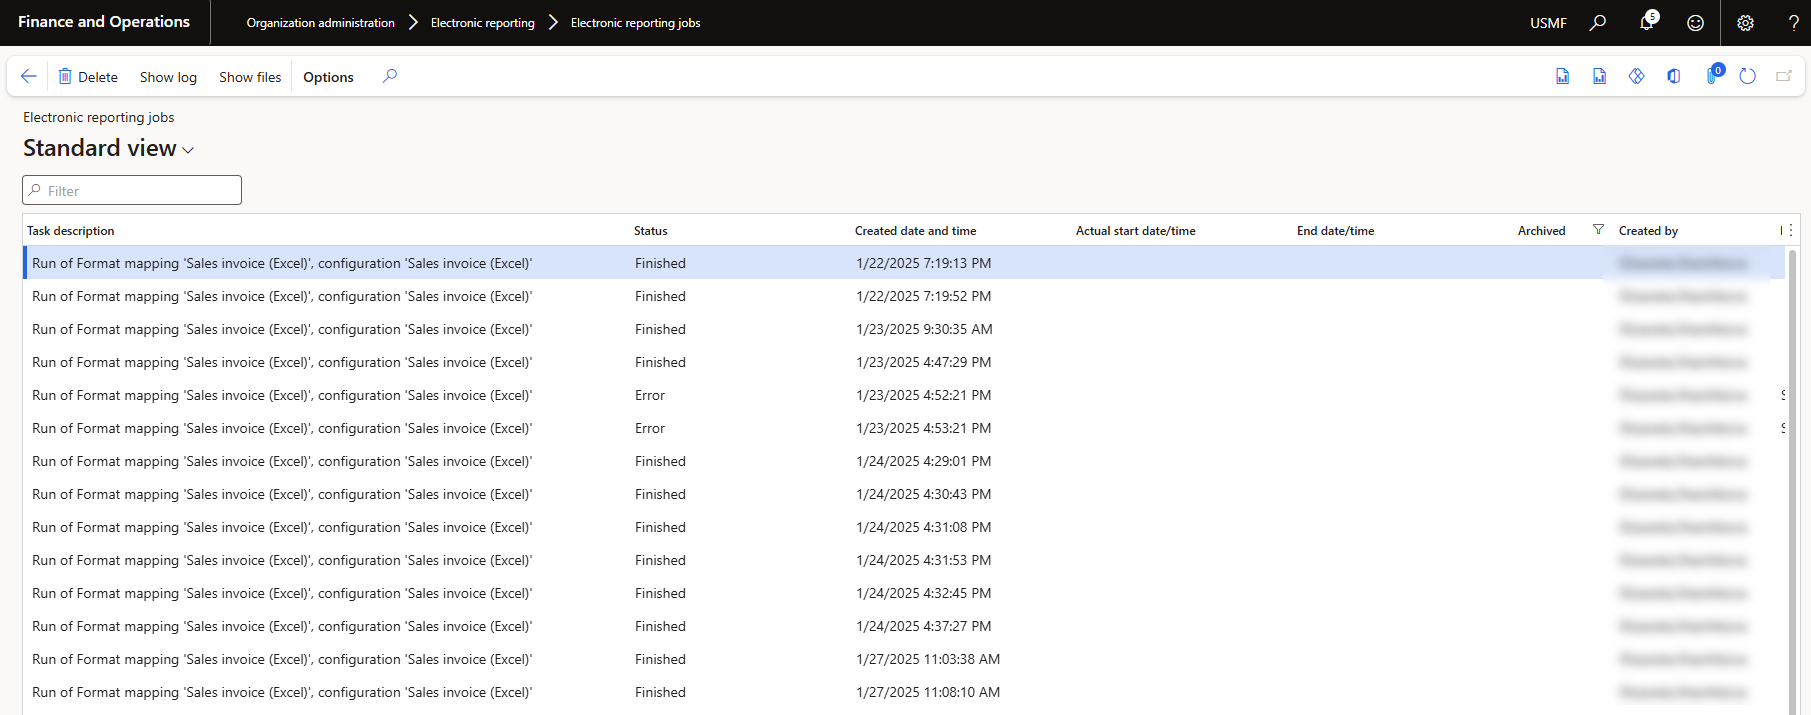
Go to Organization administration > Electronic Reporting > Electronic reporting jobs.
In the Electronic Reporting jobs form you will be able to see the history of report's running:
Electronic Reporting jobs form