You need to configure an OAuth2 Authorization to authorize the use of the BC App within D365 BC and to call the dox42 Service.
Prerequisites
You have (global) admin rights.
You have installed the BC App.
Steps
Accessing the dox42 Setup in BC
Log in to your D365 BC account.
Go to the cogwheel at the top right of Business Central, select the My settings menu and then the dox42 Administrator role.
The BC Online home screen is reloaded.In the Actions section, open the Setup dropdown menu and select dox42 Setup.
Note
The setup is best done manually and not with the dox42 Setup Wizard.
.png)
BC Online home screen
The dox42 Setup window opens.
.png)
dox42 Setup window in BC
Creating a new authentication in BC
Select the Configure Authentication tab.
The Authorizations dialog opens..png)
Authorizations dialog in the dox42 Setup
Select the New button in order to create a new authentication.
Enter a descriptive Code name, e.g.
“yourCompany”, and a suitable Description for your new authentication in the respective text fields.
Configuring the Authorization Client Code
Fill in the necessary information within the Authorization Client Code cell.
To do so, click in the cell and select the New button:
.png)
Creating a new Authorization Client Code
The Authorization Clients dialog opens.
.png)
Authorization Clients dialog
Enter a descriptive Code name, e.g.
“yourCompanyCLIENT”, and a suitable Description for your new authorization client code in the respective text fields.Click in the cell Client ID and Secret and select the outer three dots next to that cell.
.png)
Client ID and Secret cell
The Credential Dialog opens.
.png)
Credential dialog
Enter a Credential Name, e.g.
“yourCompanySECRET”.Enter the Application (client) ID, which you have received during your app registration in Entra ID and which you may have copied to your Microsoft Excel web.config file.
Enter the Client Secret, which you have added during your app registration in Entra ID and which you may have copied to your Microsoft Excel web.config file.
Select Close to get back to the Authorization Clients dialog.
Optional: Set an expiration date for your client secret.
Configuring the Authorization Resource Code
Fill in the necessary information within the Authorization Resource Code cell.
To do so, click in the cell and select the New button:
.png)
Creating a new Authorization Resource Code
The Authorization Resources dialog opens.
.png)
Authorization Resources dialog
Enter a descriptive Code name, e.g.
“yourCompanyRESOURCE”.In the Resource cell, enter the Application (client) ID once again, which you have received during your app registration in Entra ID and which you may have copied to your Microsoft Excel web.config file.
Click in the Tenant Code cell and select the New button.
.png)
Creating a new Tenant Code
The Authorization Tenants dialog opens.
.png)
Authorization Tenants dialog
Enter a descriptive Code name, e.g.
“yourCompanyTENANT”, and a suitable Description for your new tenant in the respective text fields.
Enter the Authorization Endpoint as well as the Token Endpoint, which you can retrieve from Entra ID.
To retrieve this information, go to the Overview tab of your app registration in Entra ID and select the Endpoints tab.
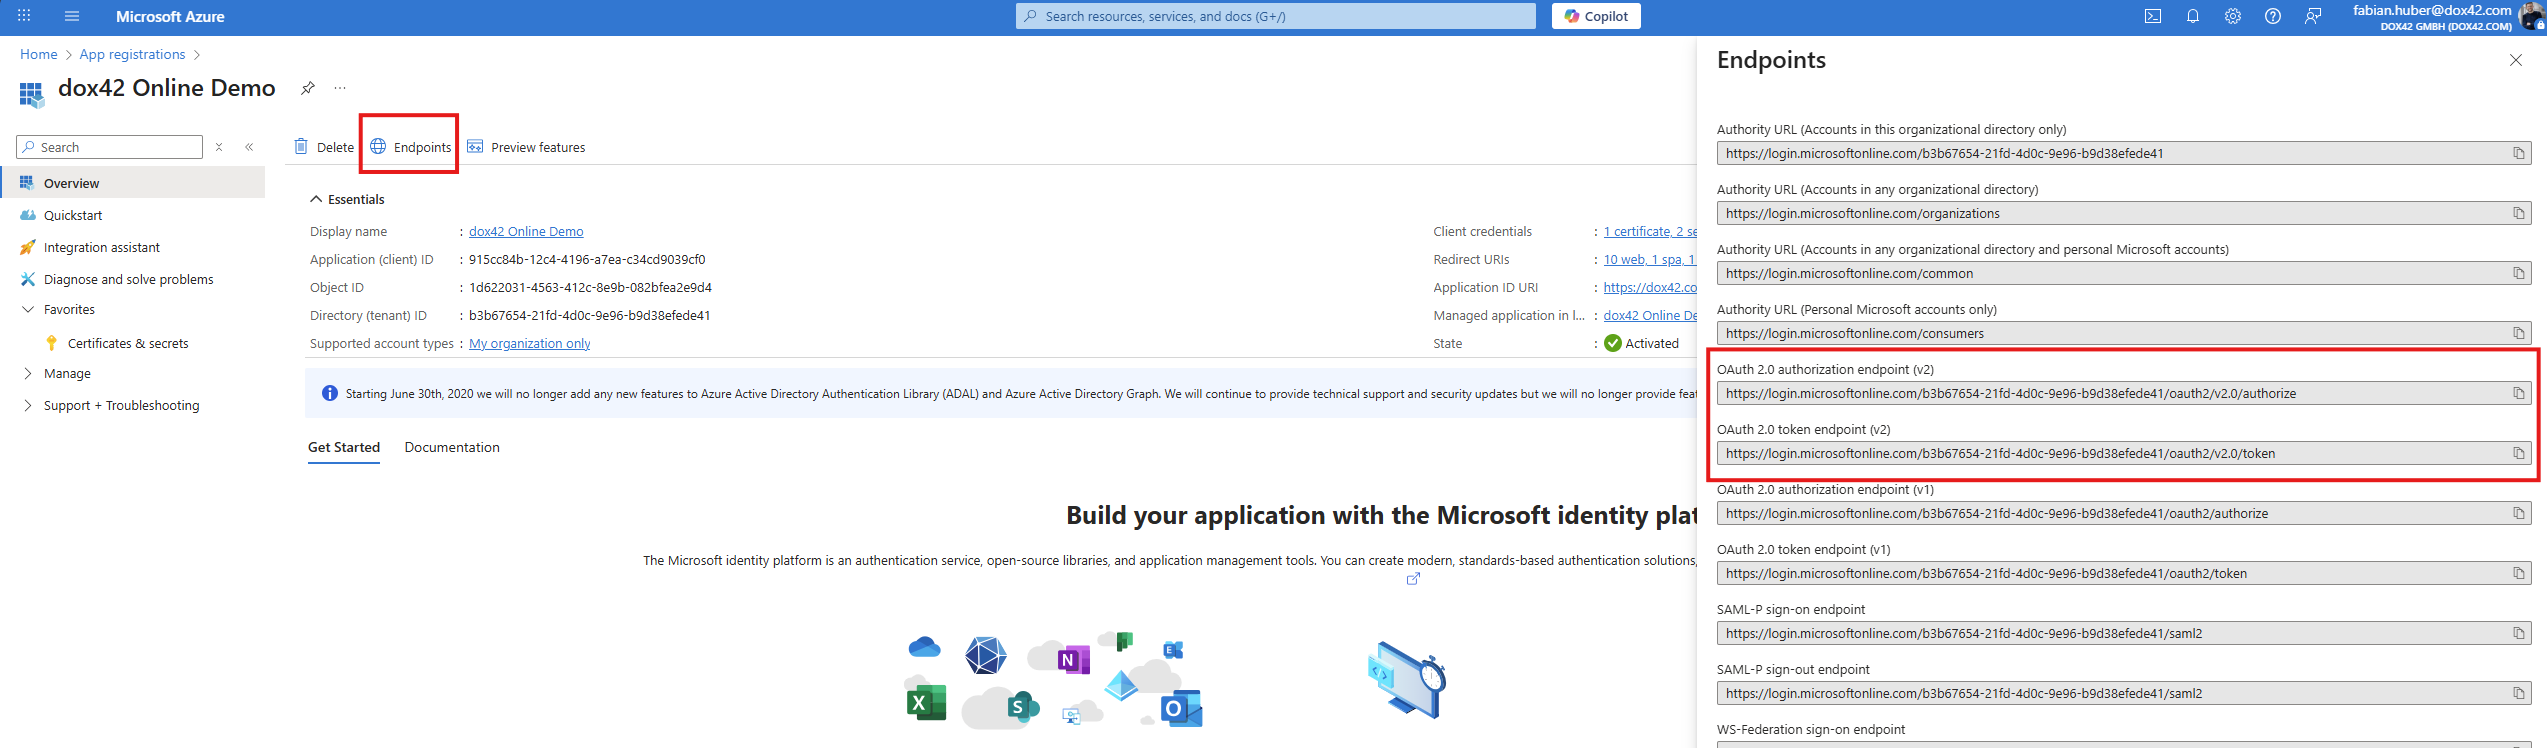
Endpoints from the app registration in Microsoft Entra ID
Copy the endpoints OAuth 2.0 authorization endpoint (v2) and OAuth 2.0 token endpoint (v2) to your clipboard and paste them into the corresponding cells.
Select the OK button to get back to the Authorization Resources dialog.
Enter
.defaultin the Scope cell..png)
Scope cell
Select the OK button to get back to the Authorizations dialog.
Completing the authentication in BC
Select the checkbox in the Active column in order to activate this new authentication.
Verify if you have configured the OAuth2 Authorization correctly.
Select the Close button to get back to the dox42 Setup window.
In the Documents section, enter a SOAP URL in the Server URI text field,
e.g. https://YourOnlineTenant.dox42.online/dox42service.asmxIn the Documents section, select the newly created authorization from the OAuth2 Authorization Code dropdown menu.
.png)
Completing the authentication in the dox42 Setup window
Use the arrow button at the top of the screen to exit the window.
Result
You have configured an OAuth2 Authorization, which authorizes the use of the BC App within D365 BC.