There are two options for adding template server configurations to Microsoft Dynamics CRM or D365 CE.
Option 1: Adding a dox42 template configuration via the dox42 model driven app
Steps
Open your D365 CE or Dynamics CRM.
Go to the nine-dot menu in the top left corner. Select dox42 app > dox42 Template Configurations.
Select the New button.
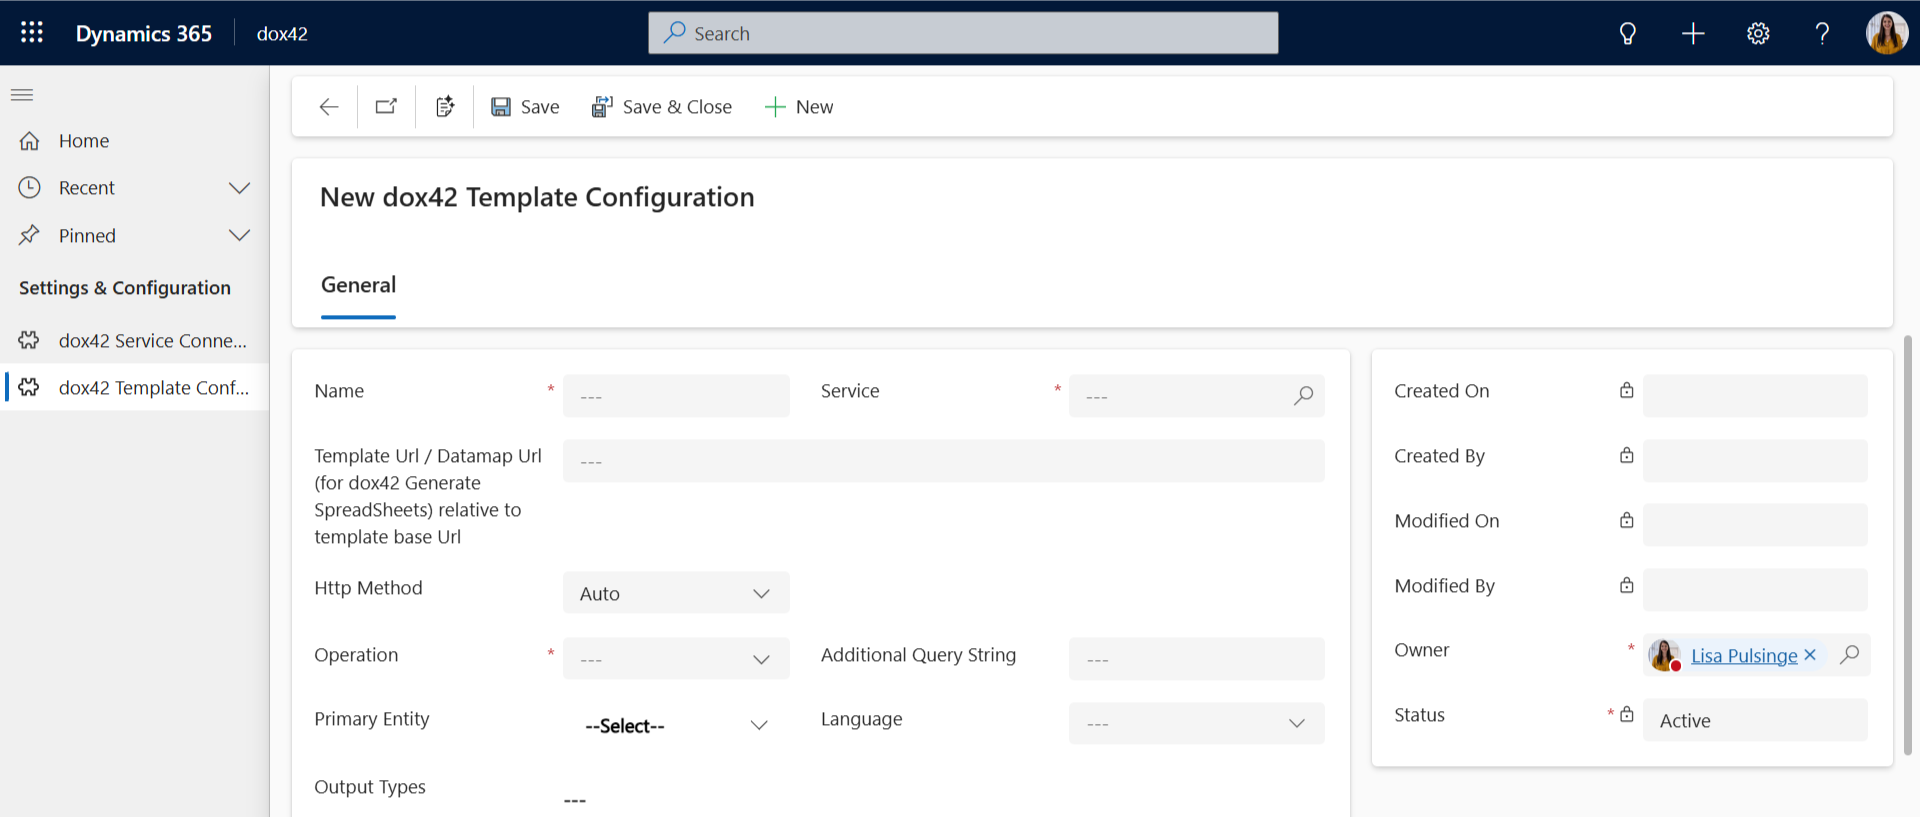
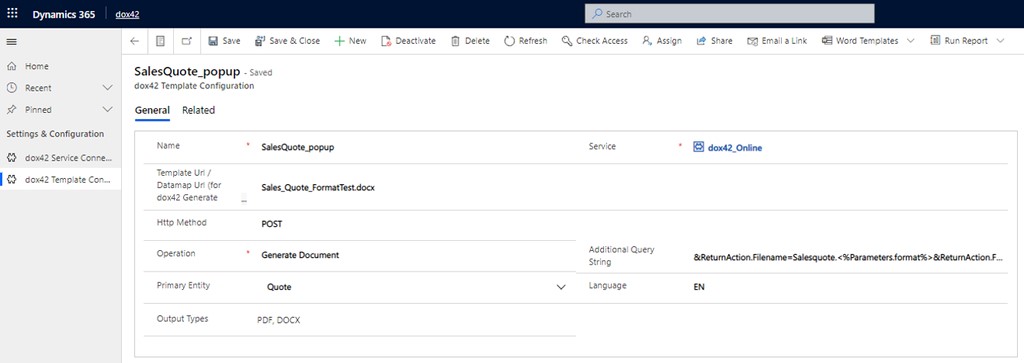
Enter a value in the Name text field depending on your integration scenario:
When using integration option 1: the name of the template configuration has to match the name you will use in the Power Apps button command.
When using integration option 2 (dox42 pop-up): the name you put here, is the name that will be displayed for this template in the dox42 pop-up.
Configuration settings for a new dox42 template in Dynamics 365 interface.
Choose a service from the Service dropdown.
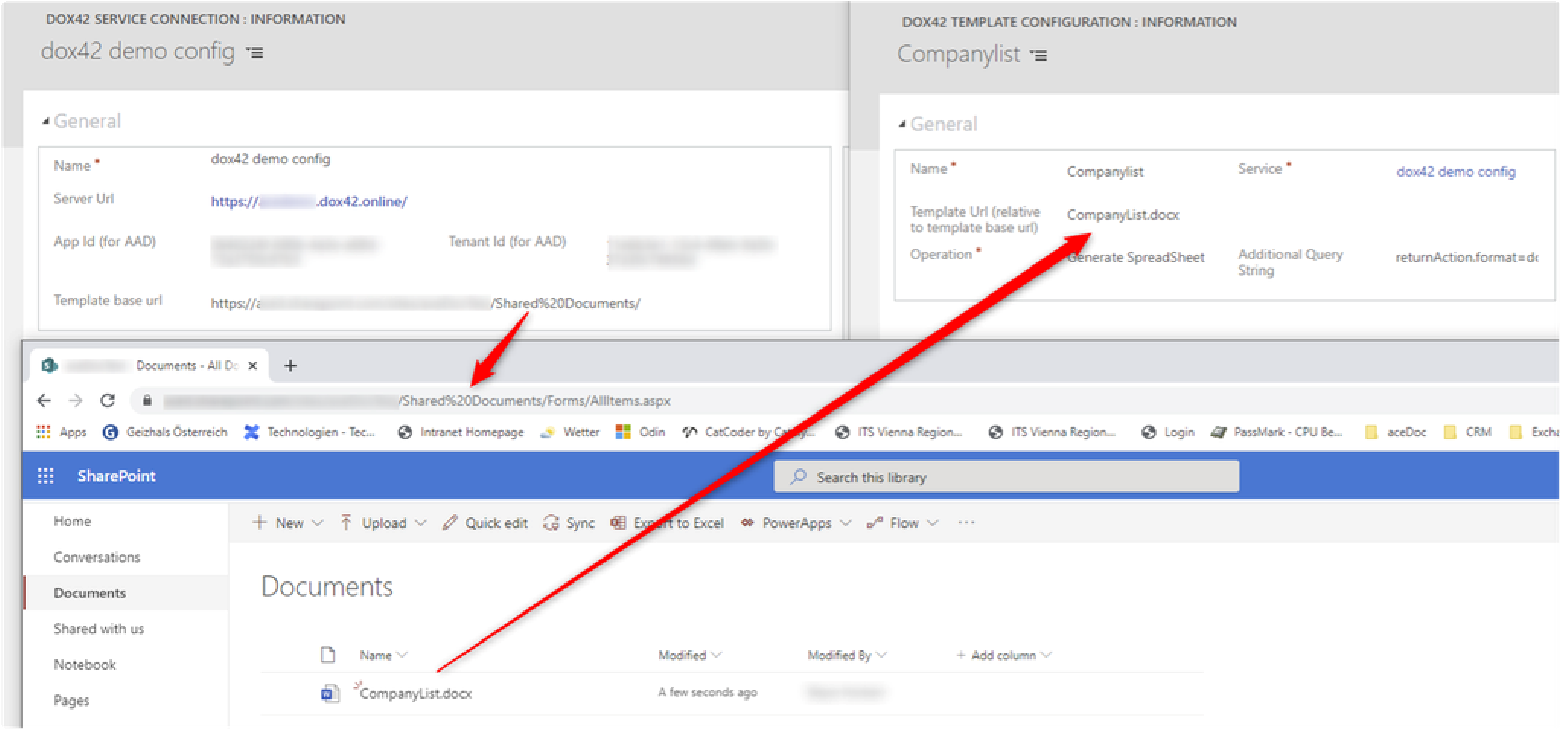
Enter a value in the Template Url text field.
The template location is build out of the service connection (Template base url) and the Template Url of the template configuration. These two values are concatenated. If you are generating Excel spreadsheets, please specify the path of the data map.From the Http Method menu, choose which method your dox42 call should use:
POST: If you generate a document from a list with several IDs or when using the dox42 pop-up and a Requestbody as input parameter.
Auto: ensures that whenever you pass a list of Ids, the request method will be POST, otherwise GET is used automatically.
GET
From the Operation menu, choose which operation your dox42 call should use:
Generate Document: for Word templates.
Generate Slides: for PowerPoint templates.
Generate SpreadSheet: for Excel templates.
In the Additional Query String text field enter your defined query string for your dox42 Output actions.
Example: If you want to return your document as PDF, the Additonal Query string looks like this:
ReturnAction.Format=pdf.Note
Find all available dox42 Output Actions and parameters in the dox42 Server documentation.
For more information on attaching documents as an annotation to an entity, or sending emails via D365 CE, see Output Action CRMOutputAction.
Use the dox42 Server Designer for an easy set-up of the query string.
When working with the dox42 integration option 2 (dox42 pop-up):
From the Primary entity, choose in which entity the template should be displayed.
From the Language menu, choose the template’s language.
Note
The Language parameter serves as a categorizer for your dox42 pop-up. If you select English here, then this template configuration will be shown when you select EN in the popup, if you selected DE it will be shown alongside all DE templates in your popup. You can add further languages within the dox42 D365 CE | Dataverse solution (Advanced Settings > solutions> dox42 client libraries > languages).
From the Output types menu, choose one or more document types for the output.
Note
If you use the “Output Types” to dynamically choose the format the document should be generated as from your pop-up, you will need to specify your input parameter in your dox42 template as
RequestBodyand includeformatas one parameter (See Setting up the RequestBody input parameter for the dox42 pop-up web resource). In this case, the additional query string needs to have dynamic values for the format. Example:ReturnAction.Format=<%parameters.format%>and other formats.
dox42 template configuration via the dox42 model driven app
Select the Save button.
Result
You have added a dox42 template configuration via the dox42 model driven app.
Option 2: Adding a dox42 template configuration via the dox42 custom entities (for Dynamics CRM on-prem)
Steps
Open your D365 CE or Dynamics CRM.
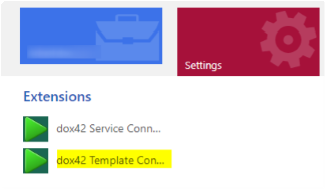
Go to Settings > Extensions.
Select the dox42 Template Configuration entity.
Template Configuration
The Active dox42 Template Configuration page opens.
Select the New button.
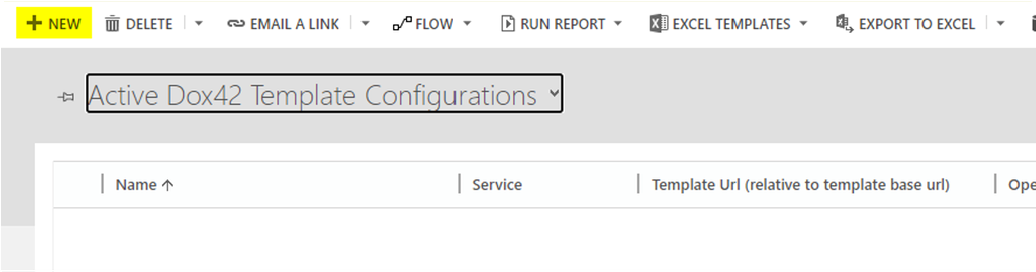
Active dox42 Template Configuration Connections page
Enter a value in the Name text field depending on your integration scenario:
When using integration option 1: the name of the template configuration has to match the name you will use in the ribbon workbench button command action.
When using integration option 2 (dox42 pop-up): the name you put here, is the name that will be displayed for this template in the dox42 pop-up.
Choose a service from the Service menu.
Enter a value in the Template Url text field.
The template location is build out of the service connection (Template base url) and the Template Url of the template configuration. These two values are concatenated. If you are generating Excel spreadsheets, please specify the path of the data map.From the Http Method menu, choose which method your dox42 call should use:
POST: If you generate a document from a list with several IDs or when using the dox42 pop-up and a RequestBody as input parameter.
Auto: ensures that whenever you pass a list of Ids, the request method will be POST, otherwise GET is used automatically.
GET
From the Operation menu, choose which operation your dox42 call should use:
Generate Document: for Word templates.
Generate Slides: for PowerPoint templates.
Generate SpreadSheet: for Excel templates.
In the Additional Query String text field enter your defined query string for your dox42 Output actions.
Example:If you want to return your document as PDF, the Additonal Query string looks like this:
ReturnAction.Format=pdfNote
Find all dox42 parameters in the dox42 Server documentation.
For more information on attaching documents as an annotation to an entity, see Output Action CRMOutputAction.
Use the dox42 Server Designer for an easy set-up of the query string.
dox42 Template Configuration: Information page
When working with the dox42 integration option 2 (pop-up):
Enter the primary entity.
Select a language
and other parameters.
Select the Save button.
Result
You have added a dox42 template configuration via the dox42 custom entities.