Follow these steps to add a template, import the corresponding input parameters and edit them, if necessary.
Prerequisites
You have the dox42 Administrator role in Business Central (to set the role, go to the cogwheel at the top right of Business Central, select the My settings menu and then the dox42 Administrator role).
You have created a new output configuration (e.g. ReturnAction or Query String).
Steps
In the Activities section, select the Templates tile.
.png)
Activities section with Templates tile
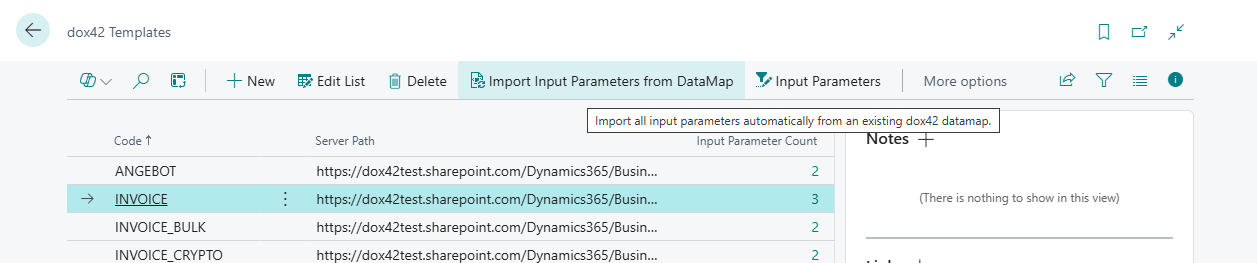
The dox42 Templates dialog opens.
Skip step 3 and 4 if your template already exists.
Select the New button to add a new template.
.png)
dox42 Templates dialog
Enter a descriptive Code name, preferably the original name of your Word template, e.g.
“INVOICE”.Go to SharePoint, locate the template you want to use for document generation and copy its SharePoint file path. To do so, click the three dots next to the template’s file name, select “Details” and then select the “copy path” icon in the More details window.
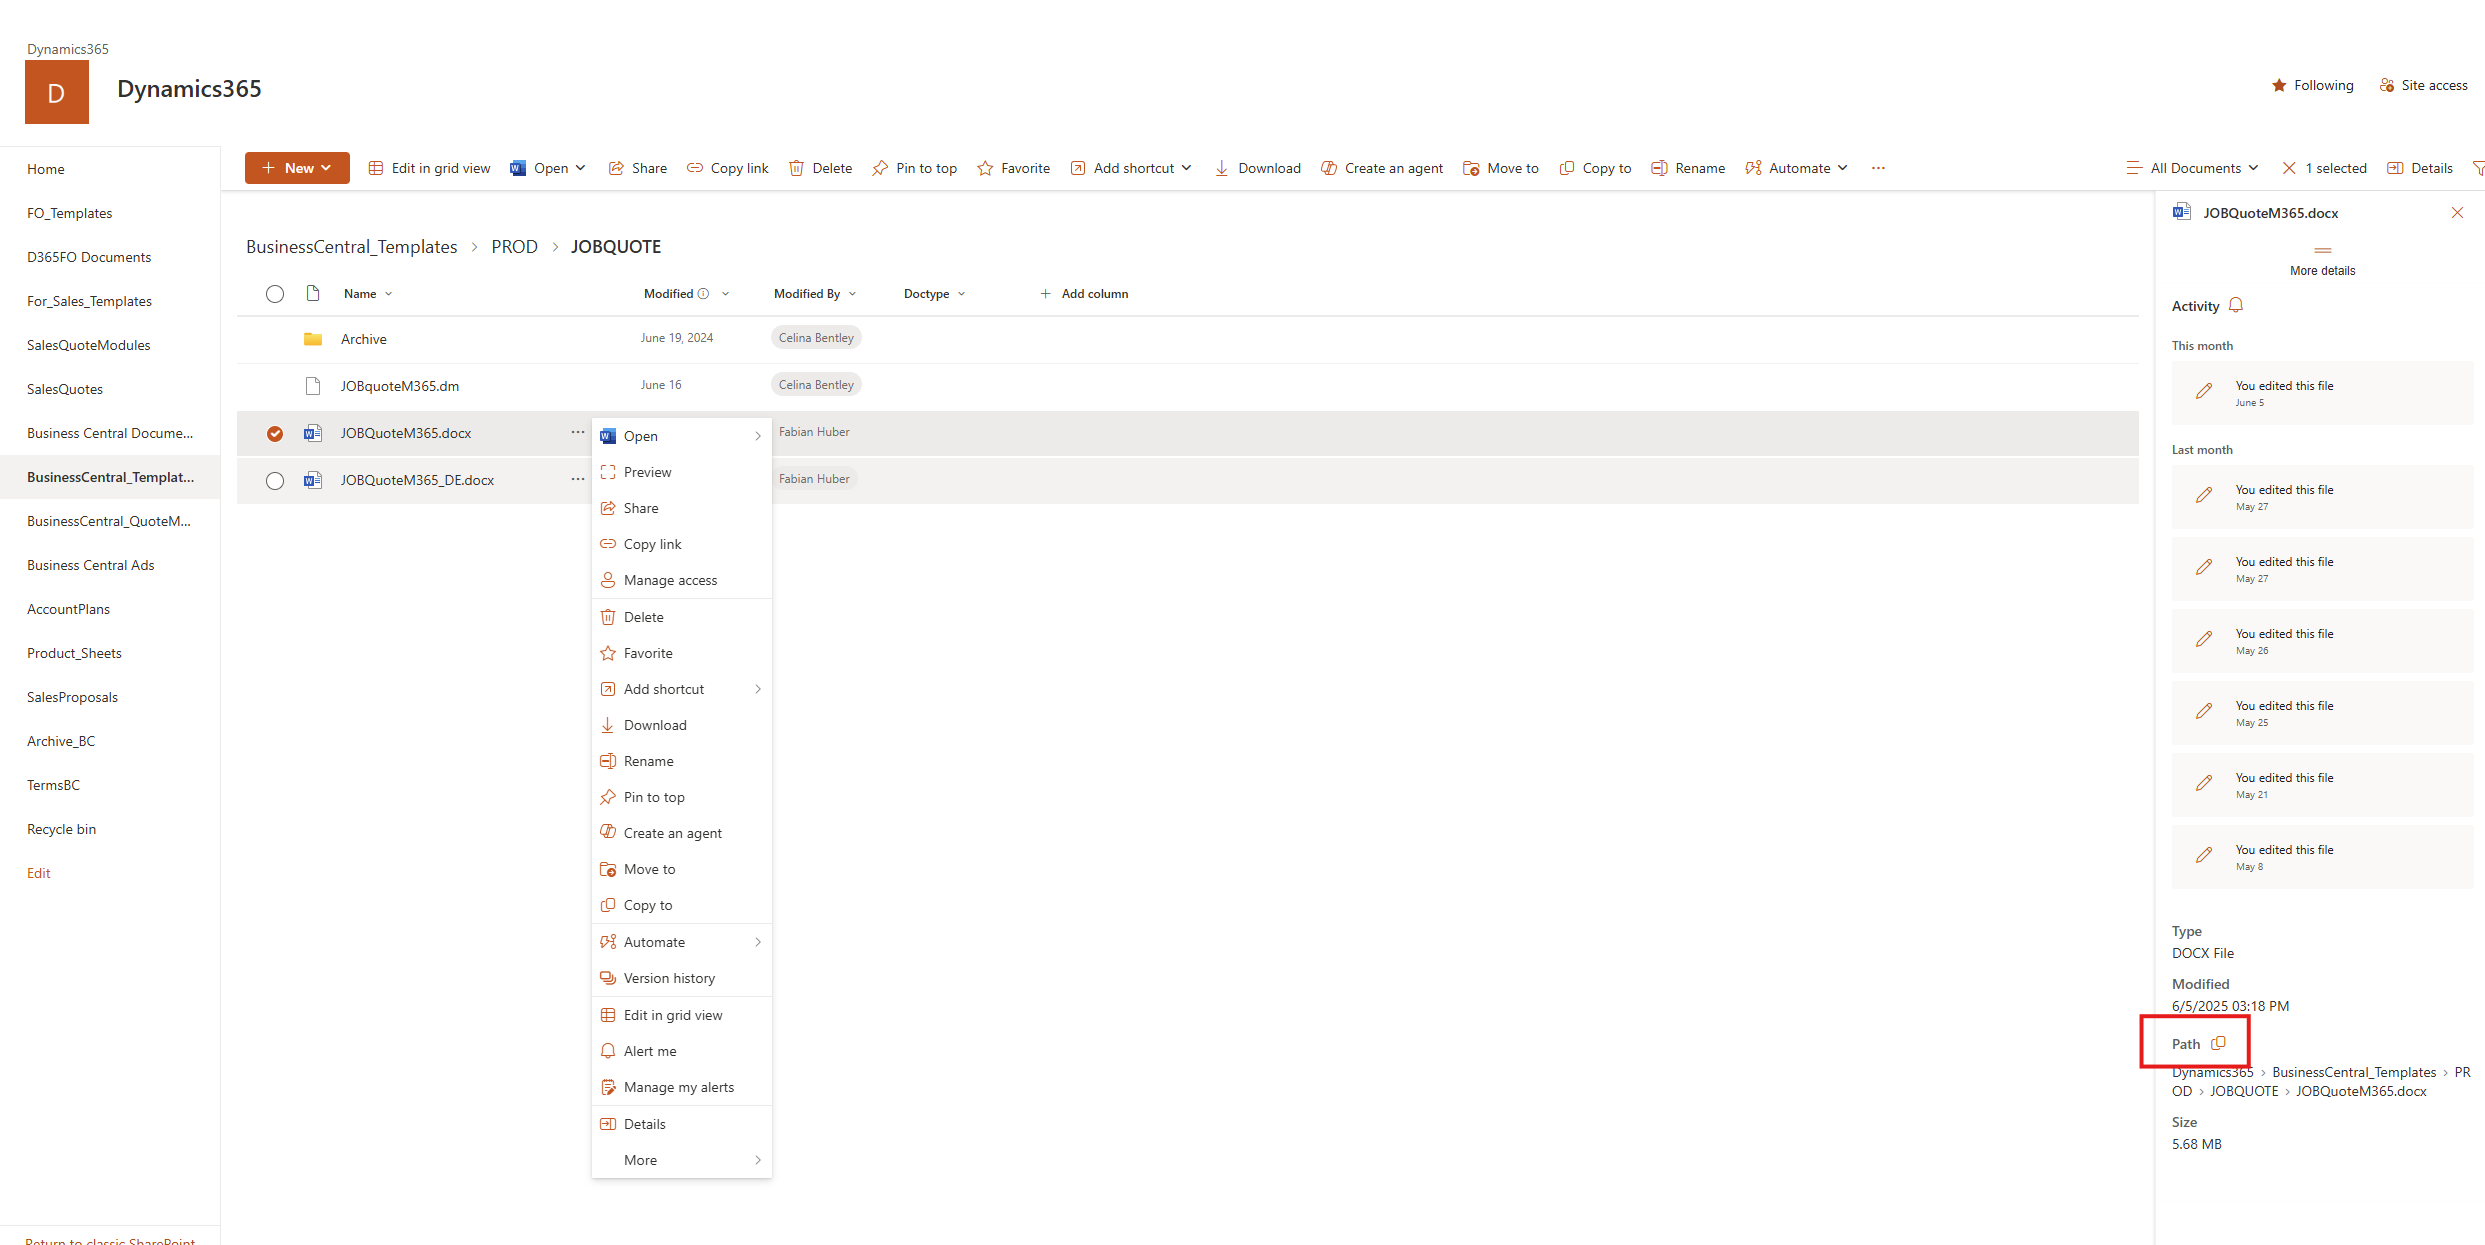
Copy file path icon in SharePoint
Important
Always use a public file path instead of a local one and make sure your dox42 Online has access to it.
Go back to where you left Business Central. In the Server Path text field, enter the SharePoint path, where your template is stored.
.png)
Template’s server path in dox42 Templates dialog
Now, define the input parameters for the selected template. We recommend importing them from your template’s data map instead of creating them manually. This helps to avoid errors. Follow these steps to do so:
Select the Import Input Parameters from DataMap button in the header.
Import Input Parameters from DataMap button
From the file explorer, import a data map in the
.dmfile format.You can edit the properties of the input parameters for the selected template and also create new parameters. Select the Input Parameters button in the header.
.png)
Input Parameters button
The dox42 Input Parameters dialog opens.

dox42 Input Parameters dialog
Optional, edit the input parameter list according to this field description:
Field
Description
dox42 Name
Name of the input parameter.
Important
The value must match the name of the input parameter in your template.
Data Type
Possible data types: Bool, Text, Integer, Decimal, Field reference, Code, Date, Time, Date/Time, Special, Listing
Default Caption
Display name of the input parameter on the Request Page.
Show on Request Page
If the field is checked, this input parameter will be displayed on the Request Page.
Table ID
For field reference data type only:
The number of the table within Business Central.
Field ID
For field reference data type only:
The number of the field within Business Central.
Table Name
For field reference data type only (automatically filled):
The Name of the selected table.
Field Name
For field reference data type only (automatically filled):
The Name of the selected field.
Special Option
Allows you to create additional input parameters, for use in a template. Possible data: client, user, language code, execution time, work date.
Default Value
Allows you to store a default value for the input parameter.
Use Default Value
Specifies whether the stored default value will be preset on the Input Parameter page.
Use the arrow buttons at the top to exit the dialogs.
Result
You have created a template for an output generation.